
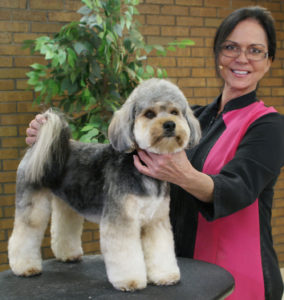
Michelle McCotter from The Salon & Spa at All Pets Considered talks about the value she’s derived from her membership in www.Learn2GroomDogs.com
Read the rest of this entry »
News » Uncategorized
Search for a News Story:
Top Ten Grooming Videos
#10 – How to Create a Stylish Salon Trim on a Mixed Breed
For this lesson, Kathy Rose puts this little dog in a super cute haircut. It’s not only appealing, but it’s also easy for the owner to care for, too. Trims like this are what bring owners back again and again. They are the bread and butter of every successful salon.
This is a highly detailed lesson. It’s perfect for newer groomers who want to add style and flair to their work.

Judy will teach you how to shorten up a Golden Retriever without destroying the natural body coat. She starts off by trimming the pads and the feet. She discusses the benefits of de-shedding a dog instead of shaving off the coat. Finally, she addresses the longer furnishings and shows you how to contour them while still maintaining a very natural look on the dog.

In this lesson, seasoned professional stylist Judy Hudson walks you through the basics with this young Standard Poodle. As Judy says, “The clipper work is the foundation of all good grooming!” She shows you how to get that perfectly clean face, feet, and tail, quickly and safely. If you are a groomer who is struggling to get perfectly clean clipper work (especially around those pesky toes), Judy’s insight will be immensely helpful.
Salvage Work
Spring is here – and not a moment too soon! Many of us will be seeing a lot of pets that are ready for a great makeover in the coming weeks.
As many of you know, I’m a big dog person. Working on these large furry dogs that have a huge shedding problem is one of my favorite things to do in a grooming salon. Over the years I’ve gotten really quick with the process and rarely cringe, no matter what the size of the dog, nor the condition.
 My #1 rule is: Never work on a dirty dog. If water can penetrate the coat, let your products do the job.
Working on a dirty dog is not only unpleasant, but it also takes longer to do. There will be a lot of coat damage and breakage. A dirty coat is dry and brittle. The dirt and dander trapped within the fur makes it more difficult to brush out. Working on a clean coat will be easier for both you and the pet – and much more enjoyable. Read the rest of this entry »
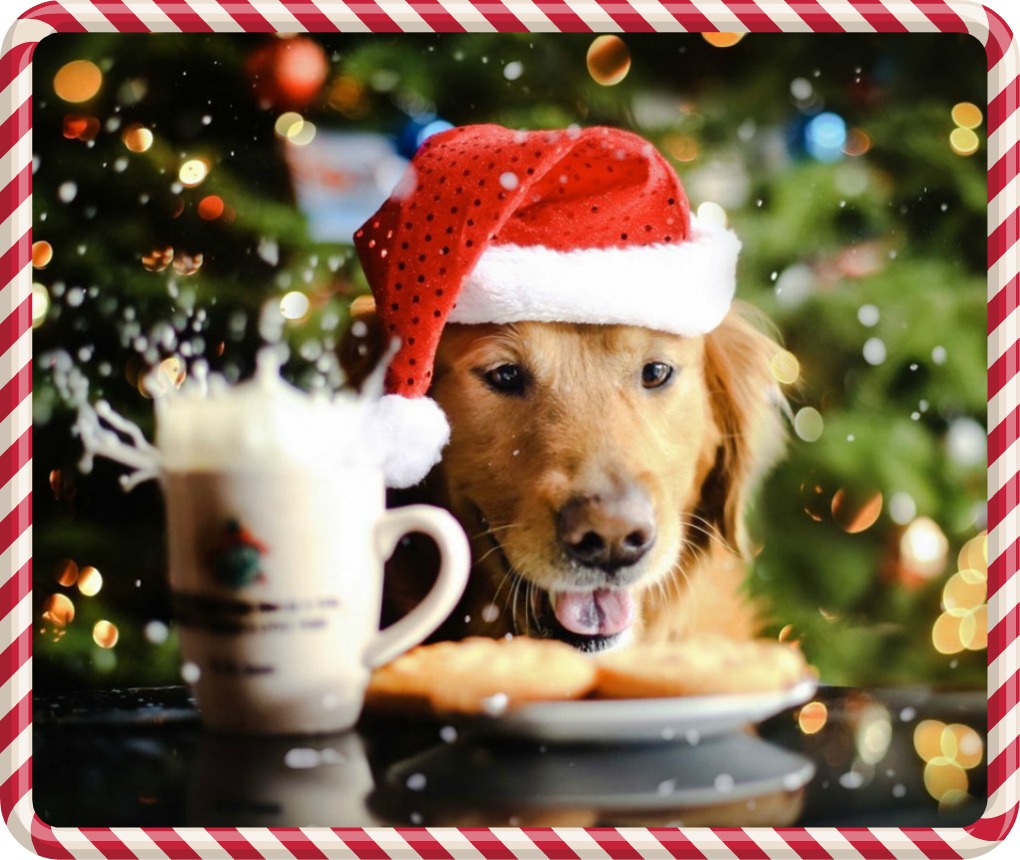
Get a little holiday cheer with Learn2GroomDogs.com!

Rating Dog Personalities
 You have a new client on the books. It’s a Lhasa/Maltese mix – or in the new world of designer dogs, it’s a “Lhatese.” The client arrives precisely 15 minutes late. She’s dressed to the nines and everything matches… even the dog.
The dog’s name?
You guessed it – Precious.
You know you’re in trouble.
If you’re a one groomer salon, you can keep the personalities of all your canine clients in your head. You know any dog named Precious is far from… precious.
But what if you start expanding your salon? What if you bring on a new bather? Maybe you have an assistant handling your appointments? Or maybe you have an inexperienced groomer joining your team?
Wouldn’t it be helpful to know the personality rating of the dogs scheduled for the day? Read the rest of this entry »
How to Get Smooth Legs on a Close Haircut – Tricks to Eliminate “Stickie-outies” on Legs
Do you struggle to get the spindly legs smooth of that clipped #5 all trim? The body comes out nice and smooth – but the legs… ugh.
Getting smooth legs is always a pesky problem for new groomers. Maybe you’ve been grooming for a while, but still struggle with this area. You’re not alone. Legs should only take you a few minutes to get smooth. If you’re missing the mark, here’s some help.
My Golden Rule for All Clipper Work
3 passes and you’re done. Period.
Your end result should be super smooth. No rough spots. No sticky-outies.
Fast. Clean. Simple.
 Legs have their own sets of challenges. One of the largest issues is simply the shape. When you set a clipper blade on one of those spindly legs, the point of contact is minimal. Look at it on your own finger, simulating a leg. You’re only making contact with one or two teeth. You’re going to have to rapidly go over those legs several times if you have any hope of getting them smooth.
I have some ideas for how to get a nice finish on those legs in no time. It’s easy when you understand the principles and the foundation skills of all good clipper work. Read the rest of this entry »
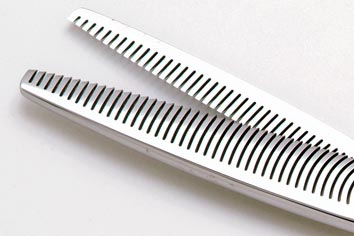
Thinning Shears are the Pet Stylist’s Eraser
Are you thinking about upgrading any of your pet grooming tools? For many dog groomers, The Groom Expo in Hershey, PA that is coming up later this month is a perfect time to see and test new items for your tool kit. If you are saving your tip money to buy new thinning shears, this blog is for you!
 Thinning shears (or blending shears) are the best-kept secrets in the grooming world. Used properly, they can make mistakes much less noticeable. For a new stylist, this is one of the first shears I always recommend upgrading in your toolbox.
It doesn’t matter how long you’ve been grooming or how talented you are as a pet stylist – sometimes you just need a little help. An “oops” can occur at any time. Mistakes happen.
Maybe there is a spot on the coat that you just can’t get smooth. Maybe there is tracking in the coat from the clippers or guard comb. You may have left scissor marks in the coat – or a hole in the coat you accidentally made with clippers or scissors. You might even be working with a dog that will not hold still long enough to work safely with clippers or scissors – leaving the coat rough and jagged.
Thinning shears can be your savior. They erase rough spots. They blend out jagged edges. They smooth out transition areas. They fix mistakes.
The difference between a good stylist and a great stylist can be determined by how much value they place on their blending shears.
 Stylists that understand the value of this type of shear will invest in multiple pairs. Just like straight edge shears, there are wide varieties from which to choose. Some are for more general use while others have more specific usage. The key is to know how you want to use the shear. Do you need it for light wispy coats? Drop coats? Terrier styling? Working around the head or eye area or dealing with large surface areas? There is a blender to fit every single one of these needs.
I always suggest you personally try out thinning shears before you purchase them. Just like Colin Taylor says, shears are like shoes. You need to find the ones that fit you! They have to fit properly as well as cut smoothly and run effortlessly in your hands.
So how do you narrow down your choices? Ask. Find out what other groomers and stylists are using. Determine which thinning shears they rely on every day in their salons. Believe me, they have opinions! There are lots of fabulous thinning shears out there – but there’s also a lot of junk.
Most high quality blending shears will have an average cost of $150 – $350. Of course, you can spend more if you like. Your equipment is an investment in your career. You may not need the Rolls-Royce when you first start out – but you do need something that is reliable and dependable. Luckily, there are many styles and varieties from which to choose.
 The difference between a good stylist and a great stylist is that they know how to fix mistakes. Every one of us makes them. Having a nice collection of thinning and blending shears will be the erasers you need when that “oops!” happens.
What are your favorite shears? What do you look forward to shopping for when you go to Hershey? Jump over to the Learn2GroomDogs Facebook page and tell us about it!
Happy trimming!
~ Melissa
What Is the Difference Between Rakes and Undercoat Rakes?
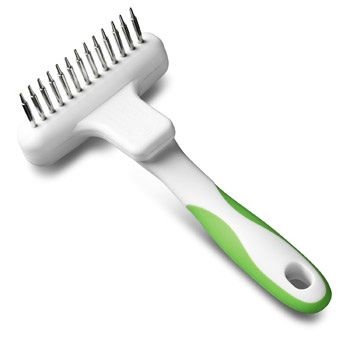
Illustration 1
These tools can be confusing. When you read their descriptions in catalogs, they’re so similar…
They do the same thing, don’t they?
No, they don’t. Let me explain.
Both remove undercoat on thick coated dogs. It’s the METHOD of removal that varies. One pulls out dead and shedding coat without cutting the fur. The other has sharp, curved teeth which remove the undercoat but will also cut the coat. One is used primarily on dry coats, both before and after the bath. The other is effective prior to shampooing, during the bathing process, and after the dog is clean and dried.
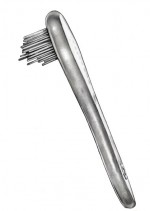
Illustration 2
The difference isn’t so much in the names. The names are interchanged all the time. To keep them straight in my own mind, I call them different things. It’s particularly beneficial when giving directions to others to utilize different names.
Rakes
Rakes are designed to pull out dead coat and shedding fur with ease. Typically they are a T-shape (see Illustration 1) with rounded pins on the head of the T. On some heads, the top bar is long, up to 6 inches across. On other designs, the head may be only a couple of inches wide. The length and shape of the teeth will vary, too. On some rakes (see Illustration 2), the teeth are short and shaped almost in a tiny cone-type fashion. With others, the teeth are long, sinking deeply into heavy, long coats. On almost all models, the handle comes directly out from the cross bar head with all the teeth.
This type of rake is designed to remove dead coat while not damaging the healthy coat. You work the tool in the natural direction of the coat growth. Care must be used not to sink the comb too far into a dense coat repeatedly with too much pressure. Tugging too firmly on a thick or tangled coat will be uncomfortable for the dog and difficult for the groomer. Repeatedly digging in too deeply could injure the skin, as well.
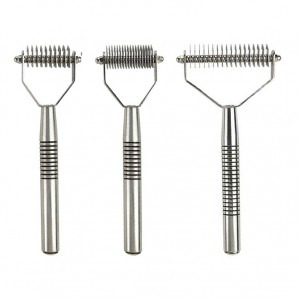
Illustration 3
Used correctly, rakes can be highly efficient for removing dead coat or “lint” from rustic-coated breeds. They are used primarily on double-coated, heavy-coated, or rustic-coated dogs.
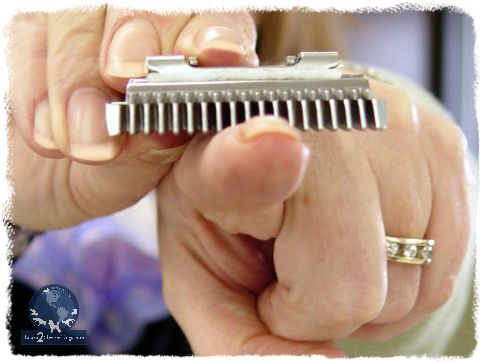
Undercoat Rakes
Undercoat rakes have many small, sharp, curved blades set close together that remove undercoat. They are available in a variety of tooth widths, making this tool suitable for a wide range of breeds. On shedding breeds, they can remove dead, fuzzy undercoat in minutes, yet leave the top coat shiny and healthy. On harsh-coated dogs, they mimic the hand-stripped look quickly and easily.
Undercoat rakes can be used on a wet or a dry coat. Pull the rake in the direction of the coat growth.Always start with a wider toothed rake to start (see Illustration 3). Work down to narrower teeth as the tool pulls through easily, removing less and less coat.
Undercoat rakes normally work better when used prior to bathing or in the tub on a wet coat.
Use caution when working with this tool. On some coat types, especially heavy-coated dogs, they will cut the top coat while removing the undercoat. While the blades are curved (see Illustration 4), you still need to be careful how much pressure you put on the tool as you drag it through the coat so you do not injure the skin. Use caution when working around areas where the skin is thin like in the hock area, ear junctions, flank, and armpits.
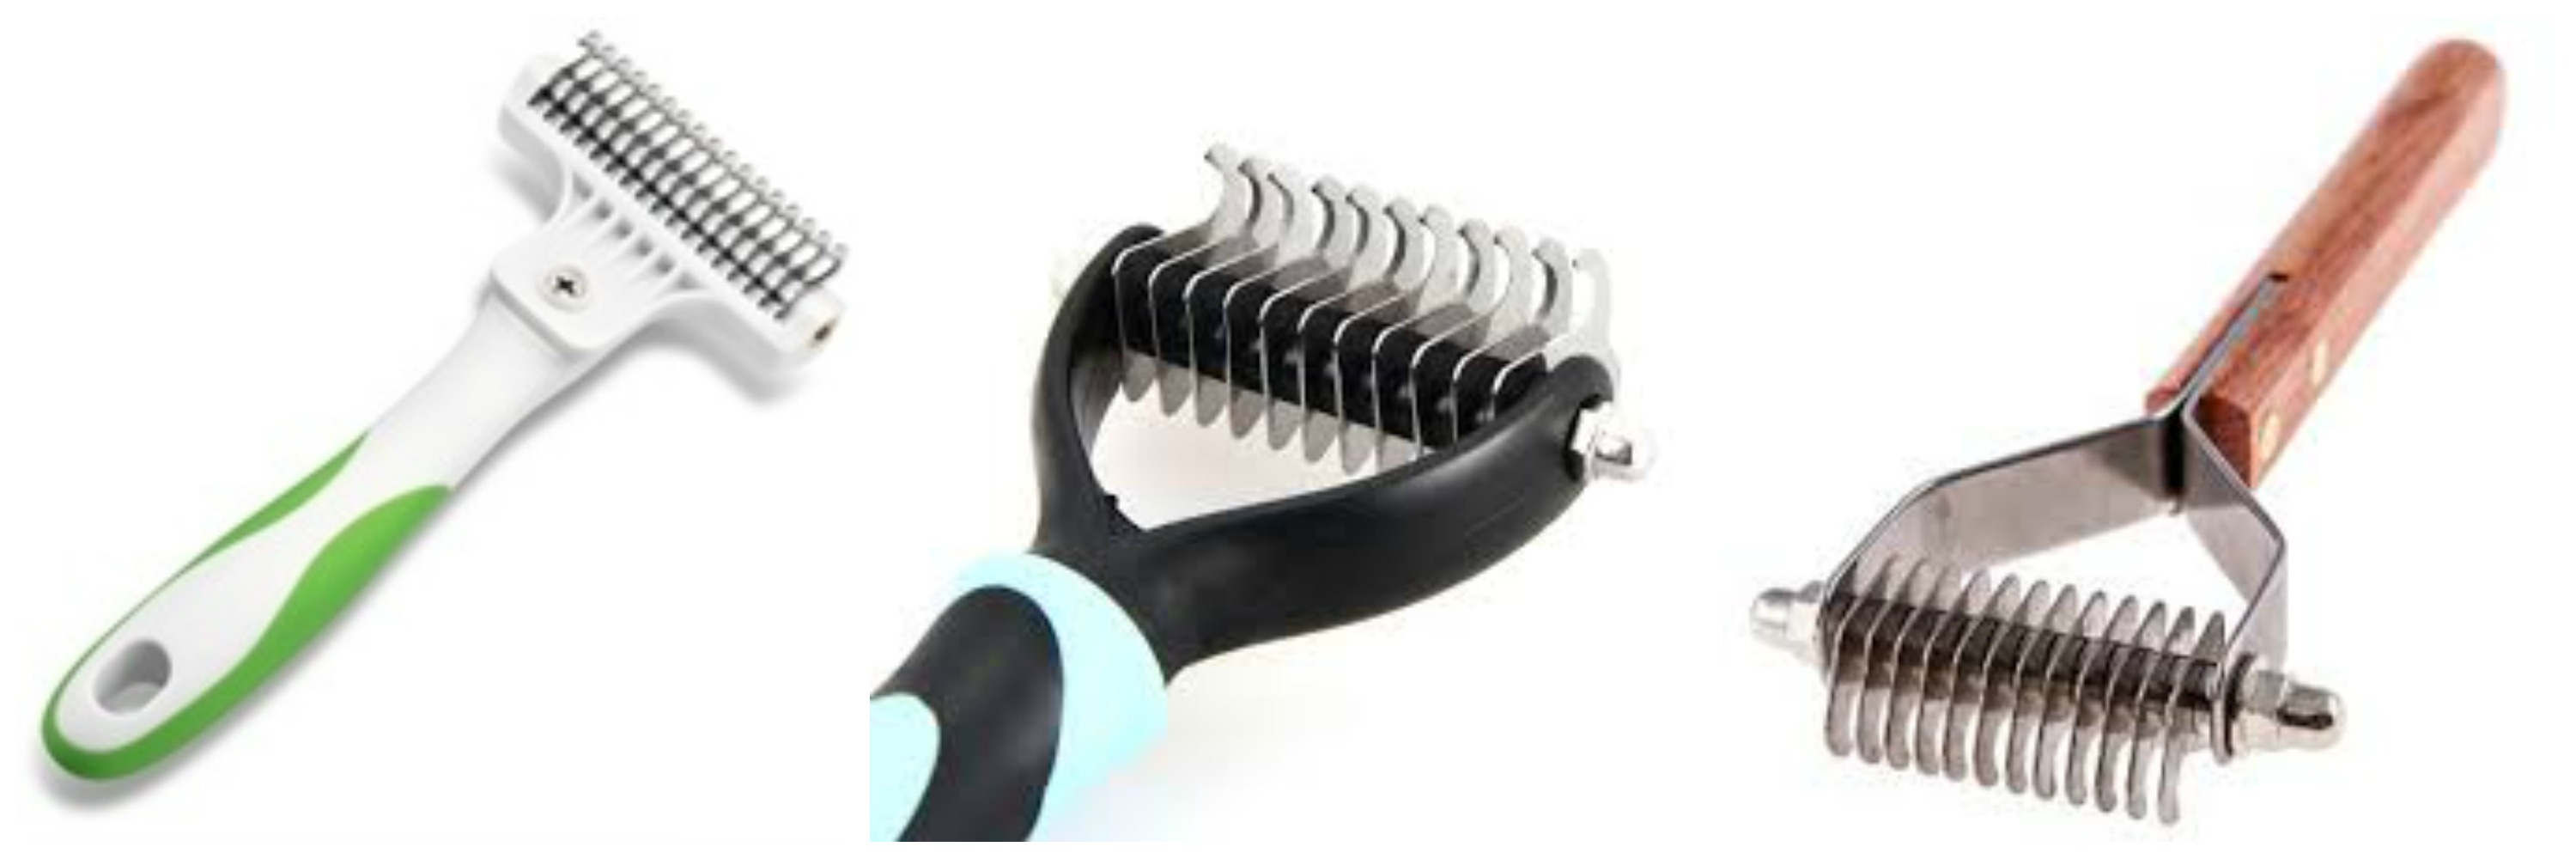
Illustration 4
Undercoat rakes work well on many coat types including double coated breeds, heavy coats, and rustic coat types. The work exceptionally well on any breed that is hand-stripped like many of the Sporting or Terrier breeds. Just be sure to monitor your progress as you work this tool over the dog.
Here is a cool trick I have seen used with undercoat rakes. This trick minimizes cutting the coat while pulling out dead coat, particularly once the coat is clean and dry. Simply take a thick rubber band and wrap it around the hooks of the blade (see Illustration 5). The rubber protects the coat from excessive cutting while the rubber helps grip the dead coat, allowing to be pulled out almost effortlessly.
Happy trimming,
-Melissa
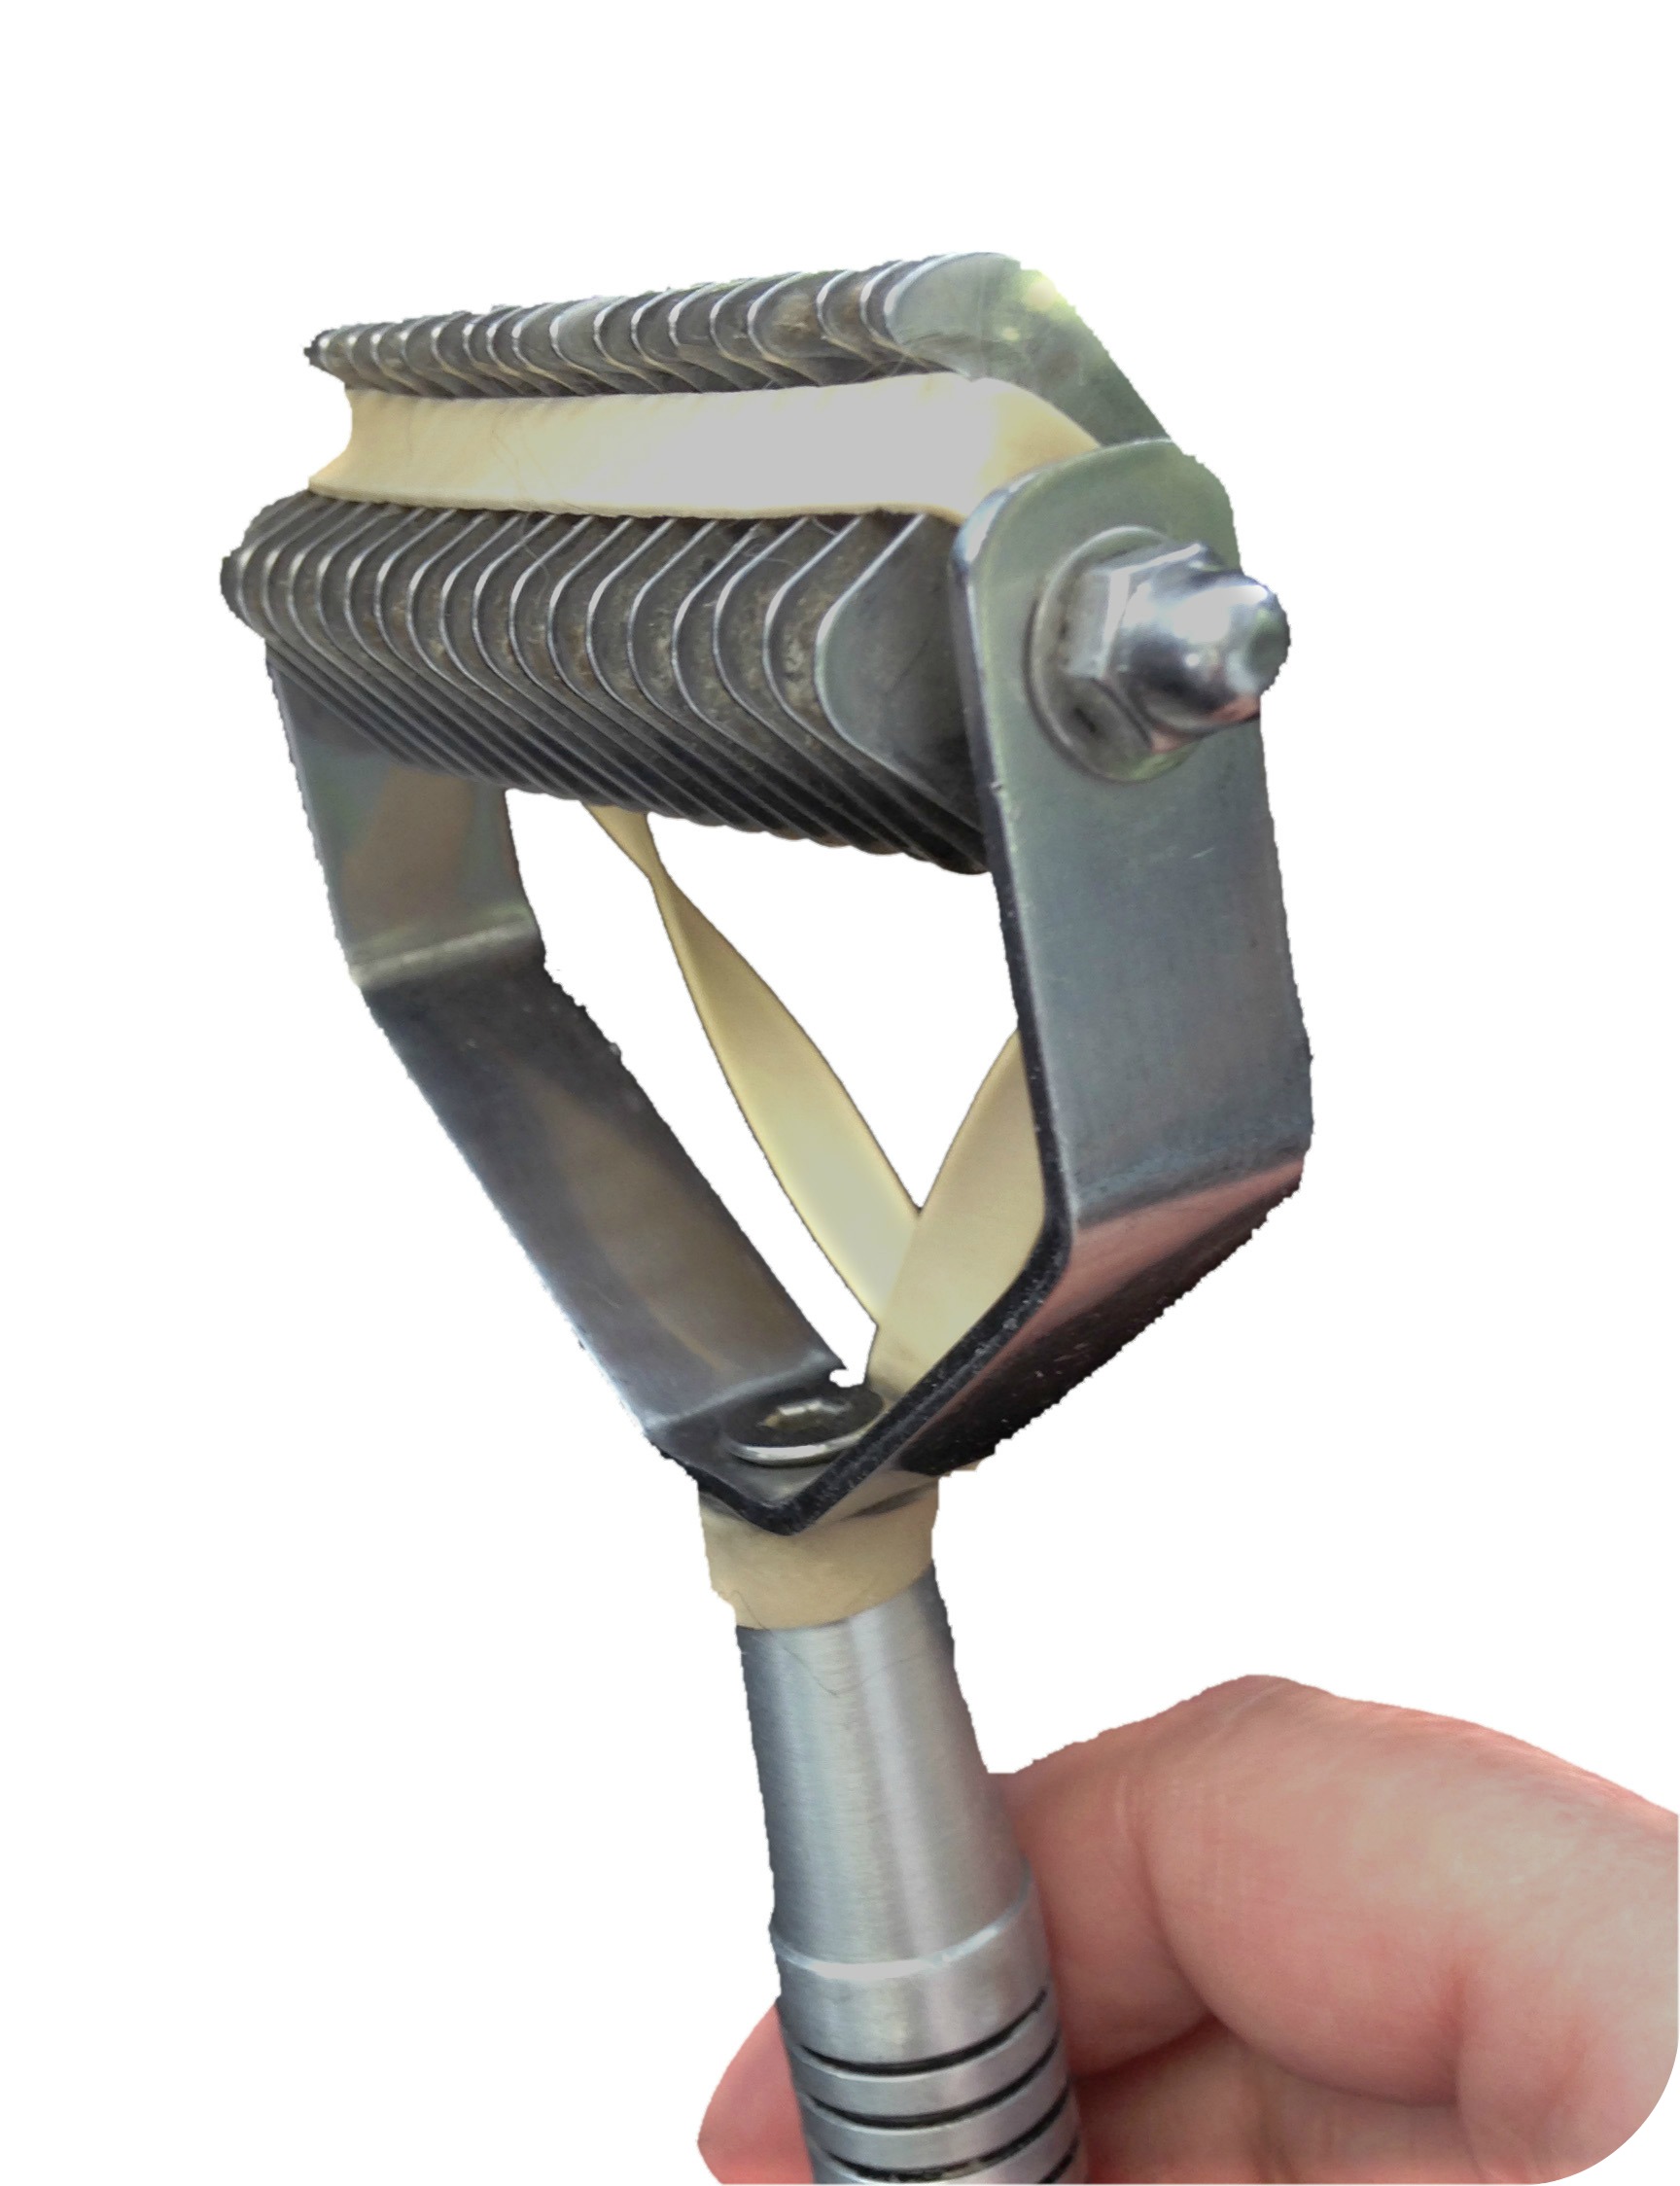
Illustration 5
P.S.
Do you have any tips to share? Jump over to the Learn2GroomDogs Facebook page and tell us.
Surviving the Holiday Rush
After working professional in the pet grooming industry over 35 years, the only time I worry about dealing with clients is the Christmas holiday season.
 The two weeks preceding the actual day can be a chaotic mess. With Christmas shopping, decorating, baking, family gatherings, holiday socials to attend, and every regular client you have wanting to be booked as close to Christmas as possible . . . phew! December can be an exhausting month!
But, wait – t doesn’t have to be! Christmas organizing all year round will let you create that picture perfect holiday without nearly the stress.
Getting Organized & Ready
The Salon
- Is it clean – really clean? Floors, walls, kennels?
- Is the lighting up to snuff?
- Are your laundry machines working properly?
- Are the tubs draining?
- What are the conditions of your pet dryers?
- Are your blowing fuses on a regular basis in one outlet?
- Does your computer need to be de-bugged for a glitch free running machine?
- Do you have a stock pile of all the office supplies you’ll need?
- Are your blades shears all sharp and ready to go?
- Are your clippers operating smoothly?
- What is your stock level of all your dispensable products? Shampoos, conditioners, cologne, flea foggers, cotton balls, ear cleaner, etc.
- Are there plenty of towels on the shelves?
The Holiday Image
- Are your holiday decorations fresh and up-to date for your salon? Keep it simple and easy… pick a simple theme and work with it.
- Do you have your client’s gifts ready to go so they can easily be passed out when the client is having their pet groomed? Remember, expense isn’t the key, packaging is. Pay attention to the details.
- Have fun with festive accessories. Head gear, costume jewelry – anything that can bring a smile to someone else is a good thing.
- Are all your holiday bows special and pre-tied? Are bandanas ready to be attached to the pet?
- Do you have red and green nail polish that is actually usable? What about other colors?
- Do you have plenty of air freshener to lend a sparkle to the air without being overly powering?
- Music is everywhere – is your holiday collection handy or is there an ‘all Christmas’ station you can tune into?
- Have you brought extra clothing or makeup to freshen up after work before heading out?
- If you’re worried that you’ll be slow after the holiday season, do you have any grooming promotions for January and February that you can be handing out now?
$$ Saving Tip: Buy all your holiday items the day after the holiday to save up to 50% the retail price;
fabric for bandanas, decorations, Christmas cards…
fabric for bandanas, decorations, Christmas cards…
Getting Through the Dogs
- What are the pros and cons of working extra hours?
- Should you take on new clients?
- Make sure all your regular clients have their holiday appointments BEFORE taking on new clients or ‘non- regulars.’
- Hiring extra help – is there something you can easily delegate with some basic training that would free you up to deal with clients? Cleaning? Answering the phone? Taking out the trash?
- Have you worked out a system to maximize the types of pets you take per stylist?
- Work out a drop-off and pick-up schedule that allows you to stay focused on grooming pets.
- Stay calm, cool, and collected no matter what happens during the course of the day.
- Set realistic time goals that push you, but stay on target. Use an egg timer if necessary or place a clock where you can’t miss it – no matter what.
- Use every speed trick in the book from prepping – to bathing – to drying – to trimming.
- When clients pick up their pet, are you offering a promotion to assist in re-booking 6 weeks down the road when it can traditionally be really slow?
Organization on a Personal Level
- Do you have a master list of all the things you need to do for the holidays? Is it broken down into smaller do-able chunks? What about a master gift list that’s simply updated year to year? Master Christmas card list? Weekly meal planner? Regular shopping tick-sheet list? For great inspiration go to www.organizedchristmas.com
- Are you are a store, catalog, or Internet shopper? Are you prepared to have ALL your holiday gift shopping done by December 15? What about the wrapping?
- As time gets closer, demands get greater and healthy meals go by the wayside… If you are in a city, do you have a full selection of menus at your fingertips? Who has great take-out that you quickly sweep in and grab on the way home or while you are at the shop? If you are a country dweller, is your freezer packed with great frozen meals that only require reheating whether homemade or store-bought.
- Does a messy house stress you out? Before is gets really busy, clean and organize the house or hire someone to help you… (or if you have kids, enlist their help.) Also think about having carpets cleaned, windows washed, or dropping you heaping laundry off at a laundromat, letting them do it for you.
- Do you need a masseuse or chiropractor to help you stay loose and limber ? If you do, book your appointment early.
After the Holiday?
- Take the week off! Trust me – your clients don’t need you for the week between Christmas and New Year’s! Take that time and spend it on yourself and your loved ones! You’ve earned it.
With a little bit of pre-planning, you’ll be breezing through the holiday. It’s so much more enjoyable for everyone to be in a festive spirit instead of being the Grinch. Put some effort into setting yourself up to enjoy the best of the season – it makes the time fly by. And you might even get a few moments to relish this time of year!
Always remember, to be successful – to thrive – you need to put forth effort today so that your future will be bright.
Happy trimming !
~Melissa
Salvage work
Spring is edging closer – and not a moment too soon! Many of us will be seeing a lot of pets that are ready for a great makeover in the coming weeks. With that in mind, I thought it was the perfect time to revisit my blog on salvage work.
As many of you know, I’m a big dog person. Working on these large furry dogs that have a huge shedding problem is one of my favorite things to do in a grooming salon. I know, I know, call me crazy – but I just love seeing the transformation in this type of job. Over the years I’ve gotten really quick with the process and rarely cringe, no matter what the size of the dog, nor the condition – I see it as a fun challenge!
My #1 rule is: Never work on a dirty dog. If water can penetrate the coat, let your products do the job.
Working on a dirty dog is not only unpleasant, but it also takes longer to do. Plus, there will be a lot of coat damage and breakage. A dirty coat is dry and brittle. The dirt and dander trapped within the fur makes it more difficult to brush out. Working on a clean coat will be easier for both you and the pet – and much more pleasant.
If there are large chunks that water cannot penetrate, go ahead and break up the tangle using the tool that is safe for the pet. Don’t worry about removing it completely, just break it apart so the water and shampoo can do its job.
 Prepare your bathing area. If the dog is exceptionally dirty, use the shampoo especially designed for dirty dogs. Using a follow-up treatment of a skin and coat conditioner after bathing twice (or maybe three times in some areas) will assist with the brush out and dead coat removal during the drying process. Make sure you have all the tools you’ll need to aid in getting the dog clean like rubber curries or scrub brushes. And make sure you have plenty of towels handy.
My favorite trick when working with this type of job is to bring my high velocity dryer right into the bathing area. With the dog fully lathered, blow the shampoo right off the pets while they are tethered in the tub. The slippery soap will allow the dirt, loose coat, and tangles slide out, being trapped in the shampoo and sticking to the back wall of the tub, minimizing the mess. Not all the shedding coat or mats will be removed but a lot will, making your job easier once you transfer to the drying table. Once you have blown out the pet, follow up with the rinsing process. Repeat this process as many times as necessary to get the dog “squeaky clean.”
Once the pet is clean and thoroughly rinsed, apply a skin and coat conditioning treatment before heading to the drying table. Read your directions: some conditioning treatments need to be rinsed out while others do not. Your high velocity dryer and a heavy slicker brush will be your best friends during the drying process.
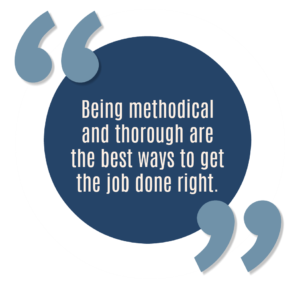
Rule # 2: Be Methodical and Thorough
First, blow out as much moisture and loose coat at possible with the air flow. Use the highest power setting the pet is comfortable with, and a condenser cone. Once you have pushed as much water and loose fur from the pet, remove the condenser cone, and bring the air flow close to the pet’s skin. “Boost” any loose coat out of the dog by lightly patting the area where the air is striking the skin with a slicker brush.
Continue to work over the dog in a methodical manner until your brush glides through the coat easily and no more loose coat is trapped in the brush.
Rule #3 – ENJOY!
When the dog is complete, it should smell clean and fresh. The coat should be glossy and float freely as the dog moves. There should be an irresistible desire to reach down and bury your hands in a freshly groomed pet.
Happy trimming!
~ Melissa