
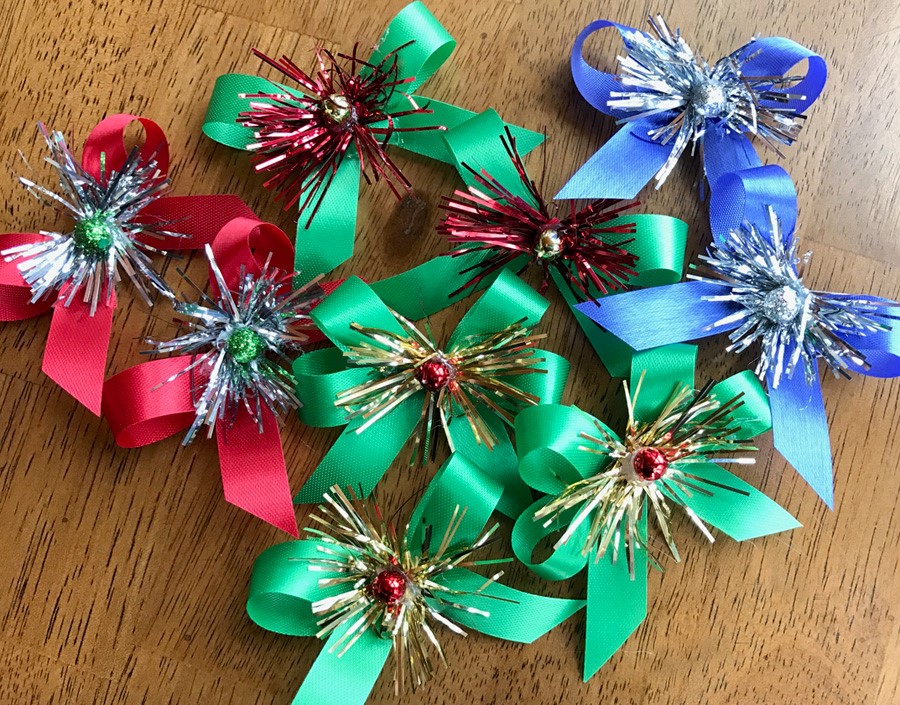
 This sparkle bow is a perfect fit for this fun and festive holiday season. Not only is it super cute, it’s easy to make!
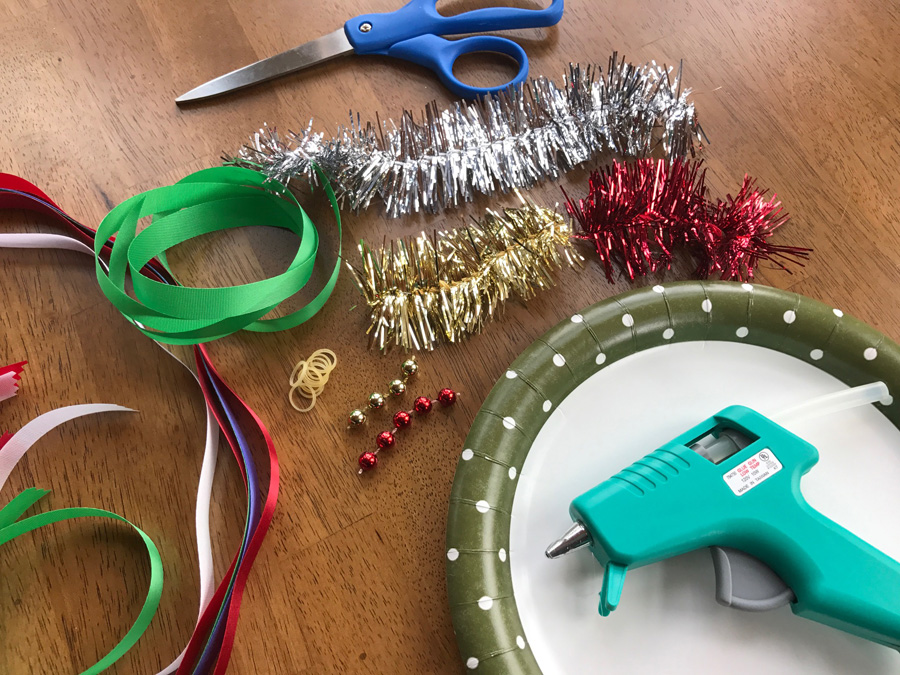
It all starts with garland. It’s easy to find this time of year. The best type to use for bows is woven with very fine wire. It typically comes in a couple of sizes and a variety of colors. I’ve found the one that’s about 2 inches in width works the best for bow projects. It also balances the finished bow nicely on the pet.
To speed this project along, I work with pre-made bows. The bows are held together with a small elastic band. When finished, there is a small loop on the back side of the bow for attaching it to the pet. Bows can be placed in the fur, in topknots, or on the collar.
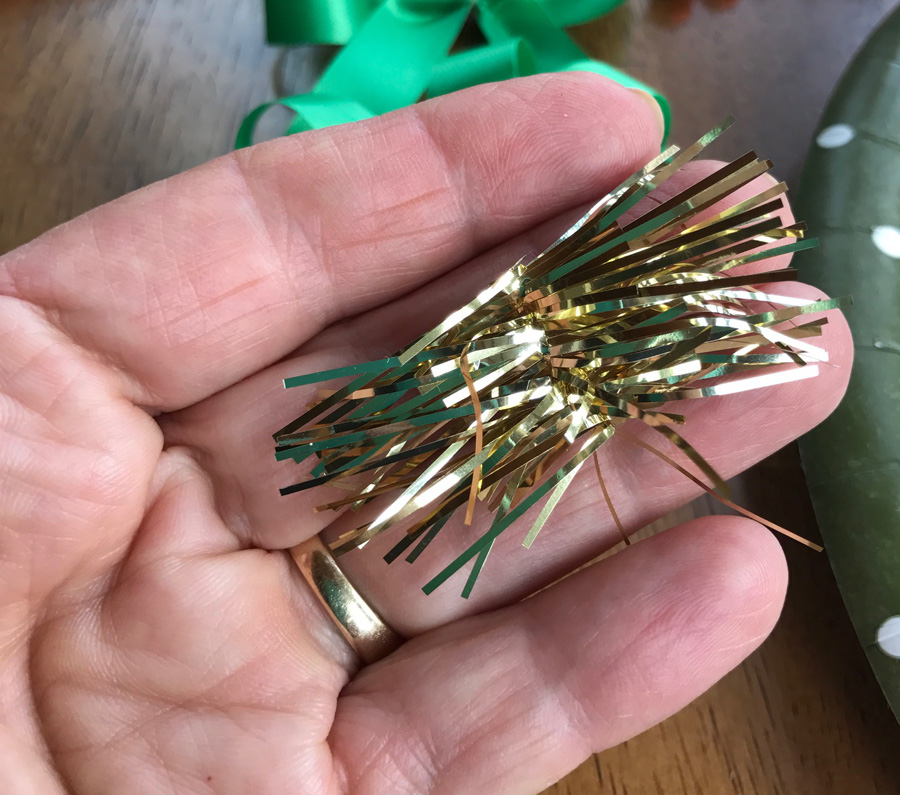
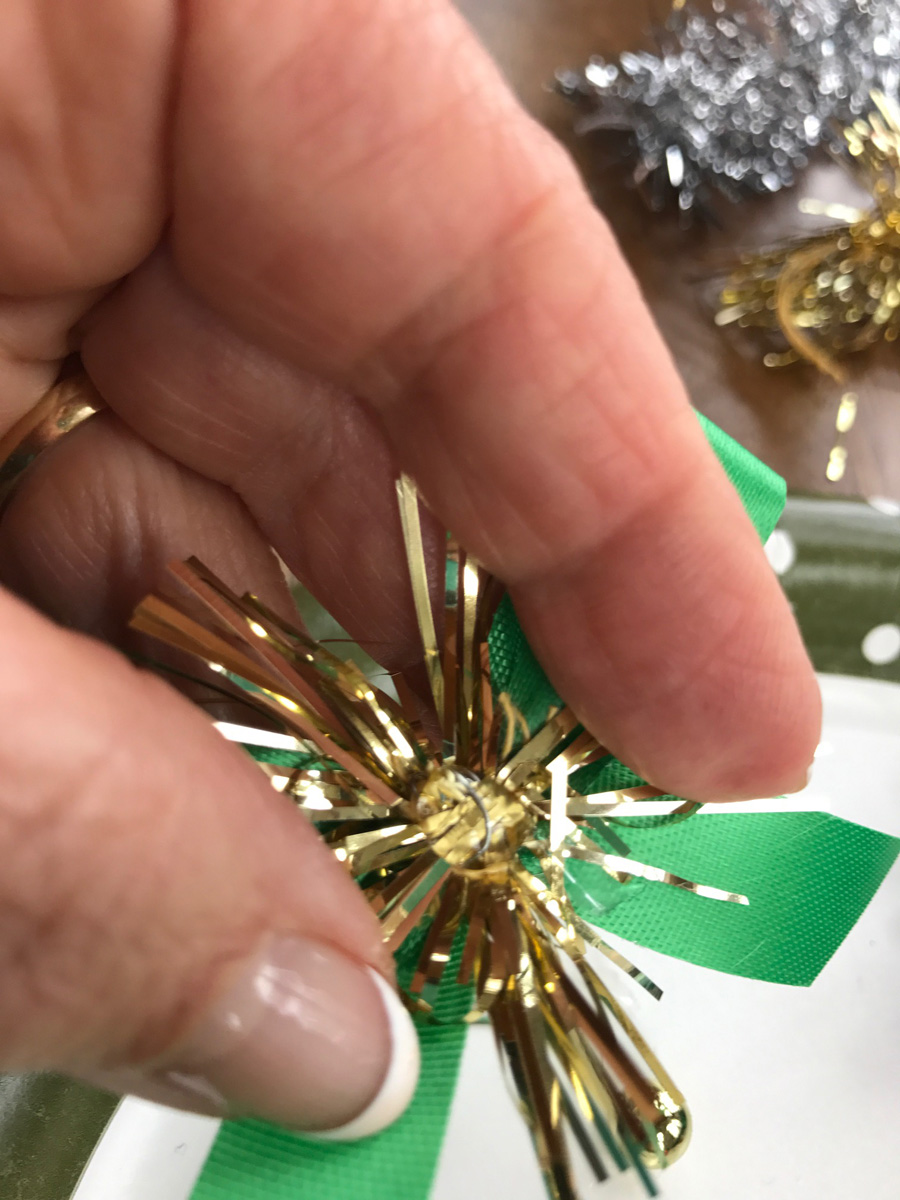
When trimming the garland into smaller pieces for the bow centers, the wired garland should hold the tinsel together. When trimming, use only the tip of the scissors to trim at the very center to the garland. As you trim, try to avoid cutting the tinsel.
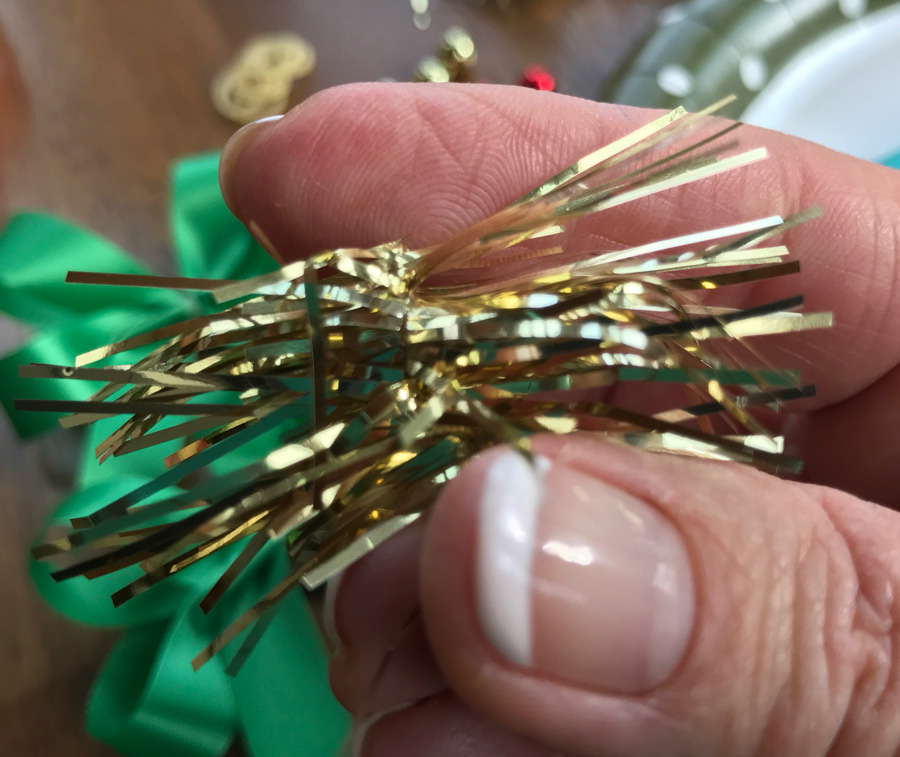
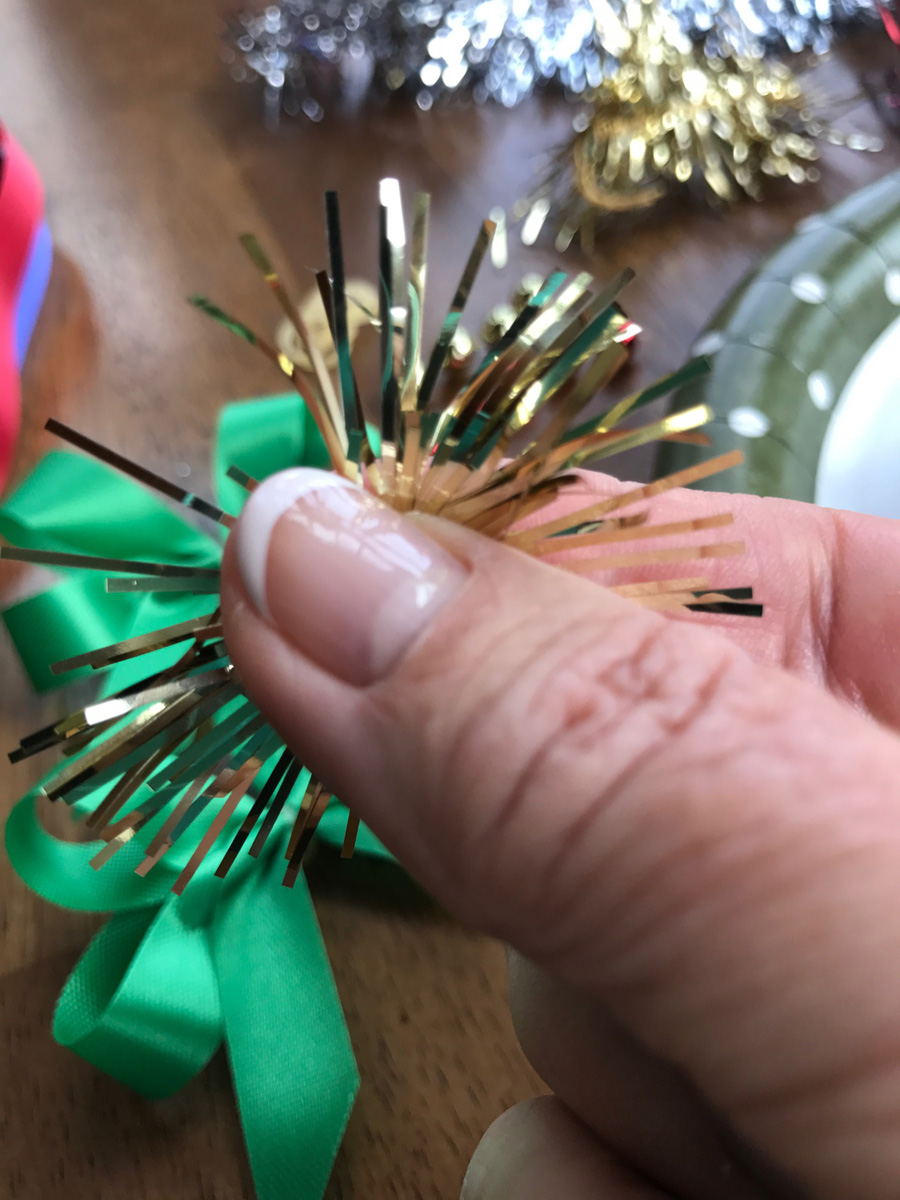
Once trimmed to length, the tinsel piece will only be about a ¾” to an inch long. The small piece of wire ends up getting crimped, creating a circular spray of sparkle for your bow center. When picking up the small garland chunk, gently hold the garland between your fingers. Push your fingers together in one smooth movement, slightly rolling the center of the garland between your fingers to get a consistent spray of tinsel.
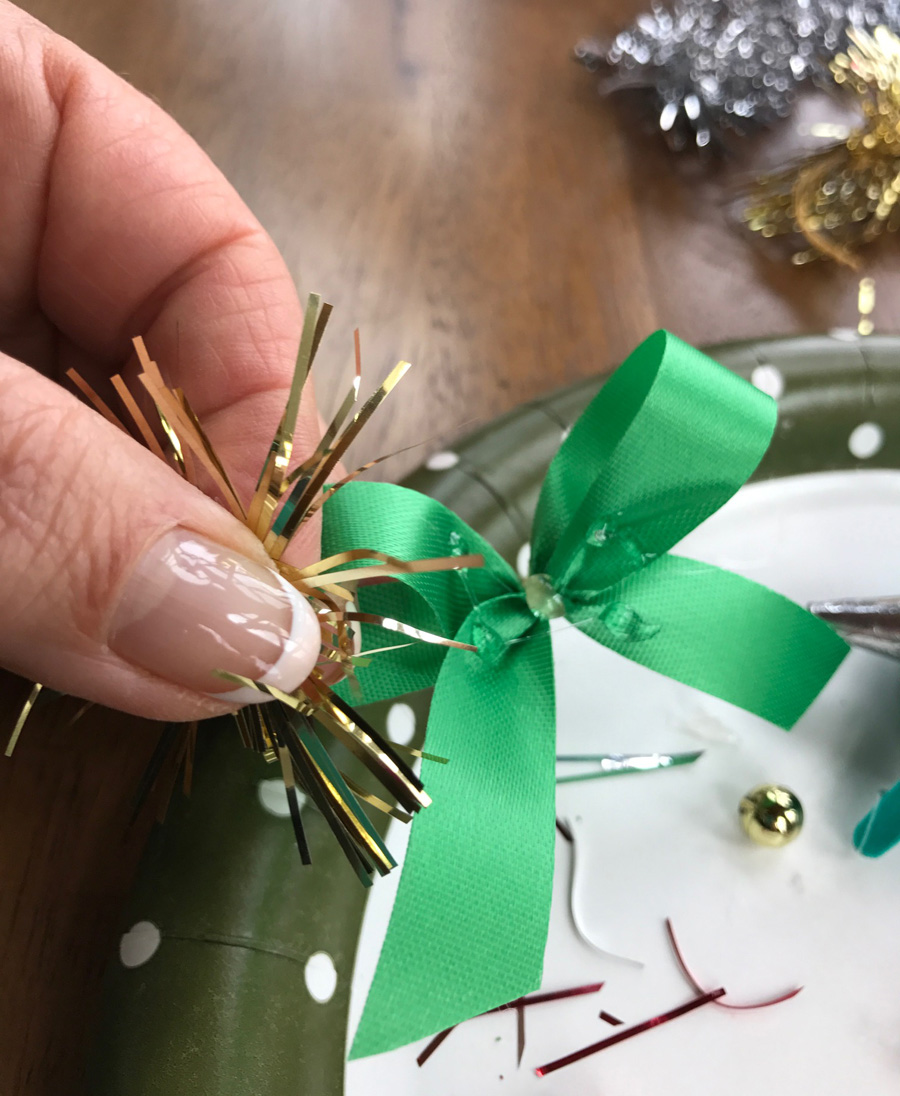
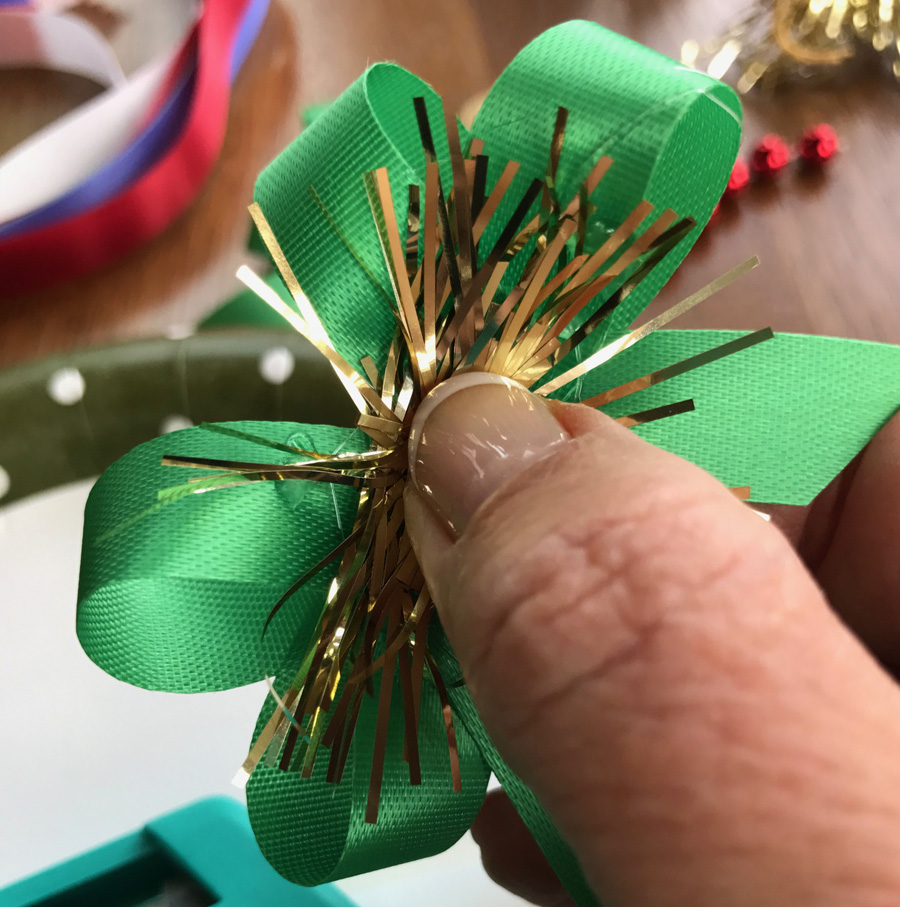
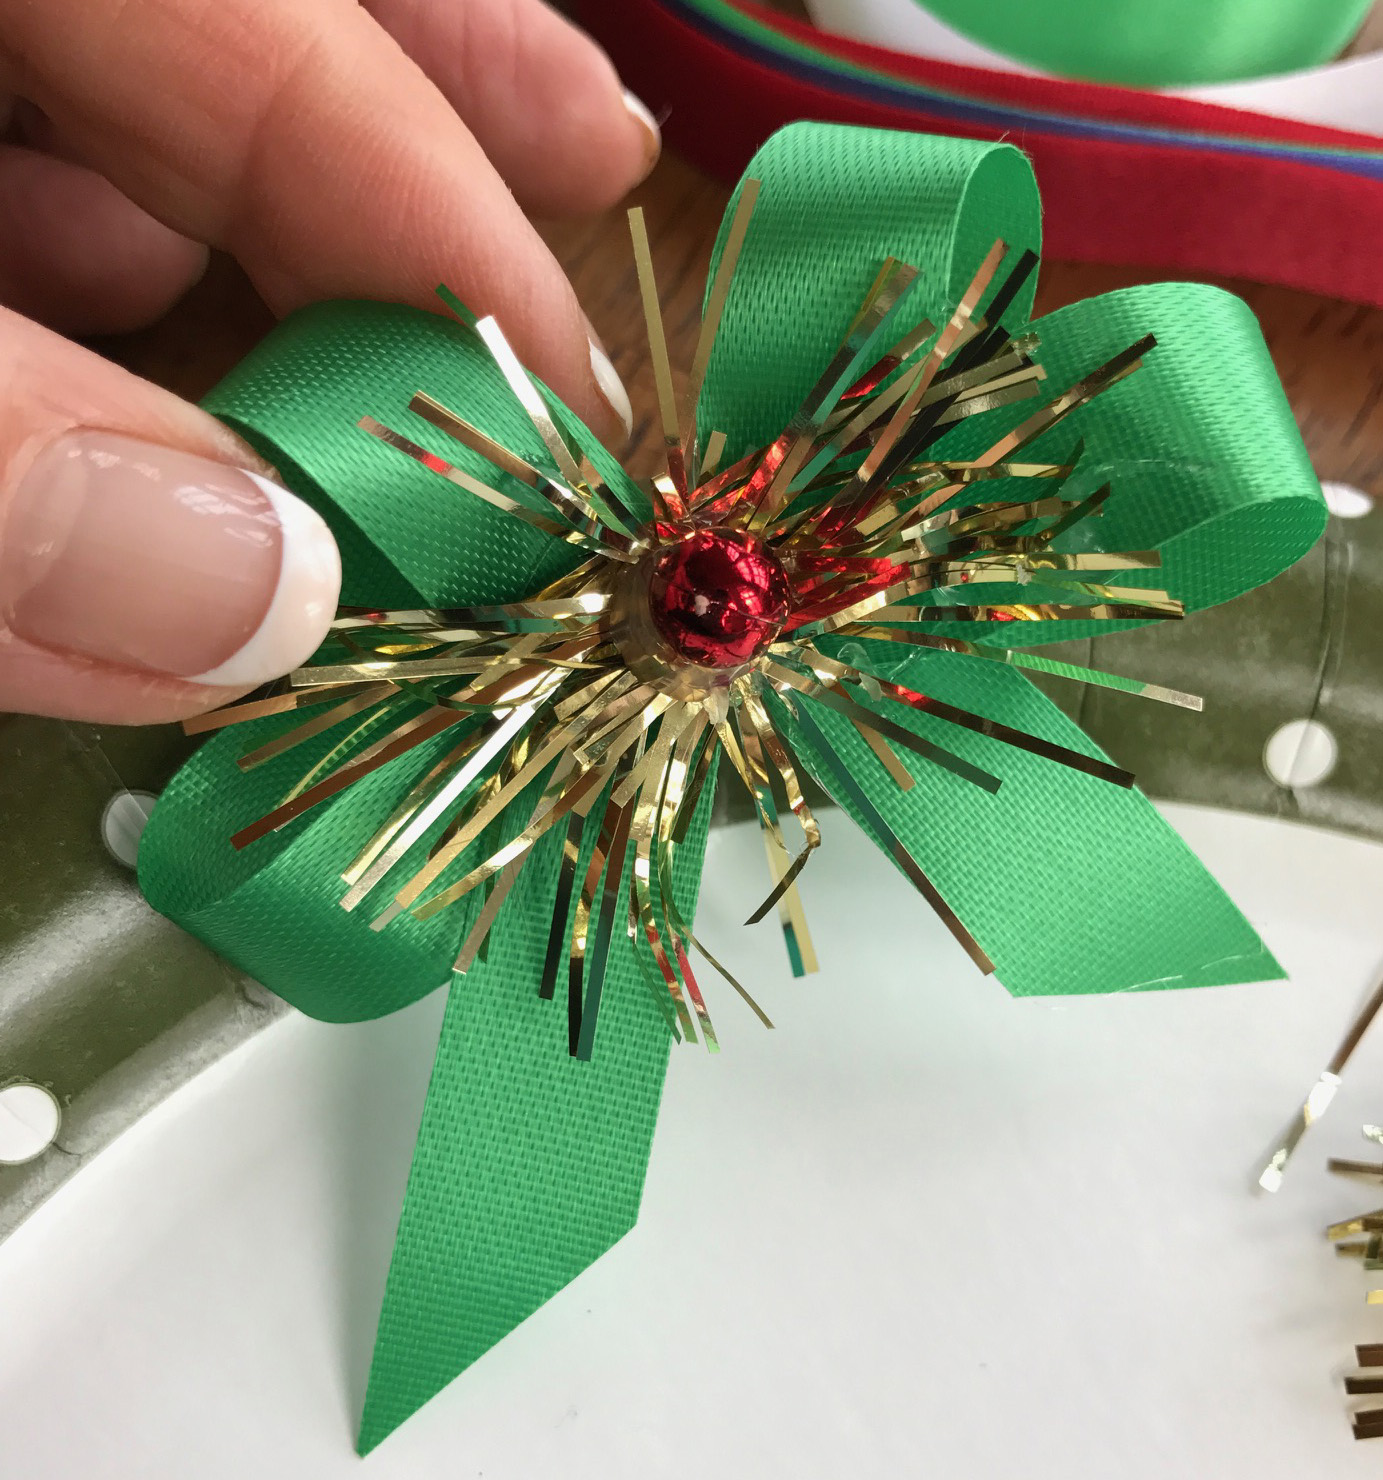
Quickly add a few dabs of hot glue to the center of the pre-made bow plus a few quick spots on the loops themselves. Apply the garland to the center of a pre-made bow while the glue is still very warm, pressing down firmly. Hold for a few seconds until the garland sparkle center is firmly attached to the bow.
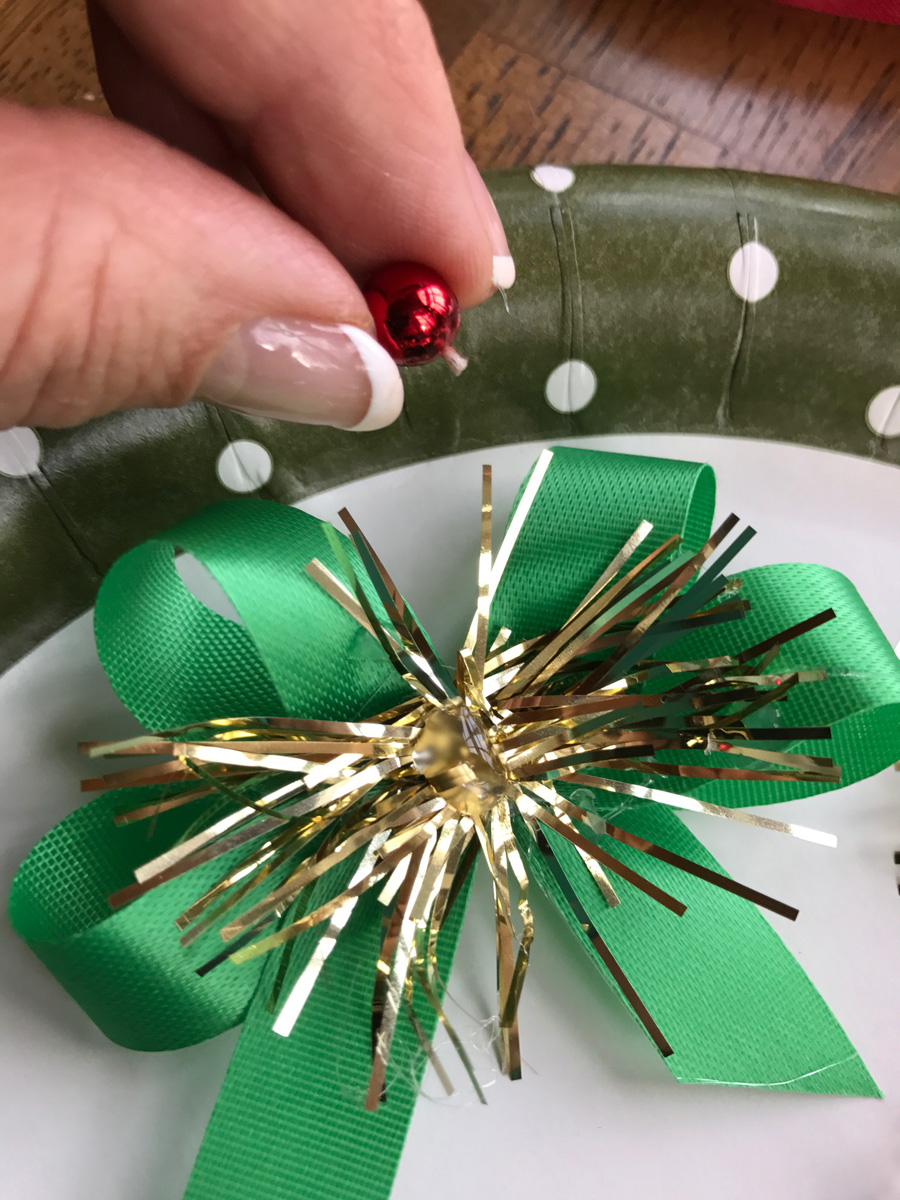
To add the final finishing touch, add a small bead at the center of the garland spray center with a dab of hot glue. Personally, I like to use Mardi Gras-style beads. You can find these during the holidays, too. Trim the strand into single beads.
When trimming the strand, I snug the shear up to one side of the bead. This allows for a small thread nub on the opposite side of the bead. If you strategically sink the thread nub into the hot glue, it will stay firmly in place. Hold for a few seconds while it adheres.
Once the glue has cooled, remove any hot glue cobwebs.
These bows are fast, fun, and festive. If you work with pre-made bows, these are easy to make in seconds. My regulars would request them in colors matching their personal holiday theme. My clients always loved them on their pets.
Items that you will need for this bow style are:
- Pre-made basic bow – 2 or 4 loops
- Christmas tinsel garland
- Beaded garland or Mardi Gras-style beads
- Scissors
- Hot glue gun
- Glue sticks
Step 1
Gather your supplies and select the color of garland you want for the center of the bow. Bows and tinsel can be prepared ahead of time. Once the bows have been made and the tinsel pieces trimmed and shaped, they can be quickly and easily assembled with the glue gun.
Step 2
Trim a small section of garland. Using craft scissors, cut the wire that holds the sparkly tinsel in place. Use only the tips of the shears or slide the open shear in until you meet the wire. Make a small cut, minimizing how much tinsel is cut with each snip. Trim the garland over a paper plate or shallow box to minimize cleanup.
Step 3
Once the garland pieces are cut, crimp the wire by holding each end on your fingertips and pinching the ends together. With the wire crimped, push your fingers against each other to send the strands out into a uniform spray shape. This also flattens the tinsel so it lies nicely at the center of the bow.
Step 4
With a hot glue gun, place at least 4-5 small dabs of glue around the bow – one on each loop and each tail – just off center. Place the final dab right in the center of the bow. Work swiftly as the glue dries very quickly.
Step 5
Place the tinsel right at the center of the bow and push firmly down, using care not to burn your fingers in the hot glue. Check that the tinsel is firmly in place. Remove any hot glue gun cobwebs (slender strands) that are typical when working with hot glue.
Step 6
Once the tinsel garland is in place, hold the strands away from the center. Add another dab of glue to the center of the tinsel. Quickly add a complementary colored bead to the center of the bow. Place the thread nub into the warm glue. Apply pressure to the bead to ensure its firmly attached. Remove any glue gun cobwebs.

Step 7
The finished bow.
Happy trimming!
~Melissa
What bows do you like to make? Hop onto our Facebook page and tell us!