Call Now: (888) 344-8658
Search for a News Story:

Making a Choice

revbookOne of my favorite holiday tasks is selecting a motivational book to give to many of my business associates. I look forward to it every year. As the months pass, I listen to what people around me are saying. What are their frustrations? What is impacting them? What do they lose sleep over? Every year it’s a little different.

This year, the common thread was choices. Little choices. Big choices. Time-consuming choices. Life-changing choices. Scary choices. Every time I turned around it seemed like someone was struggling with this issue – including myself!

As I was scanning the titles, a few stood out. I ordered three different samples. When they arrived on my doorstep back in November, it didn’t take long to realize which book to select this year: One Choice by Mac Anderson from Simple Truths. The subtitle really resonated with me…

You’re always one choice away from changing your life.”

Does it ring true with you, as well?

Every day we have choices. Each one of those choices impacts our lives. Is it going to be positive or negative?

The scary choices are the hardest. Fear can totally immobilize you.

During my career, I’ve had many difficult choices – some of them very scary. Some of my choices would not only impact me – but my team members as well.

I remember one such circumstance. It was terrifying…

In a relatively short period, we had grown the business tremendously. It was exciting. It was exhilarating. We were teaching 20 to 30 students at a time and grooming well over 80 dogs every day. Our sales catapulted to over a million dollars. We were on top of the world.

And then with one phone call – it came to a screeching halt.

I remember the fear. I was absolutely paralyzed by it. I had put most of my eggs into one large corporate training account basket. We were a year into a seven-year contract. But there was a loophole in the contract and they decided to go in a different direction. We would no longer be providing training services for them.

What was I going to do? What choices could I make? How could I save the business? What was I going to tell my team? How would we handle the clients?

Fear gripped me like never before. I couldn’t move. I could not make a decision. I remember being totally overcome with fear – and tears. I was on the verge of losing most things I had worked hard to create. My business. My team. My home.

Luckily, my core team stayed close. They picked me up, helping me regain the courage to make a choice. To make a plan.

Over the next six months I had many choices to make. Many were not choices I wanted but they had to be made. Ultimately, we arrived back to the million-dollar point in sales in less than four years.

Opportunities presented themselves with every choice I made. Many of those choices changed the direction of my life and my businesses. At the time, I had one business. Today I have six with many divisions within each of them.

Today, your life is directed by the choices you’ve made. Are you happy with those choices or would you like your life to go on a slightly different path? You alone can set a different course if you have the courage to do so. It starts with one choice to make a difference. Making one choice will lead to opportunities to make more choices.

  • Are you happy with your health? If not, make one choice to improve it.
  • Is your career going in the direction you dreamed about? If it’s not, make one choice to improve it.
  • Is your personal relationship fulfilling? If it’s not, make one choice to improve it.
  • How do you interact with your family? Is it supportive, warm, and loving? If it’s not, make one choice to improve it.
  • Do you have a positive outlook with your attitude towards life? If not, make one choice to improve it.
  • Are you reaching your business goals in a manner that is rewarding? If not, make one choice to improve it.

Ultimately, you control your life by the choices you make. Growth will only happen when you stretch beyond your comfort zone and make choices.

When selecting my motivational holiday books, sometimes they are as much for myself as the recipient. This was one of those years!

As I head into 2017, I’m excited about the choices I have before me. Many of them deal with my companies. Others deal with my personal health. Both my companies and my personal health could certainly use some improvement.  The choice is mine to change it. To improve it. To improve them.

What choices are you contemplating to make a positive change your life?  Don’t over think it – just do it. The choice is yours.

~Melissa

P.S. Have you made a choice that made a difference in your life?  Go to our Facebook page and share your story.


How to Avoid Clipper Irritation

rr-main-image
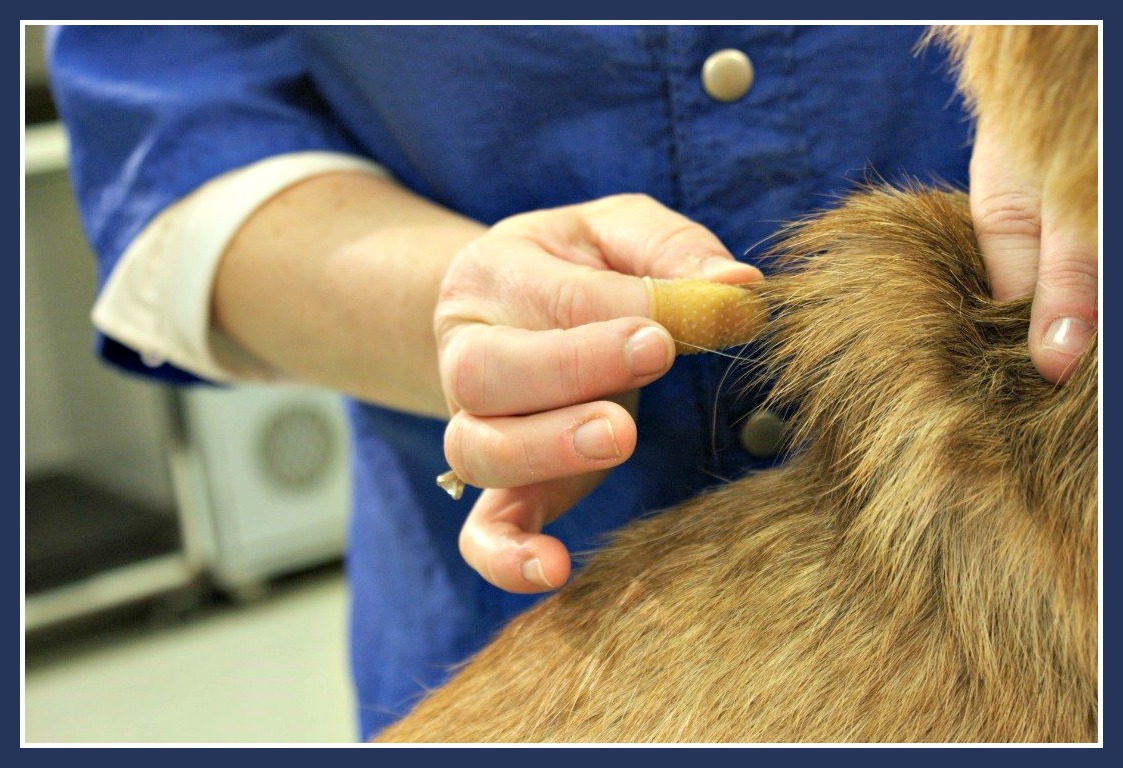
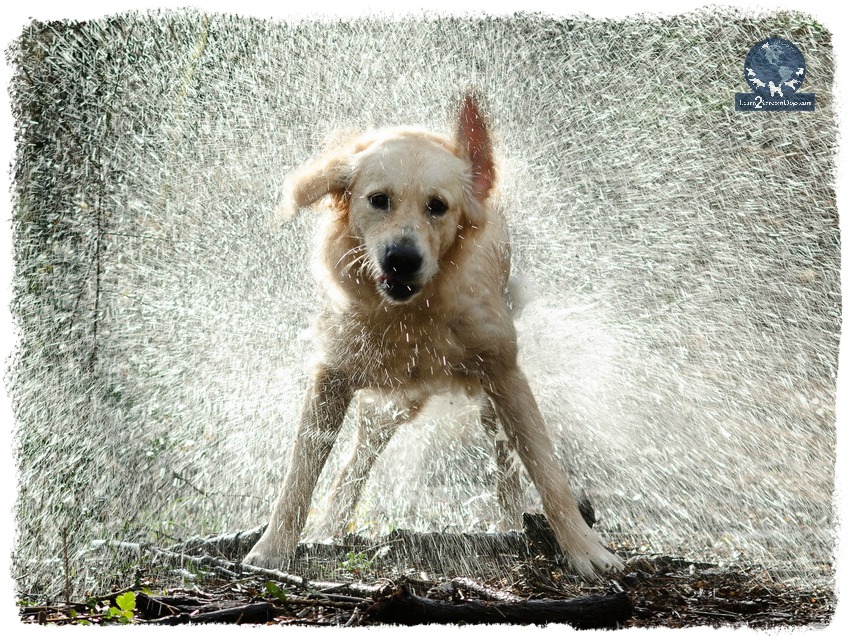
Clipper irritation is also commonly known as clipper sensitivity and clipper burn – but what is it?

Clipper irritation is an irritation to the top layer of skin. While it’s not necessarily a severe injury that can occur during pet grooming, it will be itchy and uncomfortable to the pet. This discomfort causes the dog to scratch and/or lick the area. The skin gets moist.  If left unchecked or untreated, the scratching and licking can cause an open wound very quickly.

Unfortunately, clipper irritation is not always detectable right after it happens. This means that unknown to both the groomer and the pet owner, the dog may be going home with skin irritation. The condition goes unnoticed until the pet begins to aggravate the area. In its early stages, the skin might moisten or turn a light pink. Other times, the signs may not be visible, but the dog can certainly feel the discomfort.

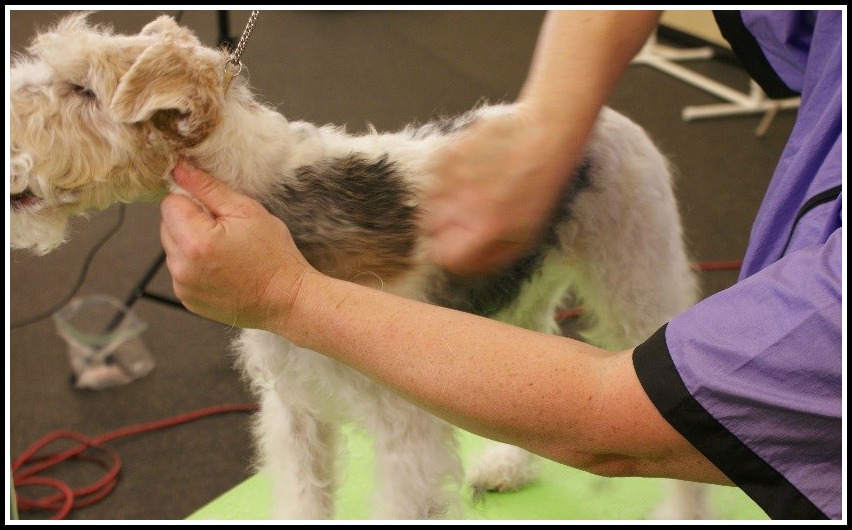
Depending on the severity of the irritation, the skin might be light pink, or in severe cases, bright red or even bloody. The skin tingles uncomfortably. The natural reaction is that a dog will lick and scratch at the site. The sharp edges of recently clipped toenails can make matters worse – and if the pet starts scratching at his face, you can have a real problem on your hands. A mild case of clipper irritation can instantly turn into a severe one with a couple bats of the back foot with freshly trimmed toenails.

Clipper irritation is one of the more common injuries in grooming salons. It doesn’t just happen to inexperienced or new groomers. I’ve seen it in the competition ring and Grooming Certifiers have reported it at certification test sites.

From a business standpoint, what happens when a pet has been affected by clipper irritation? Simple. Owners will not return to your place of business if it becomes a common problem.

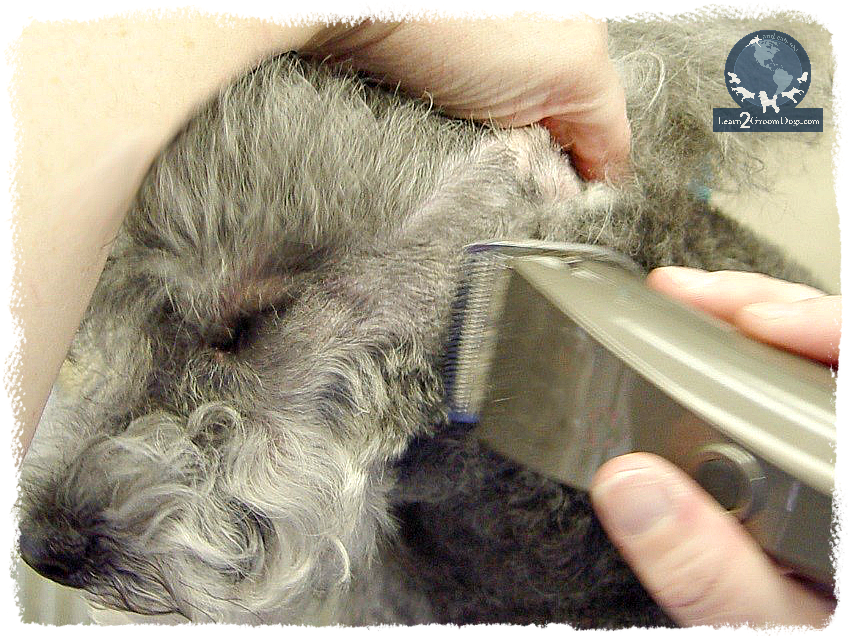
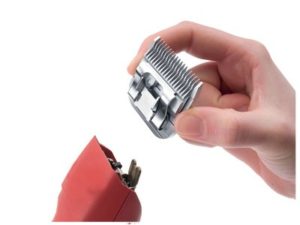
I was just reviewing a Learn2GroomDogs.com video. Well into the video, the Training Partner changed clippers and started clipping a Poodle’s face. She did not tell the audience what blade she was using but I could tell it was closer than the one she had used previously. I was guessing it was #10 or #15 blade length. Weeks after filming was completed, I shot off an email asking the Training Partner what blade length she had chosen to use. I wanted to have our video editor type it on the screen for our members because I knew it was going to be a question. I wanted to make sure I had the correct length.

I was shocked when she replied it was about a #30 blade length.

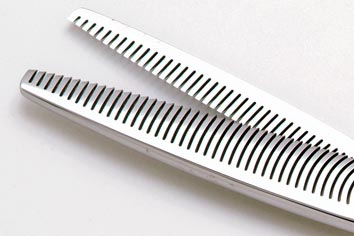
In my experience, the shorter the blade length, the greater the risk for injury. For most pet dogs, a #10 or #15 blade is considered a safe length to start with if it is used correctly. Some stylists can go shorter and not have any issues. On pets that are extremely sensitive, even longer blades such as a #9 or a #7F are safer alternatives.

How do you decide what blade to use? It all depends upon two things:

  • the dog’s skin
  • how the groomer runs their clippers

For over 15 years, I’ve watched this very talented Training Partner groom dogs. I have NEVER seen any clipper related issues with her work. She almost always uses a #30 blade on all her close work. So how can she get away with using a clipper on a #30 blade setting safely while others could not?

It forced me to think a little deeper – deeper than I go into in my book, Notes From the Grooming Table. In the book, I talk primarily about five key elements.

  1. holding the clipper
  2. keeping your hand supple
  3. the amount of pressure applied
  4. cleanliness of the coat
  5. clipper tip

Those five areas cover the basics of running a clipper effectively. However, there’s a little bit more to know if you want to consistently avoid any type of skin irritation, sensitivity, or clipper burn. To do that, we need to focus on how much pressure is being applied, the sensitivity of the pet’s skin, and the heat of the blade.

Applied Pressure

grc-detaching-bladeProper pressure is the most critical component of clipping for both quality and safety. Press too lightly, and you won’t get the area clipped smoothly. Press too hard, and you’re sure to cause skin irritation. So, what is the proper balance between the two?

That depends.

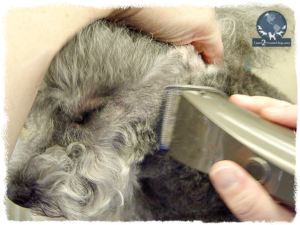
On slightly longer blades, a tiny bit more pressure can be applied without incident than on super close blades. It will take you a few more passes to get a smooth, even cut. But for the inexperienced or new groomer that is still learning, a #10 blade is a good moderate blade to begin with.

As clipper technique improves, some stylists move to a shorter blade. Why? It offers a slightly cleaner look and takes a little less time. With super close cutting blades, such as #30 or #40, you can go even faster.

Be warned – if you opt to go with a very short blade, you need to be extremely careful. Your clipper technique must be absolutely spot on. Many experienced stylists with fabulous clipper technique can use #30 or even #40 blade lengths to quickly and easily get the quality of trimming they are looking for without sacrificing the well-being of the pet.

Choosing a blade length for close clipper work is not something to take lightly. You need to identify how proficient you are with your clipper technique. You can then choose the best option that does not jeopardize the safety of the pet. The last thing any of us want is to cause discomfort or injury to a pet.

Skin Sensitivity

Just like people, every dog is a little bit different. A person with a very fair complexion will typically have more sensitive skin. Folks with a deeper skin tone have less delicate skin. Puppies and younger dogs have more delicate skin than adult dogs. Smaller dogs are more sensitive than larger dogs. Fine coated pets are prone to more issues with clipping than heavier coated pets.

If a dog has dark pigment around its eyes and nose area, chances are the skin is a little bit tougher than those with light pigment. It’s very common on dogs with light pigment around their eyes and pink or light brown noses to have hypersensitive skin. Sometimes coat color and density levels will come into play, as well. Thicker coated pets are typically much less sensitive than those with baby fine fur. Also, small, light-colored dogs (white, buff, apricot, red – even some chocolate) can be more prone to sensitivity.

The skin can be conditioned. This is a common practice with dogs who are destined for the show ring. This is a critical step, especially with dogs that have close clipper work done on a routine basis. Prospective show dogs are started out with close clipper work at a very young age. It is repeated on a regular basis each month during the early stages of the grooming process. Not only does a condition the skin, it also teaches the puppy to enjoy the entire grooming process.

With pet dogs that have not gone through this conditioning process, we need to be more careful. With all dogs, the shorter the blade length, the more cautious you need to be. With supersensitive skin types, you need to be even more diligent about gentle and proper clipper technique.

i-do-not-want-to-breast-feed-bottle-feeding-your-baby_4Heat of the Blade

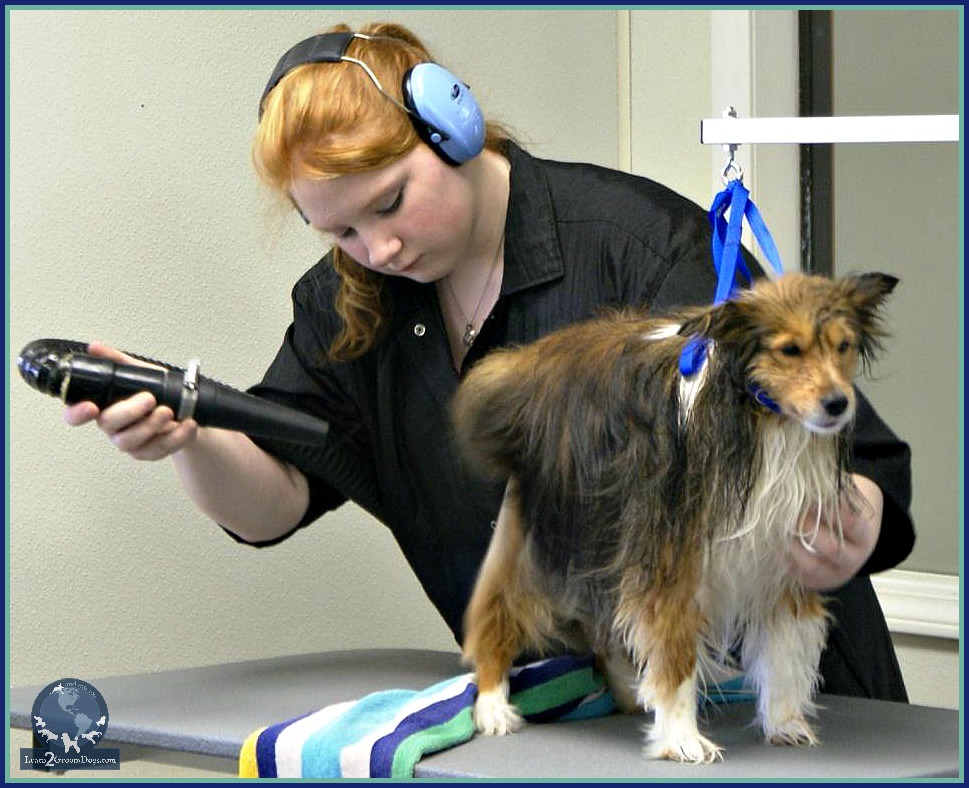
With most metal clipper blades, the longer and faster they run, the warmer they get. Each clipper will be a little different. To be safe, you need to regularly check how warm the blade is getting once they have started running.

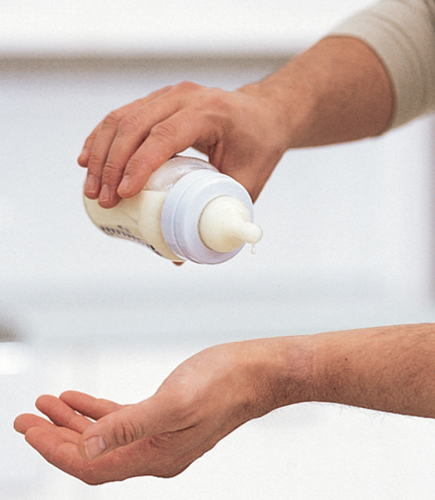
To check the heat of a blade, simply touch it to your forearm as though you were testing the formula in a baby’s bottle. You can also touch it to your cheek. Either way, if it is heating up too quickly or is uncomfortable to the touch, ice the blade down with a blade coolant or switch out to a fresh, cool blade.

What to Do If You Suspect Clipper Irritation

Whenever a dog is suspected to be prone to clipper irritation, clipper sensitivity, or clipper burn, I encourage stylists to be proactive in heading it off. Remember, in many cases, you will NOT know if a pet has been affected by it until AFTER they leave the salon. There are many different things you can do but these are the top four in my book.

  1. Choose a blade length that matches the skin sensitivity level of the pet. Longer blades are best for dogs with a greater chance of sensitivity. Minimize how many times your clippers go over one area on the dog.
  2. Always utilize gentle, soft, and supple clipping techniques in sensitive areas such as the head, between the pads, the groin, or under the tail. Test your technique by running the clipper down your forearm, simulating the same tip and pressure you would apply on the dog when running the clipper. Is your technique comfortable to you?
  3. Apply a non-greasy skin soothing ointment or spray after clipping potentially sensitive areas. There are many available designed for pets. Personally, I recommend Skin Works by Coat Handler.
  4. If you even remotely suspect clipper irritation might be a problem, talk to your client BEFORE they leave the salon. Communicate with them about what to look for, and what they can do about it if it becomes a problem at home.
  5. Send the client home with some of your favorite product. Treatments can be packaged in small self-sealing plastic bags or soak a few cotton balls in a liquid relief product. Once they are premoistened, tuck them into a self-sealing plastic bag. Instruct the client on how to utilize the product if they notice the dog starting to rub or itch the affected area.
If you even remotely suspect clipper irritation might be a problem, talk to your client BEFORE they leave the salon. Communicate with them about what to look for, and what they can do about it if it becomes a problem at home.

When I was working with a new client, my initial blade of choice was always a #10 blade for close clipper work. I feel it is a moderate length blade that is relatively safe. In my new client consultations, I discuss this if we are dealing with any breed requiring close clipping, especially in the head area. Depending on how their pet reacted to this moderate length blade, we could make adjustments in future appointments if they had any issues or concerns.

How do you decide which blade you should use? Always err on the side of caution. I would rather sacrifice a little bit of quality by going with the slightly longer blade then dealing with clipper irritation.

Remember, you can always go shorter down the road as your techniques improve and you learn how to work with different skin types. Your primary concern should always be the safety and health of your pet clients.

Happy trimming,

~Melissa

What do you think?  Jump over to the Learn2GroomDogs.com Facebook page and tell us about it.


4 Ways You Can Make a Better Day

dogIt’s Monday morning.  You walk into your salon with coffee in hand and look at your appointment book.  Hmmm… You’ve overbooked – and by the look of things, you’ve also scheduled too many oversize dogs.  What’s this?  Uh oh.  THAT customer is coming in today.  The one you can never seem to please.  And your first dog always decorates your table with unpleasant treats throughout the entire groom.

We’ve all had days like this. It’s all part of being a professional pet groomer.

I still remember the day I had 16 dogs on my schedule. When I first looked at my workload, I was totally overwhelmed.

But then I really looked at it…

…and chose positivity over panic.

I changed my thought process and my attitude.  I couldn’t change my schedule, but I could change my outlook.  I couldn’t change the fact that there was a lot of work ahead of me, but if I looked for the positives, I would see how much I stood to gain.

By the end of the day, a lot of dogs were going to look and feel a lot better.  And since I had been a commission-based stylist, I was going to have a lot of money in my pocket – not including the tips that were sure to come! This was going to be a good day!

Have you ever stopped and thought about how a day is going to unfold?  Has it ever dawned on you that you are ultimately in control of the day?  You are.

brooke

Ultimately, we choose our thoughts.  We can also control what we choose to believe.

ford

So how do you turn your thoughts and beliefs into affirmative actions?  Is the glass half-full or half-empty?  It’s both – and how you choose to interpret how you feel about that fact is what forms your outlook.

Here are 4 ways to mentally take charge of your grooming day that will boost both your outlook and your productivity.

Planning

anchors-aweighUltimately, you oversee your time and choose how to manage it.  To get the most out of your day it makes sense to plan it as efficiently as possible.

When I had a lot of dogs to get through, I chose an assembly line grooming technique.  This works whenever you have two or more pets to work on.  If you are mobile and the family has multiple pets, take them all at once to your mobile unit.

This is the order that has always worked efficiently for me.  I started with bathing the largest and furriest dog, working down the line to the smallest, lightest coated pet.  Once all my pets were bathed, I started the active drying process.  To determine which dog to start with, I simply reversed the order.  I started with the smallest, lightest coated pet working up to the furriest.  Once everybody was bathed and dried, I started the finish process.  Typically, I started with whatever was the fastest and easiest to move through the rotation.

Always look at your whole day, first.  Take a little bit of time to plan and organize it based on what has been scheduled.  No matter how chaotic it looks, if you believe you can get through it – you will.  That’s half the battle!

Focus

All of us are given 168 hours per week.  For those of us that work full time, about one quarter of it will be spent at work.  That’s not a bad trade if you are passionate about your job.  Plus, it offers the opportunity to earn a living by doing what you enjoy.

Yet, no matter how passionate you are about grooming – it can become unsatisfying or even stressful if you do not learn how to manage your time and focus.

I know stylists that are extremely happy doing just four dogs a day.  If you are one of those groomers – consider yourself very fortunate.  You have the luxury of time.  There are many professional groomers who rely heavily on grooming to support their families and need to groom more pets to sustain their lifestyle and standard of living.

Most efficient, seasoned pros can do between 6 and 12 dogs a day without sacrificing safety or quality.  If they work with an assistant, their productivity only goes up.

How do they do it?

They are totally focused on the task.  They are not distracted by phone calls, emails, Facebook, or idle chatter with coworkers.  They are 100% focused on the pet.  Most experienced pet stylists can turn a small to medium size pet in 30 to 60 minutes.  That includes everything:  bath, blow dry, nail trim, ear cleaning, and full brush-out/haircut.  Larger or extremely heavy coated dogs may take a bit longer.

If you are struggling to hit the time mark of one hour or less per dog, eliminate distractions.  Start timing yourself on a regular basis.  Break the grooming process apart and set time goals for each step.  Most people will find the bathing and drying process is the major time hog that can be improved upon.

Don’t Be Perfect

Of course, you need to produce quality results to bring clients back.  But does every pet that walks out your door honestly need to be show ring perfect?  Really perfect?  Not a hair out of place?  Probably not.

Focus on the fundamentals.  Keep the pet safe and injury free.  Get them squeaky, squeaky clean.  Remove all mats, tangles, and loose undercoat.  Get them blown out to perfection (this is where you can shine – most pet parents do not own a high velocity blow dryer).  Get smooth clipper work.  Trim those nails and make sure the ears are clean.  And don’t forget – a super cute face.

Do not nit-pick the job to death.  Even in the contest ring, the grooms are not perfect.  Do the best you can and then move to the next pet.

The Word “No”

There is unbelievable power in this word.  It doesn’t have to be negative and shouldn’t feel uncomfortable to say.

All of us are given 24 hours in a day.  It is up to us to decide how we are going to use it.  If you are overloaded or getting close, the most powerful word in your vocabulary is, “No.”

However, before you use it (especially if you’re feeling overwhelmed) analyze your day.

  • What can you do to make the day more manageable?
  • Do the problems stem from your overall attitude?
  • Is it a lack of experience and/or knowledge of skills causing the problem?
  • Are inefficient products or equipment slowing you down?

If you are truly being pushed to the brink and can’t squeeze anything more out of your grooming day, it might be time to embrace the “less is better” concept.

Even though we all get to choose what we say yes to, there are trade-offs for every choice we make.  If our work days are already full and we say yes to one thing – one more dog, one more customer – we must say no to another item on our agenda.

I have two suggestions for this dilemma.

First, if you have too many customers – and you don’t want to hire more help – you need to eliminate a few clients.  One of the easiest, and most rewarding ways to streamline your client base is to raise your grooming prices.  By raising your prices, you will automatically weed out the customers that do not value or can afford your services.  Typically, you can free up your time without sacrificing your earning capacity.

Your second option is to focus on your most valuable clients.  Those regular clients you see every six weeks or less.  Take the time to schedule them in advance.  Taking control of them first makes it much easier to say “no” to customers who don’t use your services as often.  Many highly regarded pet stylists book a year in advance.  They take full control of their schedule and take care of their most valuable customers.

Both scenarios ultimately utilize the word “no.”  No, you will not cut a special deal for certain clients.  And no, you will not take any clients that do not fit your ideal regular client profile unless you honestly have room to work them in.

Always be aware of your attitudes and how they are affecting your actions.  Always learn from your past but then let it go.  Look forward to creating the future you want.

Life is full of variables.  Our perception becomes our reality.  Whatever you choose to believe will either help you move forward or hold you back.

The choice is yours.  Make it a good one.

~Happy trimming,

Melissa


Need a Little Inspirational Boost?

Are you needing a little pick me up this week?  Here are some inspirational quotes to help kick start your day.

62b516ec-bfe9-443d-bf85-9775295544ef 48c36637-1ea1-444c-b90c-9a60165c0ee6 35691dbb-69aa-491b-a043-7faf8ddfef58 c0985ba4-b2cf-4ded-9fc9-f92204d719fc 25655a6d-a9d6-4cc4-8095-a96fb974d20b 574d3ea3-f3de-4749-b148-6f483d8f8101ccd96d25-5fe2-4afd-9b24-35809ff1026474e67831-9fc9-42cc-a2a2-c42d274787fd


Taking a Proactive Approach to Managing Your Time

main-imageAre you managing your time?

No matter how we divide up our week, the hours don’t change. We are all given 168 hours.

How is your going to be spent?

Is your week going to be smooth, controlled, productive, and rewarding? Or is your week going to be chaotic, stressed, and frustrating?The choice is actually yours. The thing about time management that you have to understand  is that ultimately you are in complete control. How you manage your time is YOUR responsibility. Managing that obligation is totally up to you – no one else.

There are always ways to make more money – but you can’t make more time.

Do you feel stressed – or blessed?

stressAll businesses have budgets. They have quotas. There is a balance between the cost of running the business and the amount of money coming in through the doors. There has to be more coming in than going out in order to be successful. The dream of running a thriving small business does not exist if the outflow exceeds the inflow.

There’s a story I read years ago in First Things First by Stephen Covey. It’s a story about fitting the most into each day. I always think about it when my own life has a tendency to spin out of control. (And yes, this blog post is a little bit about self-therapy I desperately need!)

In the story, the time scenario is demonstrated with rocks and a jar. The tale starts with a glass jar and a tray of large rocks. The facilitator asked the audience how many rocks could fill up the jar. They all made guesses and the instructor put in the rocks until the jar appeared full. He then asked the audience if the jar was full. Everybody looked at the rocks in the jar and said yes. Then the instructor pulled out a container of gravel from under the table. He poured the gravel into the glass jar and gave it a shake. The small pebbles filled in the spaces between the larger rocks. He turned to his audience again and asked if the jar was full. The audience realized there was more to this game so they hesitated. The facilitator reached under the table again. This time he pulled out a bag of sand. He sprinkled the sand on top of the rocks and the gravel. He gave the glass jar a bit of a shake. The sand settled in between the cracks. He asked his audience again if the jar was full. This time they said no. And sure enough out from under the table came a pitcher of water. He poured in the water until it reached the top of the jar. Now the jar was full.

So what is the moral of the story? Some people think it’s about being able to fit more into your day if you really work at it. That’s not really the lesson. His point was that if the big rocks don’t get put in first, the rest wouldn’t begin to fit inside the glass container.

Your life is the same. Your work is the same. You need to fill in the big pieces first before the smaller pieces can be added. By being deliberate with your time, you can get more out of your day – out of your week – when you place the pieces in the right order.

So how does the scenario play out in a grooming business? Like many service-based businesses, time is money. How do you make the most of it? Do you struggle to get four or five dogs done each day? Are you frustrated because you can’t get eight dogs done in a day without making yourself miserable?

What are your big rocks and how many of them can you fit? How can you fill up your personal jar the most efficiently?

Everything starts with an appointment book or digital schedule. If time is money, and you can’t create more time, you want to make the most efficient use of the time available.

project-teamThe Team

Look at the players you have on your team. What are their strengths? What are their weaknesses? Do they have specialties? Which team members have high-level skills?It doesn’t matter if you are solo flyer or part of a larger team. Isolate and analyze all the strengths and weaknesses. Successful teams focus on strengths. If you have a stylist who is highly proficient at breed profile trimming and high-level skills, it is a waste of time to have that person doing elementary tasks that could easily be delegated to others.

By the same token, if you are a solo stylist, you can still delegate. Do you really need to wear all the hats? Can you delegate salon cleaning? Hire a receptionist or a bookkeeper? My guess is your strength is grooming. Don’t waste time on other tasks that you can delegate.

If you’re trying to grow your business and your team, think about this. People can only handle larger stones if they increase their knowledge base. Helping your team grow by enhancing imagestheir skills is always a smart move.

The Appointment Book

This is a crucial part of putting in the big rocks. The big rocks would be the full-service grooms. Bichons, Shih Tzus, Schnauzers – pets that require haircuts.

Next in line would be the bath and brush style pets. These will be what I would consider the gravel-sized grooms: Golden Retrievers, Labs, Shelties, etc.

After that you’re looking for the sand. These would be the smaller, very simple dogs to do. They may be smaller weekly or biweekly bath and brush dogs or simply short-coated small dogs. Many stylists affectionately refer to them as “Splash and Dashes.”

acco_aag_planner_monthlydaily_lg_optThe water would be the quick things that you could do to increase your revenue. These would be add-on services like:

  • Walk in nail trims
  • Teeth brushing
  • Nail filing
  • Coat and skin conditioning treatments

There is a long list of extra services that could be your water.

Start by figuring out how many of the larger rocks (the full-service grooms) need to go under each stylist per day. Once that is been established, then schedule with less taxing jobs such as the bath and brush dogs. These dogs will be the gravel, filling in between the full-service grooms. Many people color code these types of jobs in the appointment book to give a strong visual of how the day is shaping up. Once the rock and gravel is scheduled, then you can fill in the gaps with the sand – those appointments that are super simple to do. And then to really fill up the day, add in the water – the add-on services.

Grouping Tasks Together

screen-shot-2015-09-15-at-9-20-12-amTo use your time efficiently, group similar tasks together whenever possible. Batching tasks together will always enhance your productivity. Think about it like an assembly line. Even if you just have a couple dogs scheduled at one time, try to work them in an assembly line fashion.

Have the clients drop all the dogs off at approximately the same time. Prep them all at the same time. Get them all into the tub at about the same time. Condense all the drying into a single span of time. Finish them one right after the other. Finally, release them all at the same time.

Why does this work? It minimizes the number of distractions with clients coming and going. It allows you to be much more focused and efficient with your time at the grooming table.

Slow Down

Sometimes the best way to increase your time is to actually slow down. Be deliberate, and methodical. Plan out what you are going to do. Stop and think. Breathe.

Use your appointment book. Create systems you can follow consistently. Ultimately those systems will be your shortcuts to efficiency – and your sanity.

stock-girl-peace-serene-calm-recovery-happy-6y3wAll of us are only given 168 hours a week. The choice is yours how you are going to use it and live your life at work and at home.

Are you going to feel stressed?

Or are you going to feel blessed?

Use your time wisely.

What techniques do you use to be proactive with your schedule? Jump over to the Learn2GroomDogs.com Facebook page and tell us about it!

Happy trimming!

~ Melissa


Can You Teach Yourself to Strip?

finger-pluclkI was at GroomExpo just a few weeks ago and met many wonderful pet professionals. One of them was Connie Carter of Gorgeous Growlers Grooming in Florida. She had attended several of my lectures and at the end of the show she stopped to thank me as we passed in the hall. We chatted a bit and as we parted ways, I reminded her that I was happy to help with any questions that she wanted to email to me. I love complex questions that can lead to blog topic ideas! Well, guess what? Connie didn’t waste any time. Within a week, I got my first question from her – and it’s a good one.

“Can I learn how to hand-strip online? How long does it take to learn how? I have a new client whose Westie puppy is being delivered at the end of October. I do have some experience helping but I’ve never done a full hand stripping job of my own.”

The short answer to your question is: “Yes.” You can teach yourself to hand-strip if you have the right information. The trick is getting the right information at the right time – AND you need to have the right dog with the right coat to practice on!

connieLuckily, hand-stripping is pretty forgiving. Granted, some breeds are easier to learn on than others.

There are two types of coats that need routine stripping to maintain the correct texture and color:

1. Sporting Dogs (also known as Gun Dogs)
2. Harsh-coated pets (primarily in the Terrier and Working groups)

I still remember the coat of my first hand-stripped show West Highland White Terrier. It felt like a suit of armor. The dogs’ jacket was so hard, nothing was going to penetrate that coat. At that point in my career, I had only clipped Westies. They were smooth, soft, and cuddly. I had no idea what hand-stripping was – let alone that hand-stripping was the correct way to prepare the coat.

I rank the difficulty of hand-stripping on a scale from 1 to 3. The coat is factored in, as well as the temperament of the pet.

(Because Connie based her question on a West Highland White Terrier, I will focus more on the harsh-coated coat types. I would say Westies fall between a 2 and a 3 on the following difficulty scale.)

RATING SCALE

ONE

Super simple. The hair pulls out with very little effort.

TWO 

Requires a bit more thought and effort. The hair needs to be worked a little bit more. You will need a wider variety of stripping tools to get the job done. You also need to think about the new layer of coat coming in. This fresh layer of harsh coat will need to be constantly rotated. The rotation normally takes place at consistent intervals so the dog is never stripped down naked.

THREE 

In a word – challenging. Different parts of the coat on the dog’s body grow at different rates. Hand stripping them in the right sequence is critical for correct coat regrowth. Some sections are easy to pull down, while others are very difficult. Getting the dog to look conformation show ready is an art. It requires education, knowledge, training, skill, and practice. Lots and lots of practice.

Many accomplished stylists do a combination of half stripping, half clipping on their pet clients. This technique mimics the look and texture of a properly pulled coat. It’s typically much quicker to do. It’s easier on the pet – and kinder to the client’s pocketbook. It will also leave a bit a coat on the dog, making it more attractive to a pet owner.

When you are first starting to learn the technique of hand-stripping, it is advantageous to start with what I would consider a #1 rated dog. Start with something very easy. Preferably, the coat is blown and literally falling out. This type of coat requires very few tools to pull it out – maybe just your fingers. Which breeds with these be? Here are a few:

  • Many of the Russell-type breeds
  • Some Cairn Terriers
  • Border Terriers
  • Some Irish Terriers
  • PBGVs
  • Irish Wolfhounds
  • Otter Hounds
  • Podengos
  • Scottish Deerhounds
  • German Wirehaired Pointers
  • Wirehaired Vizslas
  • Spinone Italianos
  • many mixed breeds including wire coated Doodles

stripAs you increase your skill level, you’ll be ready to tackle more challenging coats. I would consider these dogs a #2 in their level of difficulty. Keep in mind many dogs could waver between levels.

  • Wire coated Dachshunds
  • Australian Terriers
  • Dandie Dinmont Terriers
  • Glenn of Imaals
  • Norfolk Terriers
  • Norwich Terriers
  • Brussels Griffons
  • Bouvier des Flandres’

Once you have mastered the skills required to hand-strip #1 and #2 rated coat types, then you’re ready to start working on the most challenging group. Remember to keep in mind that this also depends on the dog.

  • all of the Schnauzers
  • Airedales
  • Lakeland Terriers
  • Scottish Terriers
  • Welsh Terriers
  • Westies
  • Wire Fox Terriers
  • Affenpinschers

All of the harsh-coated breeds will vary slightly with their degree of difficulty. A number of factors affect where they ultimately fall in this rating system. Genetics need to be considered. Hormones, as well as whether the dog is  altered or intact will affect a coat. The length of time between grooming sessions will dictate how readily their coats pull. The climate and the season will also play a role in how easily the coat is removed.

Where do you turn when you want to learn the technique of hand-stripping? You have options – and many of them can be self-directed.

Observation

Start with observing high-quality dogs. Seeing a dog in the flesh is the best way. Go to dog shows. Study the dogs in the grooming area as well as in the ring. Look at magazines featuring top winning dogs. Do an online search for images of AKC or UKC Champions. Go to top breeder websites. Watch dog shows online or on TV.

You need to firmly etch a mental picture of what a high-quality hand-stripped dog should look like. It is also important to actually touch the coat to get an idea of what it feels like. Achieving any type of quality without this knowledge will be impossible.

bookBooks

Breed specific books will give you details. There is one particular booklet I really like. It does an excellent job of explaining the techniques of hand-stripping. It’s older and though it may not be very sophisticated, the material is timeless This book caters to what I would consider the more challenging breeds: broken-coated Terriers that have their coats “staged” for proper regrowth. However, the techniques outlined can be applied to many of the easier breeds as well.  Click here to see more details about this book.

Videos

Most professional pet groomers are visual learners. Videos are a great way to go – as long as the content is accurate.

In this day and age, you have to be very careful. Trust me, I just did some quick research to see what was currently available on YouTube concerning hand-stripping. There certainly was a wealth of information but much of it was scary. Sure, there is a few nuggets of excellent content but you have to know what you’re looking for and have enough knowledge to know whether you’re looking at quality techniques or not. You’re better off looking for top stylists that are producing videos on the topic. You can find them both in DVDs as well as online streaming. In the Learn2GroomDogs.com library there is a wide assortment of streaming video lessons. Here’s a hint. If you search the site using the word “strip” in the search bar, you will pull up ALL the hand-stripping lessons. From there, you can isolate what appeals to you.

All of the training partners do a great job. Jennifer Hecker does an excellent job explaining the basics of dealing with a harsh-coated Terrier. Lisa Leady, Suesan Watson, and Amy Triezenberg all focus on beginner and intermediate hand-stripping. Most of their lessons deal with typical pet dogs we see in our grooming salons. Michelle Evans focuses on more advanced techniques, as well as how to apply different stripping techniques. There are many other training partners sprinkled through the hand-stripping section who also have exceptional lessons.

When you are looking for DVDs or videos to watch, make sure you verify the qualifications of the demonstrator. There are many high-quality lessons available but others can be a waste of time.

Clinics and Seminars

One of the best ways to learn hand-stripping techniques is to attend a clinic or seminar. Advanced hand-stripping is definitely an art. It takes plenty of knowledge and practice. Learning from a master is a huge shortcut when it comes to becoming proficient. How do you find out about clinics and seminars? Many certification organizations host workshops. Make sure you are on their mailing lists. Join a couple professional groups on Facebook such as Pro Groomer Network. Your state may have an organized groomers Facebook page. Grooming schools in your area may also host events.

Mentor

Finding a mentor for a particular technique or breed will certainly fast track you to your goals. The mentor may come from the conformation show ring, the competitive pet styling arena, or they may have years of experience grooming pets. As your skills grow, your mentors might grow and change. And if you can’t find a mentor, find a study partner who is looking to expand their skills. Somebody that you can work with you as a team to find the best information. Meet up after hours to work on your skills together with practice pets.

Whatever route you choose, you certainly can teach yourself. Finding help in the form of books, videos, seminars, clinics, or an actual mentor will certainly help. The more you are able to combine those learning resources, the shorter your learning curve.

The art of hand-stripping is becoming more widely accepted in the pet grooming arena. When a new harsh-coated Terrier walks through your door, think twice about clipping the coat off. Is that really the best option? Clipper cutting a harsh-coated Terrier typically destroys the correct texture. Many clients opt for that route simply to reduce cost and time factors associated with hand stripping. For those clients that have educated themselves about their breeds, hand stripping may be their preference – as long as they can find a professional pet stylist that can execute the technique correctly.

Are you that person?

Do you do any hand-stripping?  Why or why not? Jump over to the Learn2GroomDogs Facebook page and tell us about it!

Happy trimming!

~ Melissa


Making the Most of a Seminar

seminarWhen you attend trade shows and clinics, preparing in advance can help you make the most of this experience.  Seminars are a great way to improve your skills and recharge your batteries.  Meeting your mentors and soaking up their knowledge is a fantastic opportunity, and if you can see and hear them in action, it maximizes the experience.  When you know what you need and what you hope to get out of the session, you can better prepare yourself to squeeze out as much as you can from your time together.

1.  Step into the session with a very open mind.

If you are young and fresh to the industry, the amount of information that you get can be intimidating.  Listen, take notes, and soak up every bit of knowledge that you can.  Sometimes that may mean suspending what you know in order to make room for something new.  Trying new techniques or ideas can be uncomfortable just because you’ve never tried it before.  Keeping an open mind enables you to break from your routine to get different results.  With time and practice, the awkwardness goes away and you become more efficient.  Remember: having more tools, techniques, and knowledge allows you to have multiple approaches to a problem.

2.  Make efficient use of the time available.

Many trainers at these sessions have limited time.  They are often rushing from one obligation to another – judging competitions, speaking in seminars, or providing hands-on clinics.  If they can, many will take the time to answer your questions.  If you know what you need to ask, it helps you make the best use of the brief time you may have together.  Be prepared – write down your questions in advance so you don’t forget something important or stumble over your words.  Being ready to participate in the learning experience helps you make the best use of the session – and the presenter will respect you for it.

3.  Don’t be nervous – plan ahead.

With so much to see and do at trade shows, it’s easy to feel overwhelmed.  Break out the catalog and study the floor plan before you arrive.  Map out your plan of attack to make sure you get to everything you need to see.  Some shows have free apps you can download to help make the most out of your experience.  Know the schedule of events so you don’t miss that speaker you’ve been hoping to see.  Sometimes it’s good to go to shows like this with a friend – divide and conquer, then compare notes later.

As your knowledge and skills advance, the clinics won’t be as daunting. They will become a great way for you to fine-tune your skills.  You can begin to network and exchange thoughts with others in the industry who can provide insight when you need it.  Plus, these types of functions are a great way to invigorate your career.

These principles remain valid for many forms of advanced learning in the pet grooming industry. Maybe you don’t have the opportunity to do a hands-on training session. There is a wealth of information to learn from these all-star pet stylists. You might be in the audience at a trade show, pet grooming competition or watching a grooming video lesson featuring one of these top stylists. The better you can execute the core skills with your everyday grooming, the easier it will be to successfully transfer their lessons to your own grooming table.

If you are not as accomplished as these award-winning and highly successful pet groomers are – take note. You can learn a lot from their well-developed skills. Learning new skills, tips, and tricks make grooming pets all that more fun!

What do you attend at trade shows? What do you look forward to shopping for when you go to Hershey? Jump over to the Learn2GroomDogs Facebook page and tell us about it!

Happy trimming!

~ Melissa

2016-09-21_1422


Thinning Shears are the Pet Stylist’s Eraser

Are you thinking about upgrading any of your pet grooming tools? For many dog groomers, The Groom Expo in Hershey, PA that is coming up later this month is a perfect time to see and test new items for your tool kit. If you are saving your tip money to buy new thinning shears, this blog is for you!

pencilThinning shears (or blending shears) are the best-kept secrets in the grooming world. Used properly, they can make mistakes much less noticeable. For a new stylist, this is one of the first shears I always recommend upgrading in your toolbox.

It doesn’t matter how long you’ve been grooming or how talented you are as a pet stylist – sometimes you just need a little help. An “oops” can occur at any time. Mistakes happen.

Maybe there is a spot on the coat that you just can’t get smooth. Maybe there is tracking in the coat from the clippers or guard comb. You may have left scissor marks in the coat – or a hole in the coat you accidentally made with clippers or scissors. You might even be working with a dog that will not hold still long enough to work safely with clippers or scissors – leaving the coat rough and jagged.

Thinning shears can be your savior. They erase rough spots. They blend out jagged edges. They smooth out transition areas. They fix mistakes.

The difference between a good stylist and a great stylist can be determined by how much value they place on their blending shears.

ToolboxStylists that understand the value of this type of shear will invest in multiple pairs. Just like straight edge shears, there are wide varieties from which to choose. Some are for more general use while others have more specific usage. The key is to know how you want to use the shear. Do you need it for light wispy coats? Drop coats? Terrier styling? Working around the head or eye area or dealing with large surface areas? There is a blender to fit every single one of these needs.

I always suggest you personally try out thinning shears before you purchase them. Just like Colin Taylor says, shears are like shoes. You need to find the ones that fit you! They have to fit properly as well as cut smoothly and run effortlessly in your hands.

So how do you narrow down your choices? Ask. Find out what other groomers and stylists are using. Determine which thinning shears they rely on every day in their salons. Believe me, they have opinions! There are lots of fabulous thinning shears out there – but there’s also a lot of junk.

Most high quality blending shears will have an average cost of $150 – $350. Of course, you can spend more if you like. Your equipment is an investment in your career. You may not need the Rolls-Royce when you first start out – but you do need something that is reliable and dependable. Luckily, there are many styles and varieties from which to choose.

royale-double-teeth-thinning-shear-bladesThe difference between a good stylist and a great stylist is that they know how to fix mistakes. Every one of us makes them. Having a nice collection of thinning and blending shears will be the erasers you need when that “oops!” happens.

What are your favorite shears? What do you look forward to shopping for when you go to Hershey? Jump over to the Learn2GroomDogs Facebook page and tell us about it!

Happy trimming!

~ Melissa


How to be an Indispensable Groomer’s Assistant

Wallpapersxl Dog The Wet Hq For 695583 1366x768It always shocks me when a competitor or a workshop participant presents me with a DIRTY DOG for evaluation. A dirty dog?! No joke – it happens all the time.

Nails are not trimmed correctly.Coats are not dried properly or completely.

…or worse yet, there are still mats and tangles left in the coat.

It’s not good grooming but I see all the time. Not only in the ring or at hands-on events, but in salons, too.

To me, bathing and drying are the most critical parts of any groom. One bather can make or break your entire grooming department.

Here are 7 skills I look for in an indispensable groomers’ assistant (AKA the bather!) All 7 of these skills must be MASTERED if you want to be highly valued in your grooming salon, if you want to move ahead in your career, or before you can gather loads of glowing clients.

1Be able to identify popular breeds

Anybody working professionally with pets needs to be able to identify the top 15 or 20 breeds that regularly come into your salon. It’s the fastest way for groomers to be able to communicate to one another.

2Be able to handle pets safely and compassionately

How many times have you heard others (or maybe even yourself) say, “This dog is driving me nuts!” Impatient treatment of a pet is never acceptable. If you lose control, you can bet that you won’t have clients for long. Being able to understand canine body language is job requirement #1. If you are going to win the pet’s trust and cooperation, you must be able to speak its language. It will keep you and the pet safe. It will also make the entire experience much more enjoyable for all parties.

3Understand the many different coat types found on individual pets

Each coat type has special needs that need to be addressed in the bathing and drying process to get the best results. A Beagle has different bathing and drying needs than a Standard Poodle. The same holds true with a coat on a Golden Retriever or an Airedale Terrier. A talented bather will instantly be able to identify dogs that possess simple coats or dogs that are going to be time-consuming and a challenge.

4Bathe the dogs until their coats squeak

If they don’t squeak, they are not clean.

Period.

This is the foundation of every fabulous grooming job. I cannot stress its importance enough. There are many products on the market to help achieve superior results in only one or two baths. Even if you use the best shampoos on the market, the dog will not get squeaky clean unless they are rinsed thoroughly. Rinse until the water runs clear and you hear the “squeak” when you push the water through the coat. And not just the easy to see or reach parts. Get soap and water to the undercarriage, under the ears, and the special parts. If the whole dog isn’t clean – it’s still dirty. Nothing wastes time or money more than having to re-bathe a dog because you didn’t do the job right the first time. There’s an old saying: if you don’t have time to do it right, when will you have time to do it over? Get it right the first time.

5Dry the coat to perfection

Most of the time, this will mean utilizing a form of active drying. There are several drying methods and combinations to choose from, based on the coat type, trim, and the pets’ tolerance. Incorrect techniques or careless attention to drying will waste more time than almost anything else in the grooming process. In most cases, high velocity and stretch (or fluff) drying techniques will need to be used to get superior results. Oh, and the pet needs to be bone dry too!

6Learn efficient and SAFE brushing techniques

Systematic brushing is the only way to effectively work through a coat and get right down to the skin. Selecting the correct tool for the coat type will be important. Knowing how to hold the tool along and how much pressure to exert is also important. Not enough pressure and you will not be efficient. Too much pressure and you’re going to make the pet uncomfortable and could cause injury. The key is to work methodically and gently over the entire dog – right down to the skin until a wide tooth comb can easily be pulled through the fur.

7Nails, ears, and glands

Trimming nails and cleaning ears is just an automatic process when it comes to grooming pets. If it is not done – or not done well – it’s considered sloppy. Clients don’t want to spend their hard-earned money on sloppy work. Stylists executing haircuts should not have to go back and double-check this type of preliminary pre-work. Some salons routinely check and/or express anal glands. Whatever your salon option is, you should follow their guidelines.

Being a bather – or being a groomers’ assistant – can be extremely rewarding. However, it does carry a lot of responsibility. Many of these skills are considered the foundation of all grooming.

Remember: every owner faces a choice when it comes to grooming. They can come to you, do the job themselves, not have the pet groomed all… or go down the road to someone else. Make sure they make the right choice by sticking with you.

What do you look for in a great groomer assistant? Jump over to the Learn2GroomDogs Facebook page and tell us about it!

Happy Trimming!

~ Melissa


Production Bathing & Drying

production-blogPet bathing and drying seems to be a huge time challenge for many professionals. Many of you are all overflowing with pets to bathe during the summer season. I thought this would be a great time to review my time-tested “game.” I loved to play this game whether it was with 8 or 80 dogs a day! I’ve done it both ways and every number in-between over the years.

If you are one of those high volume shops doing 40 – 70 or more pets per day…  that’s a lot of toenail trimming no matter how you look at it!! How can you get more done in less time while not letting the quality of the work suffer? Here’s my method –  it’s a fast paced game with lots of variables to mix it up every day. After all, whoever thought pet grooming was going to be a boring job?

It’s not a mystery but it is like cooking a meal. The larger and more extravagant the meal (with multiple dishes being served), the more complicated the timing and the choices get to be. With a few dogs, it’s pretty simple – the choices are limited. Add more dogs and the variables increase.  Move to a full-blown shop pushing through 50+ dogs and you have something like a full force, successful restaurant that is managed by an experienced head chef.  OK, so how do you manage your bathing and drying roster so all the pets are done to the highest degree of quality and proficiency, just like getting multiple dishes to the table all done to perfection and hot?

The Three Basic Rules & Guidelines to Follow

1Review all the dogs on your roster for that day or session. This game works best when you have multiple pets arriving at one time so you can stagger them according to coat type, size, and degree of difficulty.

2Do your largest and furriest dog first. Something that can be bathed and then lightly high velocity dried to lift and separate the fur. By spending a few minutes with the high velocity dryer on each pet, it allows a clear view of any special needs of that animal while enhancing airflow to the coat once it is placed in an inactive drying situation. Bathe and set up the coat on all the bath and brush pets first, starting with the largest and most time-consuming dogs, working down the line of difficulty to the least difficult of the bath and brush pets. Once all the bath and brush pets are bathed, then proceed with dogs that need active drying to yield the best results

3Your goal on all trim dogs is not only to get the pet clean, but the coat needs to be tangle free and as straight as possible for the finished trim. After all the B&B pets are bathed, start washing your trim dogs. Start with the pet that has the heaviest and straightest coat – something that can sit for a few minutes while you bathe your other haircut pets without risking the coat drying before you get to an active drying method. Let the pet sit in a warm place wrapped in a towel. Proceed washing the next pet based on size, coat density and curl factor – less curl hits the tub before a curly coat – curly coats such as Bichons or Poodles go to the tub last. Once all the trim pets are bathed, start drying. The first pet up on the drying table should be the one that has the curliest, but lightest coat since that coat type will dry the quickest. If the coat dries before an active form of drying can take place while the coat is still damp, it will be impossible to remove the curl unless you re-wet the pet. Once the curliest coats have been fluffed dried so they are absolutely straight, move to the next kinkiest or wavy coat type – also weigh in the coat density factor. A lighter or shorter coat will need to go before a heavier or longer coats. A typical example would be that you have two dogs of equal size and similar haircuts like a 1 guard on the body and a fuller leg style. One dog is a Lhasa and the other is a Maltese/Shih Tzu mix. Normally the Maltese cross would have a lighter density of coat than the Lhasa, thus the Maltese mix gets dried before the Lhasa. Continue this process moving from the curliest coats down the line. The key is to get to a coat before it is dry so the heat of the dryer can straighten the fur out. Remember, the goal is always to have a straight, fluffy, mat free coat to finish. Curls and kinks in the fur make it impossible to execute a trim that is smooth and sleek. If a coat gets too dry, it must be re-wetted and the drying process started over.

????????There are many variations to how this game gets played out to be effective. It is what makes a day interesting to a professional pet stylist. The better you get at this game, the faster you will be able to get through multiple pets without sacrificing quality. Think about what we do in the terms of food. An average home cook should be able to get 2-3 dishes on the table at the same time. A first-class home cook should be able to handle a meal with 4-5 dishes and at least 6 people. Seasoned home entertainers can handle an elaborate holiday meal for 20 with ease. A professional chef will master an entire shift serving over a 100 meals and all their side dishes with it all arriving to the table hot and beautifully prepared.

How far can you push yourself – before you get lost in the order of bathing pets? Test yourself and see how you do. It’s a fun game that can be challenging yet really invigorating. The more dogs, the more fun, and reward when it goes smoothly!

What are your best methods? Jump over to the Learn2GroomDogs Facebook page and tell us about it!

Happy Trimming!

~ Melissa


Count Me In!

Sign up to get notified when we host FREE Facebook Live Events!

Thanks! We'll remind you to join our next Facebook Live event!

Count Me In!

Sign up to get a reminder when your Members' Only Facebook Live Q&A is about to start!

Thanks! We'll remind you to join our next Facebook Live event!

Count Me In!

Join us for our FREE Webinar and get tips, tricks, and the secrets to success from our team of top dog-grooming Experts. We'll send you a reminder email the day of the Webinar.

Thanks! We'll remind you to join our next Facebook Live event!

Count Me In!

Join us for our FREE LIVECAST and get inspired by our team of dog-grooming Experts. Learn the tips and tricks other members have used to fuel their success through Learn2GroomDogs.com. We'll send you a reminder an hour before the LIVECAST begins.

Thanks! We'll remind you to join our next Facebook Live event!

Count Me In!

From the atmosphere and lay out of your salon, marketing to attract and keep clients, to how many dogs you are going to do that day, Melissa and Joe will help you map out a plan for Success!

Thanks! You will be sent reminder emails and a special link to join the webinar!