
Illustration 1
These tools can be confusing. When you read their descriptions in catalogs, they’re so similar…
They do the same thing, don’t they?
No, they don’t. Let me explain.
Both remove undercoat on thick coated dogs. It’s the METHOD of removal that varies. One pulls out dead and shedding coat without cutting the fur. The other has sharp, curved teeth which remove the undercoat but will also cut the coat. One is used primarily on dry coats, both before and after the bath. The other is effective prior to shampooing, during the bathing process, and after the dog is clean and dried.
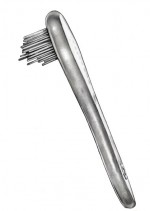
Illustration 2
The difference isn’t so much in the names. The names are interchanged all the time. To keep them straight in my own mind, I call them different things. It’s particularly beneficial when giving directions to others to utilize different names.
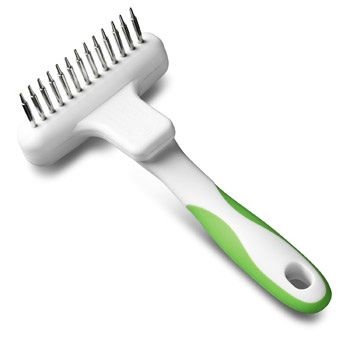
Rakes
Rakes are designed to pull out dead coat and shedding fur with ease. Typically they are a T-shape (see Illustration 1) with rounded pins on the head of the T. On some heads, the top bar is long, up to 6 inches across. On other designs, the head may be only a couple of inches wide. The length and shape of the teeth will vary, too. On some rakes (see Illustration 2), the teeth are short and shaped almost in a tiny cone-type fashion. With others, the teeth are long, sinking deeply into heavy, long coats. On almost all models, the handle comes directly out from the cross bar head with all the teeth.
This type of rake is designed to remove dead coat while not damaging the healthy coat. You work the tool in the natural direction of the coat growth. Care must be used not to sink the comb too far into a dense coat repeatedly with too much pressure. Tugging too firmly on a thick or tangled coat will be uncomfortable for the dog and difficult for the groomer. Repeatedly digging in too deeply could injure the skin, as well.
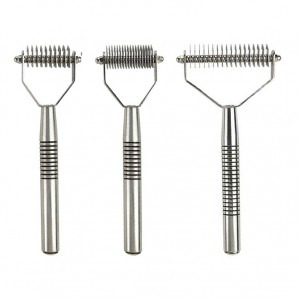
Illustration 3
Used correctly, rakes can be highly efficient for removing dead coat or “lint” from rustic-coated breeds. They are used primarily on double-coated, heavy-coated, or rustic-coated dogs.
Undercoat Rakes
Undercoat rakes have many small, sharp, curved blades set close together that remove undercoat. They are available in a variety of tooth widths, making this tool suitable for a wide range of breeds. On shedding breeds, they can remove dead, fuzzy undercoat in minutes, yet leave the top coat shiny and healthy. On harsh-coated dogs, they mimic the hand-stripped look quickly and easily.
Undercoat rakes can be used on a wet or a dry coat. Pull the rake in the direction of the coat growth.Always start with a wider toothed rake to start (see Illustration 3). Work down to narrower teeth as the tool pulls through easily, removing less and less coat.
Undercoat rakes normally work better when used prior to bathing or in the tub on a wet coat.
Use caution when working with this tool. On some coat types, especially heavy-coated dogs, they will cut the top coat while removing the undercoat. While the blades are curved (see Illustration 4), you still need to be careful how much pressure you put on the tool as you drag it through the coat so you do not injure the skin. Use caution when working around areas where the skin is thin like in the hock area, ear junctions, flank, and armpits.
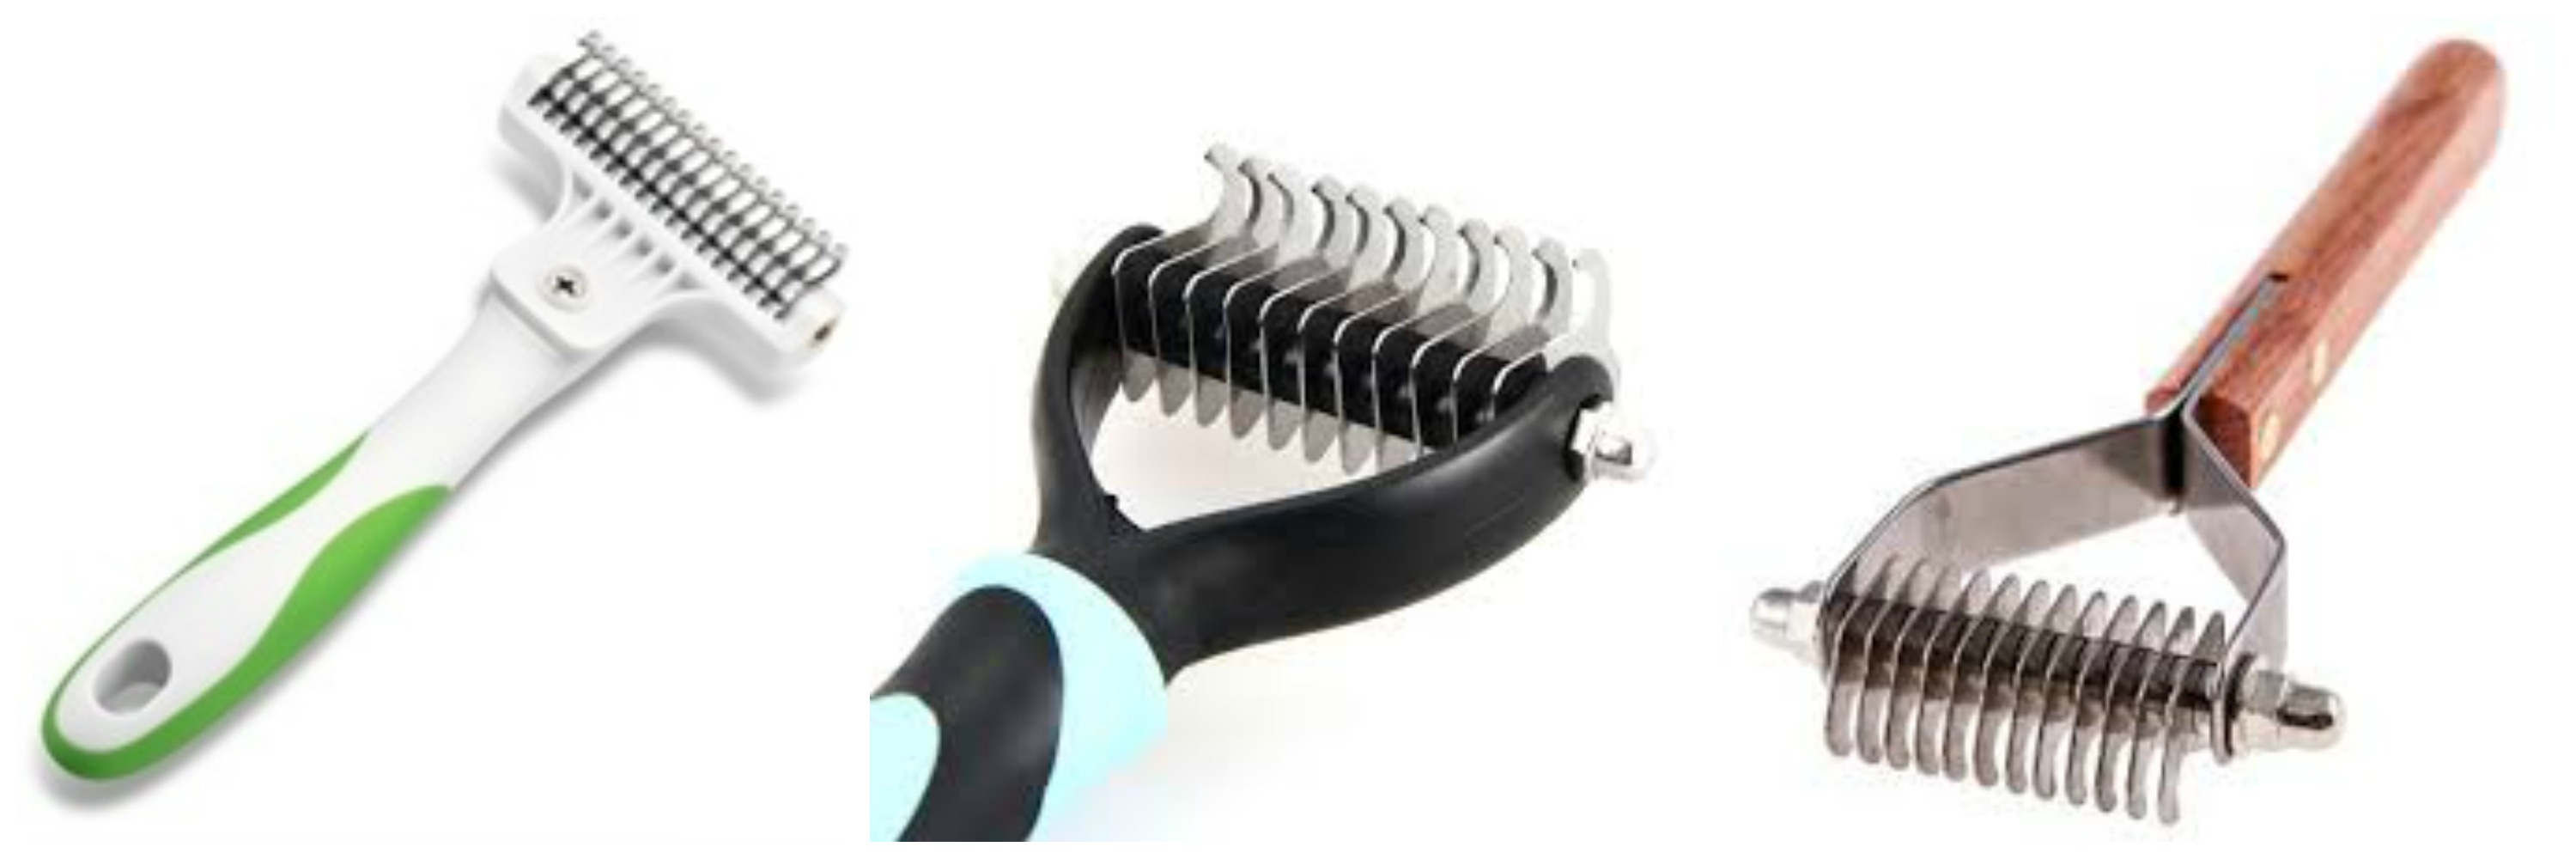
Illustration 4
Undercoat rakes work well on many coat types including double coated breeds, heavy coats, and rustic coat types. The work exceptionally well on any breed that is hand-stripped like many of the Sporting or Terrier breeds. Just be sure to monitor your progress as you work this tool over the dog.
Here is a cool trick I have seen used with undercoat rakes. This trick minimizes cutting the coat while pulling out dead coat, particularly once the coat is clean and dry. Simply take a thick rubber band and wrap it around the hooks of the blade (see Illustration 5). The rubber protects the coat from excessive cutting while the rubber helps grip the dead coat, allowing to be pulled out almost effortlessly.
Happy trimming,
-Melissa
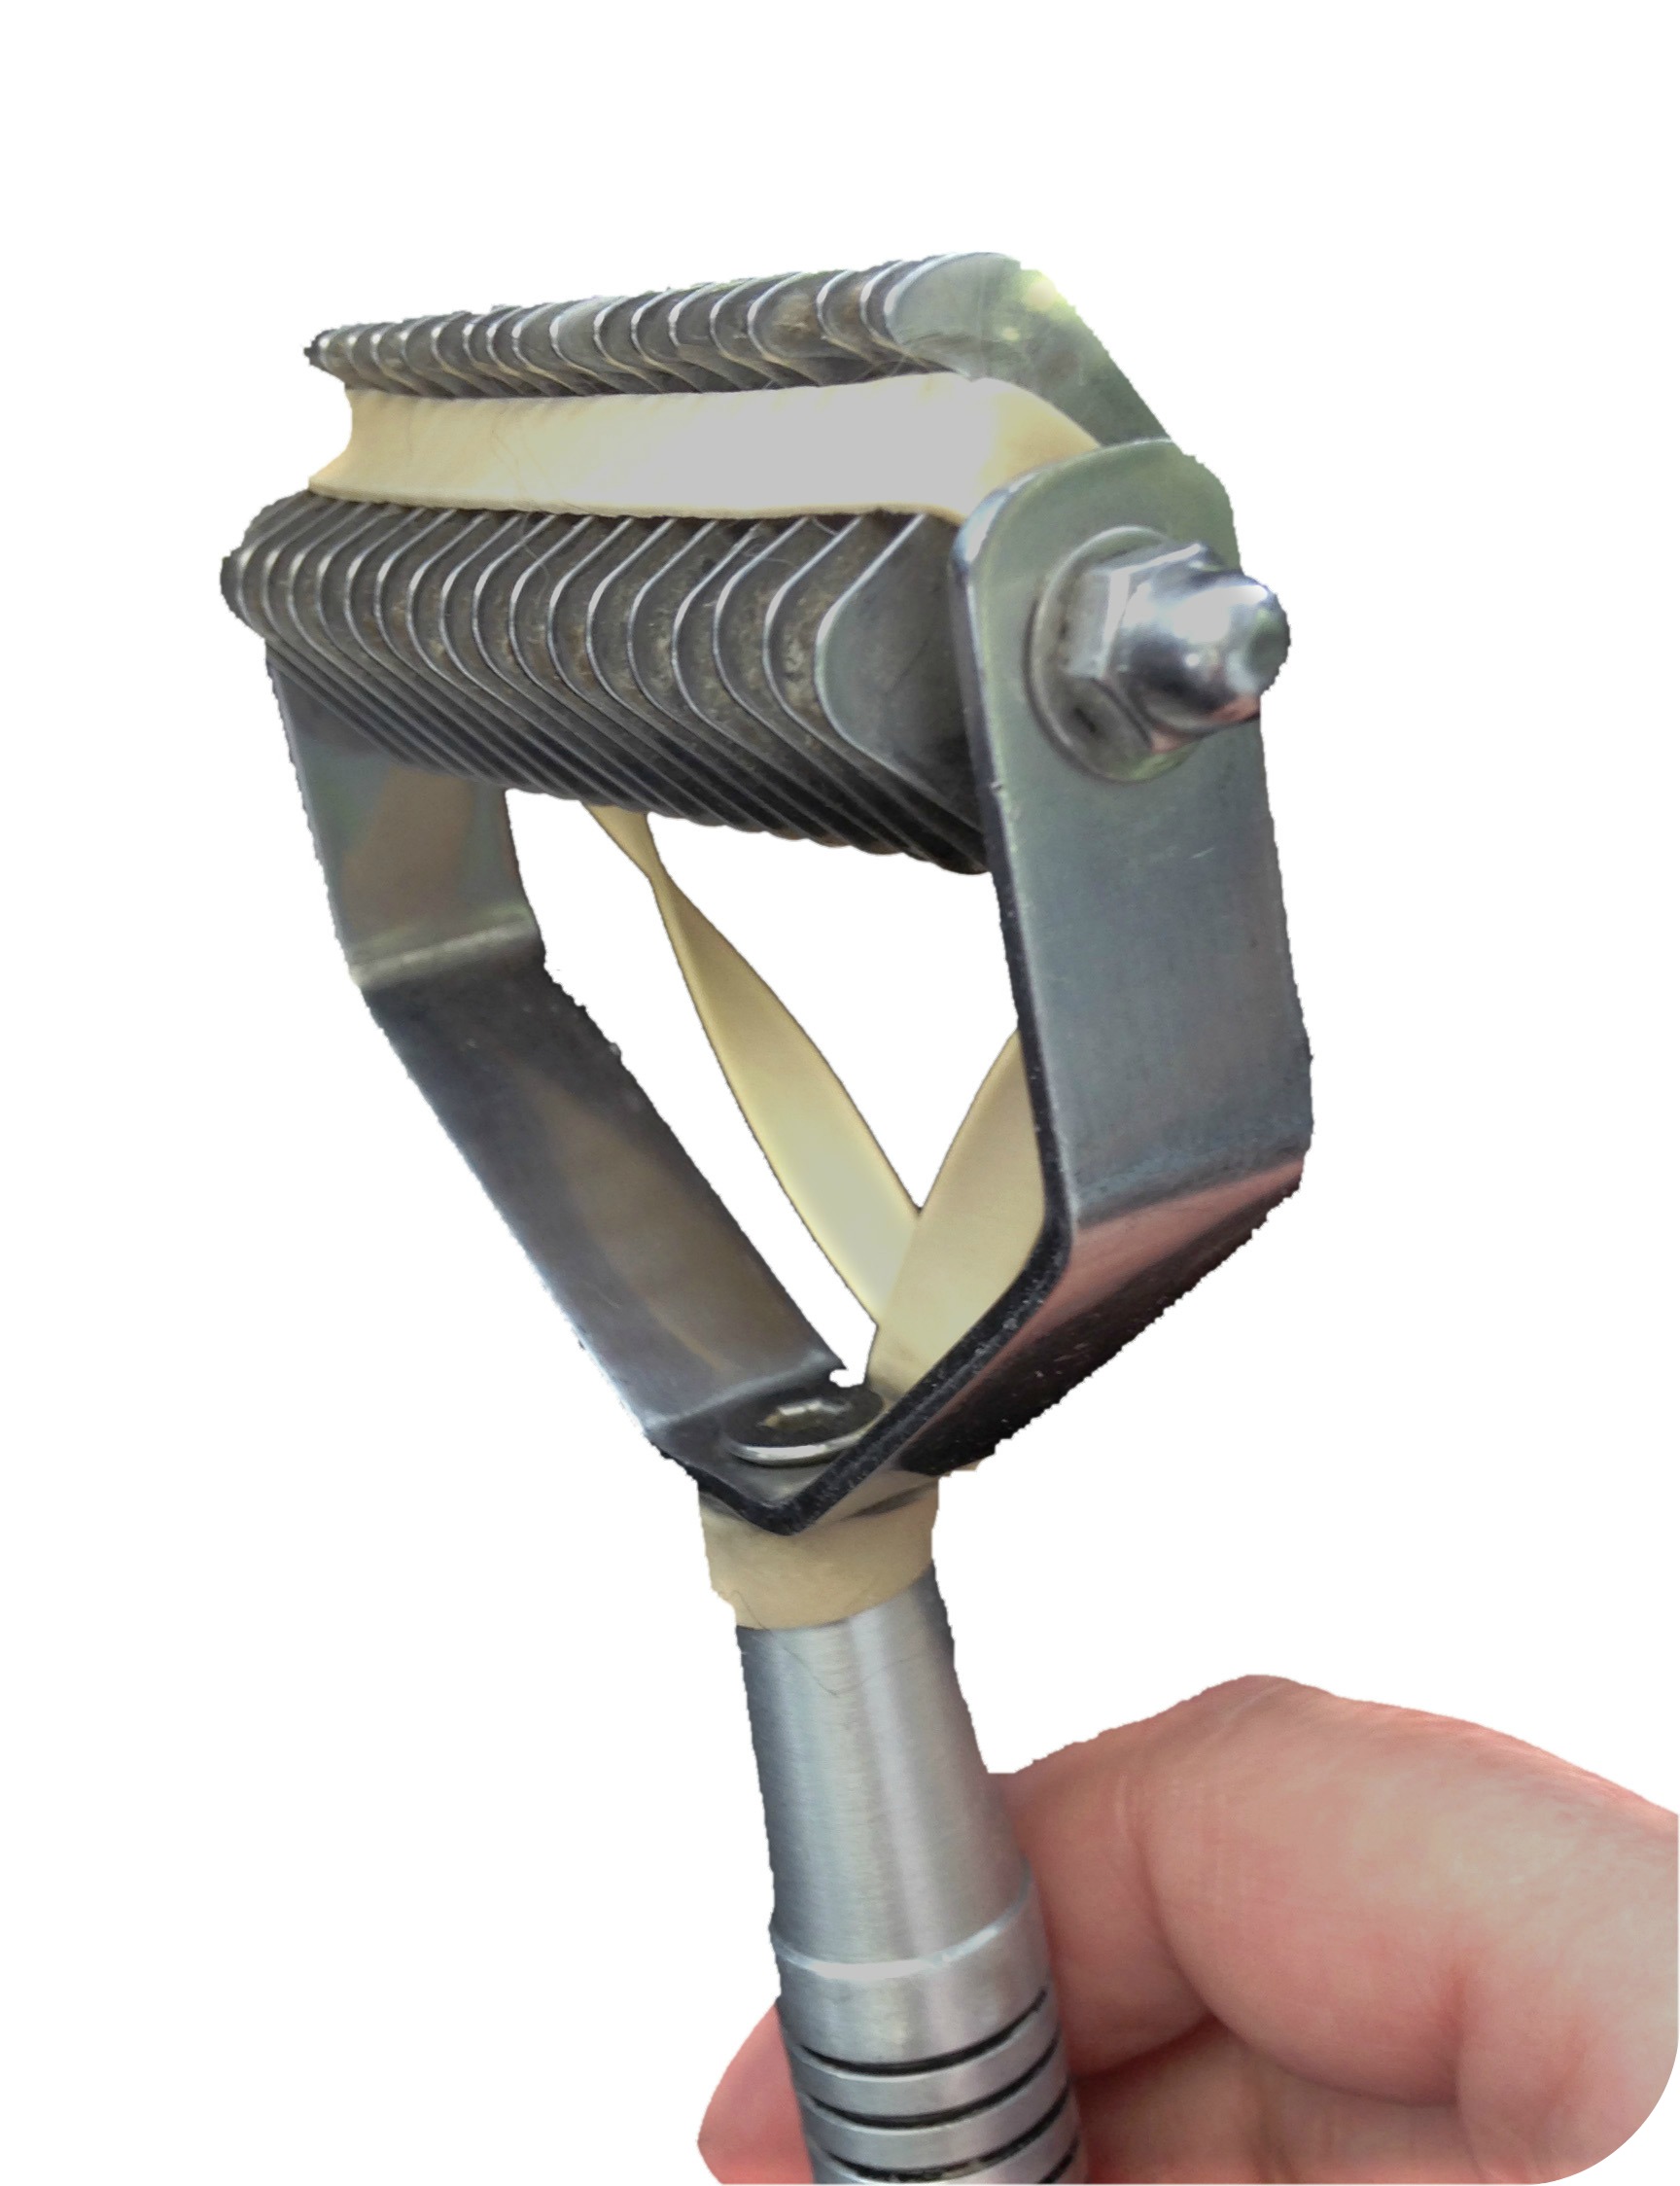
Illustration 5
P.S.
Do you have any tips to share? Jump over to the Learn2GroomDogs Facebook page and tell us.