Call Now: (888) 344-8658
Search for a News Story:

Educational Events: Should You Send Your Team?

I recently received a question about taking staff members to educational events. As most of you know, I am a huge advocate of continuing professional development. Getting out to trade shows and other events is a great way to learn as well as re-energize your team.

 “I have a question about taking my employees to trade shows and seminars. I have never taken an employee to a conference before. My business has grown. I am seeing the need and benefit of having my employees go to classes instead of just me going and me coming back, sharing all I learned. (Which is hardly possible!)

I am wondering:

  • What is reasonable, as far as compensation for my employees?
  • Do I pay them their hourly rate for giving up their time and “working” all weekend?
  • Do I pay for all expenses…3 meals, hotel, classes, etc.

This is new territory for me and I need some experienced advice.”

-Debbie L., North Carolina

professional-developmentWhen you have a team that values education and training, the possibilities are endless!  Their excitement, dedication, and passion can propel their careers to uncharted heights and help your business thrive.  Encouraging that eagerness to try new techniques and test new tools and products has fulfilling personal payoffs that are also great for your salon.  If you have a team like this, investing is their education is also a solid investment in your company.

As a business owner, you must always balance risk with reward.  You are the person who must look objectively at your team and decide if they have the right attitude and drive for this financial investment.

I have always encouraged my staff to continue their education by attending trade shows and other events. The staff members who participated were dedicated to their craft and did not need a lot of guidance.  This is not always going to be the case.

About 18 years ago, I had my first major setback with a team.  We had had an exceptional year.  As a reward, I flew almost my entire team from Michigan to Intergroom for an all-expenses-paid learning experience.

About half the team did exactly what I had hoped. They presented themselves in both dress and manner as true professionals in every sense. They focused on learning and came home with lots of new knowledge and skills.

Unfortunately, the others fell far short of my expectations.  Their appearance was terrible and many of them spent way too much time in the bar or on the dance floor.  A few members of this group were even too hung over to make it to any of the classes.

By the end of the show I was more than frustrated – I was embarrassed.

These employees did not represent themselves or my business the way I had hoped.  They embarrassed their team mates.  They squandered an amazing learning opportunity – and I lost a significant financial investment in their training.

I realized changes needed to be made. I needed strong guidelines. I developed new policies and put them into place so this type of disappointment would never happen again.

Over the years, we have applied several different techniques with great success. Hopefully, a few of the ideas below with help you avoid frustrations and wasted expense.

Continuing Education Benefits

Today, we have an Education Assistance Program in place. It’s a benefit to all full-time employees. Each year we set a budget and these funds can be requested for a wide range of learning formats.

Everyone’s situation is a little different. Some employers find a set amount to work well for their entire team. Others find a sliding scale works best. Lower level team members get one amount. Key staff members and/or managers get a higher amount.  Figure out what works best for your team – and your budget. Typical amounts would range anywhere from $100 to $1000 or maybe even more, depending on your situation.

professional-development-2Formal Education Assistance

Occasionally, a staff member goes back to college. If the class or program will enhance their job performance, they may qualify to have all or part of the tuition costs covered by us. All courses must be pre-approved prior to reimbursement. Upon successfully completion, the team member submits their transcript or certificate along with their receipts for expenses. We will compensate them for the pre-approved portion of classes.

In-House Educational Training

Occasionally, we arrange in-house training. These programs aid the overall knowledge of our pet service teams. At times, the training programs are offered to our employees for free or at a heavily discounted rate. Other times, the benefit is simply the convenience factor. They have access to leading educators right in their back yard. Attendance is highly encouraged at these events. If it is a mandatory event, the staff member will be paid to attend.

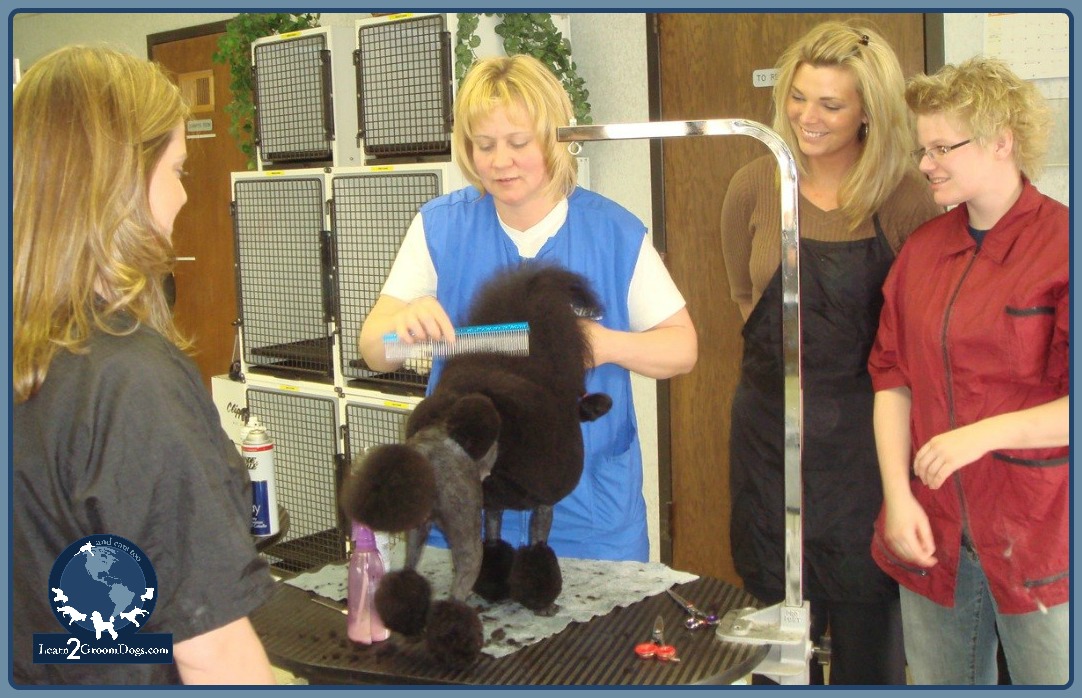
Seminars, Clinics, Trade Shows, and Grooming Competitions

teri-2
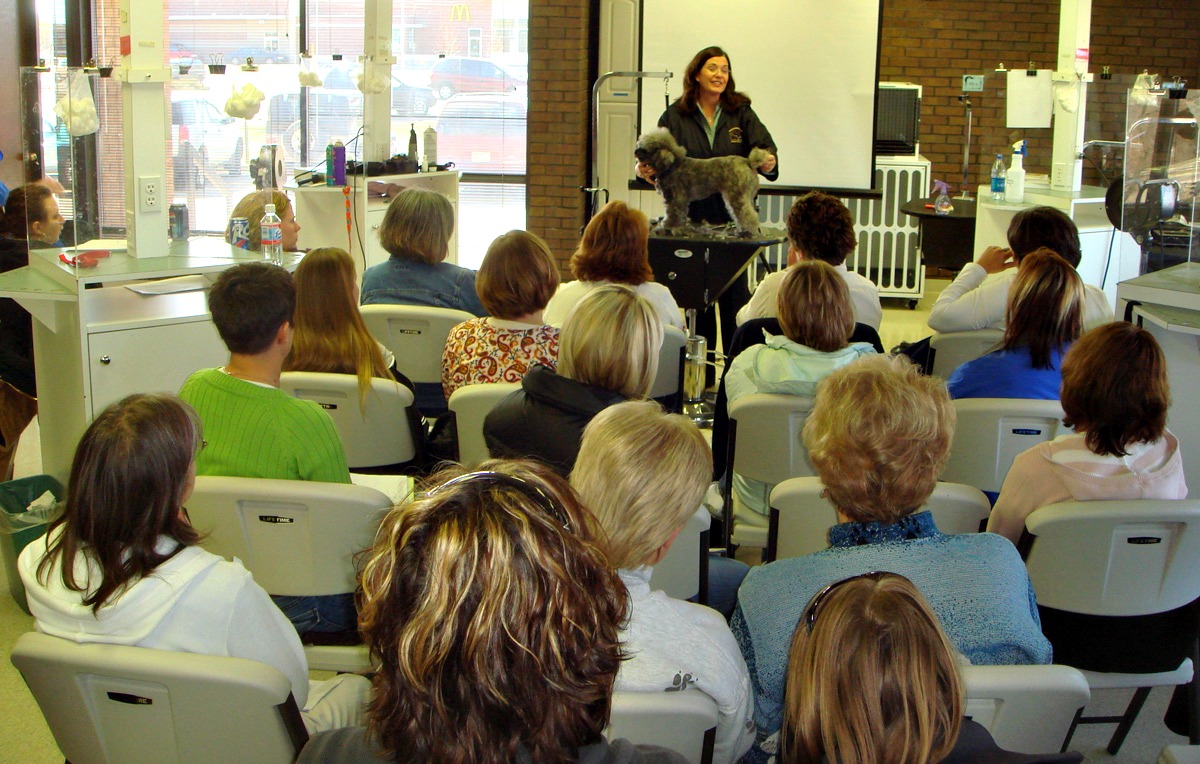
Smaller seminars and clinics offer wonderful ways to learn. Typically, this type of educational event is much more intimate. It’s easy to get up close to see what the demonstrator is doing. Plus, it’s easy to ask questions throughout the entire program.

Larger trade shows are fabulous learning opportunities. At larger events, attending classes isn’t the only way to learn. Opportunities abound out on the trade room floor. There is a variety of products, services, tools, and equipment to learn about. Many of the larger vendors have platform demonstrations going on right at their booths. Sitting ringside watching the top stylist groom in the competition ring will yield plenty of educational opportunities too. Some of the best learning takes place in a more social setting while networking with fellow pet professionals.

To qualify for reimbursement, employees must seek approval before attending. The staff member needs to submit an outline of the program(s) they plan on attending and what they hope to learn from each.

Sitting down with them shortly after their return is a great way to let them share what they’ve learned. Show support and encouragement. You want to learn firsthand what they heard and saw. Ask them how they plan on applying the information. I personally give them brownie points for coming back with photos on their phones of their favorite speakers and personalities at the event.

Don’t forget, upon return of the educational event, they need to submit a written report outlining key takeaways from what they have learned at the program. If they have been pre-approved for travel expenses, they must submit a full expense report including receipts.

Keep in mind, whenever a staff member is at a work-related function, they must uphold your professional standards of conduct. If they fall short, they may not be reimbursed for the cost of the event. Having them sign an agreement outlining your expectations of professional conduct would a great idea.

Here are a few qualifying rules for our Education Assistance Program Benefit.

The Cost

There is more to it than just the upfront cost of the learning event. There are lots of hidden costs, too. Typically, there will be fees associated with:

  • travel
  • lodging
  • meals
  • wages (if the training is required)
  • lost revenue if the event takes place during a typical work day

Sometimes, it’s more cost-effective to seek out smaller events – especially when first getting a team excited about continued education. Personally, I like to test my team on smaller events closer to home. They are easier for my team to get to and less costly. FYI, some of the best educational events for my team are those I’ve hosted. (That’s another blog altogether!)

Staff members must:

  1. Advise the company prior to enrolling for any continuing educational event. Upon review of the training opportunity, the management team will decide if the course or programs qualify for the Education Assistance Program.
  2. The program must be job-oriented and offered by an approved institution, person, company, or organization.
  3. The staff member must be employed with the company for at least six (6) months (full-time).

Alternative Educational Opportunities

We offer additional funds towards approved learning opportunities. These opportunities include, but are not limited to; on-line training programs, membership based platforms, educational videos, and literature.

We encourage all staff members to stay current, informed, and self-educated as it relates to their job. Ultimately, it is their responsibility to manage and grow their career.

If a team member is seeking reimbursement for the cost of a learning opportunity, they must seek prior approval.

Depending upon the situation, either written or verbal reports will need to be submitted to the management team prior to reimbursement for the cost of the educational opportunity.

Certified Master Groomer Status

All our grooming staff members are eligible for voluntary certification testing through one of the approved programs: NDGAA, IPG, or ISCC. This is above and beyond their educational assistance program benefit. Upon successful completion of each phase, we will pay the cost associated with each level of the testing.  Membership dues are the responsibility of each employee.

What do I do if a team member shows their commitment to learning? I start looking at more involved programs for them. I’ve had a few staff members so committed to growing their careers, they blow through their allotment in one weekend. If they want to attend events beyond what I will pay for, we will always try to rearrange their work schedule to make it possible.

Continued education is at the heart of all successful grooming businesses. I love helping people grow their skills. If I have a team members committed to growing their careers, I will do what I can to point them in the right direction. Knowledge builds confidence, bolsters technical skills, and increases productivity. Win. Win. Win.

If you are building a team committed to quality and success, you have decisions to make. What is the best way to grow your team? It will be up to you to weigh out those costs and to determine how they will benefit your business.

Happy trimming!
~Melissa
Hop onto our Facebook page and tell us what YOU do!

How to Make a Sparkle Bow

headerThis sparkle bow is a perfect fit for this fun and festive holiday season. Not only is it super cute, it’s easy to make!

It all starts with garland. It’s easy to find this time of year. The best type to use for bows is woven with very fine wire. It typically comes in a couple of sizes and a variety of colors. I’ve found the one that’s about 2 inches in width works the best for bow projects. It also balances the finished bow nicely on the pet.

To speed this project along, I work with pre-made bows. The bows are held together with a small elastic band. When finished, there is a small loop on the back side of the bow for attaching it to the pet. Bows can be placed in the fur, in topknots, or on the collar.

When trimming the garland into smaller pieces for the bow centers, the wired garland should hold the tinsel together. When trimming, use only the tip of the scissors to trim at the very center to the garland. As you trim, try to avoid cutting the tinsel.

Once trimmed to length, the tinsel piece will only be about a ¾” to an inch long. The small piece of wire ends up getting crimped, creating a circular spray of sparkle for your bow center. When picking up the small garland chunk, gently hold the garland between your fingers. Push your fingers together in one smooth movement, slightly rolling the center of the garland between your fingers to get a consistent spray of tinsel.

Quickly add a few dabs of hot glue to the center of the pre-made bow plus a few quick spots on the loops themselves. Apply the garland to the center of a pre-made bow while the glue is still very warm, pressing down firmly. Hold for a few seconds until the garland sparkle center is firmly attached to the bow.

To add the final finishing touch, add a small bead at the center of the garland spray center with a dab of hot glue. Personally, I like to use Mardi Gras-style beads. You can find these during the holidays, too. Trim the strand into single beads.

When trimming the strand, I snug the shear up to one side of the bead. This allows for a small thread nub on the opposite side of the bead. If you strategically sink the thread nub into the hot glue, it will stay firmly in place. Hold for a few seconds while it adheres.

Once the glue has cooled, remove any hot glue cobwebs.

These bows are fast, fun, and festive. If you work with pre-made bows, these are easy to make in seconds. My regulars would request them in colors matching their personal holiday theme. My clients always loved them on their pets.

Items that you will need for this bow style are:

  • Pre-made basic bow – 2 or 4 loops
  • Christmas tinsel garland
  • Beaded garland or Mardi Gras-style beads
  • Scissors
  • Hot glue gun
  • Glue sticks

 Step 1

Gather your supplies and select the color of garland you want for the center of the bow. Bows and tinsel can be prepared ahead of time. Once the bows have been made and the tinsel pieces trimmed and shaped, they can be quickly and easily assembled with the glue gun.

sparkle-bow-1supplies

 Step 2

Trim a small section of garland. Using craft scissors, cut the wire that holds the sparkly tinsel in place. Use only the tips of the shears or slide the open shear in until you meet the wire. Make a small cut, minimizing how much tinsel is cut with each snip. Trim the garland over a paper plate or shallow box to minimize cleanup.

sparkle-bow-2-tinsel-length

 Step 3

Once the garland pieces are cut, crimp the wire by holding each end on your fingertips and pinching the ends together. With the wire crimped, push your fingers against each other to send the strands out into a uniform spray shape. This also flattens the tinsel so it lies nicely at the center of the bow.

 sparkle-bow-3beginning-crimpsparkle-bow-4crimping

 Step 4

With a hot glue gun, place at least 4-5 small dabs of glue around the bow – one on each loop and each tail – just off center. Place the final dab right in the center of the bow. Work swiftly as the glue dries very quickly.

sparkle-bow-13holding-w-glue-dabs

 Step 5

Place the tinsel right at the center of the bow and push firmly down, using care not to burn your fingers in the hot glue. Check that the tinsel is firmly in place. Remove any hot glue gun cobwebs (slender strands) that are typical when working with hot glue.

sparkle-bow-6-adhereing-tinsel

 Step 6

Once the tinsel garland is in place, hold the strands away from the center. Add another dab of glue to the center of the tinsel. Quickly add a complementary colored bead to the center of the bow. Place the thread nub into the warm glue. Apply pressure to the bead to ensure its firmly attached. Remove any glue gun cobwebs.

sparkle-bow-9-thread-nubsparkle-bow-14glue-dabsparkle-bow-15securing-bead

 Step 7

The finished bow.

sparkle-bow-finished

Happy trimming!

~Melissa

What bows do you like to make? Hop onto our Facebook page and tell us!


Mentors Make the Difference

revised-mainMentors are the most valuable resources you can tap into when it comes to growing your career.

The idea of launching or growing a pet-related business, becoming a certified master groomer, or entering the competition arena can be intimidating. Let’s face it – growth and change is challenging. Even if you are brave enough to take the leap, it is easy to get derailed.

Did you know that over 70% of Fortune 500 companies offer mentoring to their employees? It’s a way to attract, motivate, develop, and retain employees while increasing productivity. Mentoring and working with consultants helps successful companies maintain their cutting edge. In the pet service industry, the same tactics can boost your business and career.

When I was first starting out, I sought out the wisdom of mentors. I was only 22 when I started my first business and was still in college. One of my first advisors was my college business professor. He encouraged me to open my original business after grading a final paper – a business plan for mobile dog grooming.  I left college in 1983 before earning my degree to start Four Paws Mobile Grooming.

The business grew so rapidly, I had six mobile grooming units within five years. I knew needed help growing my business while expanding my own skills.

How did I do it? Through mentoring and coaching.

I joined a local women’s business group and networked with business leaders and service providers. It’s been over 30 years and I still work with a few of the people I met through that organization.

In the early 80’s I learned about voluntary certification testing for pet groomers. I went to clinics, attended workshops, went to trade shows (not that there were many!), and networked with the visionaries of that time. Ultimately, I formed close mentoring relationships with several of them.

I was introduced to the AKC conformation dog show world. I networked with breeders and handlers who taught me about structure, movement, coat maintenance, and advanced grooming skills.

In exchange for their wisdom, I did whatever I could to help THEM. I helped breeders and handlers with dog maintenance, conditioning, and grooming. I did whatever I could to assist visionaries with their projects. I paid my dues with business groups, attending meetings and listening closely to speakers. Every experience helped me grow and improved my business.

The great mentors boost your confidence. Whenever you start something new, there is uncertainty. That’s normal. Many people can overcome that feeling by themselves, while others need more guidance. With a good mentor, you are learning from someone who is already where you want to be. They know exactly what it takes to get there and can lead you through that uncertainty.

Mentors are the most valuable resources you can tap into when it comes to growing your career.

When you first start out, you don’t need someone at the very top of the field. Not only is it unrealistic, it’s not always helpful. There’s a good chance the advice of mentor at the very top would be intimidating or not appropriate for your current circumstances.

Learning is like stairs on a staircase. Working with a mentor allows you to rapidly climb the staircase – but you still can’t eliminate the steps. As you look for inspiration, look for someone or something which is a few levels ahead of you. As you climb the career staircase, continue to look for mentoring situations that will inspire you to new levels.

The internet has changed the learning landscape. There are now a wider variety of mentoring options. Some are free or inexpensive thanks to today’s technology. Many of them self-guided. Others follow outlines or structured programs. Still others utilize social media as a form of networking and sharing ideas.

Here are 9 ways to learn from others who have already walked the walk.

  1. Blogs and Podcasts. Information is just a few keystrokes away. The beauty of blogs and podcasts is that they are free. Are you taking advantage of them?
  2. Books are indispensable. Pick a topic – any topic. You will find so many books that will provide clarity that may be just a download away.
  3. Training Programs. Training programs can be hands-on or online. More are added every day.
  4. Facebook Groups. Facebook groups offer an amazing community of inspiration. Many of them offer free mentoring on specific topics.
  5. Study Groups. We think of these more in high school and in college but they are still valuable as you grow your career. Hosting a monthly local study group is a great way to network with other pet professionals in a relaxed and casual setting.
  6. Clinics and Workshops. These are typically smaller, more intimate lectures/demonstrations led by a top field professional. Grooming clinics and workshops can generally be found in larger communities.
  7. Membership Sites. There are amazing subscription-based sites hosted by industry leaders. A wide array of topics include business, finance, marketing, social media, leadership, grooming, and much more.
  8. Coaches and Consultants. Professional coaches earn their living by helping others succeed. A talented consultant can kick start your career by providing the motivation and inspiration you need to keep moving ahead.
  9. Personal Mentors. Finding a personal mentor can be quite challenging. Potential candidates at the height of their careers have huge demands on their time. For most of them, taking on mentees outside of their own personal network is not easily possible. Some may make exceptions for the right person.

shutterstock_162619325-career-coachingCompensation for an experts’ time depends on the amount of time and effort they have invested in the process. Sometimes a simple hand-written thank you note is enough. Offering your assistance in exchange for their time is another idea. There are thousands of ways to show your appreciation, both during the learning process, as well as long afterwards. It’s best to discuss the topic of compensation up front to avoid misunderstandings.

Your need for fresh mentors always changes. Skill sets will grow. Experiences will expand. You will gain knowledge as you apply yourself. It’s likely you will outgrow your early mentors. That’s OK. It’s not uncommon for mentors to eventually become your peers. Who knows, you may end up becoming friends or even collaborating on future projects!

Experience is a priceless tool. Experience can’t be bought – it can only be earned or shared. Talented mentors will share their knowledge. They can help you achieve your goals by relying on their own experience to guide you.

I recently received a personal note thanking me for writing Notes from the Grooming Table. Even though I did not personally mentor this individual firsthand, the knowledge I shared through my book was indispensable to her career success. I was blown away.

Always remember to appreciate the mentoring opportunities created for you, whether it be a blog, podcast, book, training program, workshop, or other mentoring scenario. Your success will be a product of that knowledge and experience.

Happy trimming,

~Melissa


How to Avoid Clipper Irritation

rr-main-imageClipper irritation is also commonly known as clipper sensitivity and clipper burn – but what is it?

Clipper irritation is an irritation to the top layer of skin. While it’s not necessarily a severe injury that can occur during pet grooming, it will be itchy and uncomfortable to the pet. This discomfort causes the dog to scratch and/or lick the area. The skin gets moist.  If left unchecked or untreated, the scratching and licking can cause an open wound very quickly.

Unfortunately, clipper irritation is not always detectable right after it happens. This means that unknown to both the groomer and the pet owner, the dog may be going home with skin irritation. The condition goes unnoticed until the pet begins to aggravate the area. In its early stages, the skin might moisten or turn a light pink. Other times, the signs may not be visible, but the dog can certainly feel the discomfort.

Depending on the severity of the irritation, the skin might be light pink, or in severe cases, bright red or even bloody. The skin tingles uncomfortably. The natural reaction is that a dog will lick and scratch at the site. The sharp edges of recently clipped toenails can make matters worse – and if the pet starts scratching at his face, you can have a real problem on your hands. A mild case of clipper irritation can instantly turn into a severe one with a couple bats of the back foot with freshly trimmed toenails.

Clipper irritation is one of the more common injuries in grooming salons. It doesn’t just happen to inexperienced or new groomers. I’ve seen it in the competition ring and Grooming Certifiers have reported it at certification test sites.

From a business standpoint, what happens when a pet has been affected by clipper irritation? Simple. Owners will not return to your place of business if it becomes a common problem.

I was just reviewing a Learn2GroomDogs.com video. Well into the video, the Training Partner changed clippers and started clipping a Poodle’s face. She did not tell the audience what blade she was using but I could tell it was closer than the one she had used previously. I was guessing it was #10 or #15 blade length. Weeks after filming was completed, I shot off an email asking the Training Partner what blade length she had chosen to use. I wanted to have our video editor type it on the screen for our members because I knew it was going to be a question. I wanted to make sure I had the correct length.

I was shocked when she replied it was about a #30 blade length.

In my experience, the shorter the blade length, the greater the risk for injury. For most pet dogs, a #10 or #15 blade is considered a safe length to start with if it is used correctly. Some stylists can go shorter and not have any issues. On pets that are extremely sensitive, even longer blades such as a #9 or a #7F are safer alternatives.

How do you decide what blade to use? It all depends upon two things:

  • the dog’s skin
  • how the groomer runs their clippers

For over 15 years, I’ve watched this very talented Training Partner groom dogs. I have NEVER seen any clipper related issues with her work. She almost always uses a #30 blade on all her close work. So how can she get away with using a clipper on a #30 blade setting safely while others could not?

It forced me to think a little deeper – deeper than I go into in my book, Notes From the Grooming Table. In the book, I talk primarily about five key elements.

  1. holding the clipper
  2. keeping your hand supple
  3. the amount of pressure applied
  4. cleanliness of the coat
  5. clipper tip

Those five areas cover the basics of running a clipper effectively. However, there’s a little bit more to know if you want to consistently avoid any type of skin irritation, sensitivity, or clipper burn. To do that, we need to focus on how much pressure is being applied, the sensitivity of the pet’s skin, and the heat of the blade.

Applied Pressure

grc-detaching-bladeProper pressure is the most critical component of clipping for both quality and safety. Press too lightly, and you won’t get the area clipped smoothly. Press too hard, and you’re sure to cause skin irritation. So, what is the proper balance between the two?

That depends.

On slightly longer blades, a tiny bit more pressure can be applied without incident than on super close blades. It will take you a few more passes to get a smooth, even cut. But for the inexperienced or new groomer that is still learning, a #10 blade is a good moderate blade to begin with.

As clipper technique improves, some stylists move to a shorter blade. Why? It offers a slightly cleaner look and takes a little less time. With super close cutting blades, such as #30 or #40, you can go even faster.

Be warned – if you opt to go with a very short blade, you need to be extremely careful. Your clipper technique must be absolutely spot on. Many experienced stylists with fabulous clipper technique can use #30 or even #40 blade lengths to quickly and easily get the quality of trimming they are looking for without sacrificing the well-being of the pet.

Choosing a blade length for close clipper work is not something to take lightly. You need to identify how proficient you are with your clipper technique. You can then choose the best option that does not jeopardize the safety of the pet. The last thing any of us want is to cause discomfort or injury to a pet.

Skin Sensitivity

Just like people, every dog is a little bit different. A person with a very fair complexion will typically have more sensitive skin. Folks with a deeper skin tone have less delicate skin. Puppies and younger dogs have more delicate skin than adult dogs. Smaller dogs are more sensitive than larger dogs. Fine coated pets are prone to more issues with clipping than heavier coated pets.

If a dog has dark pigment around its eyes and nose area, chances are the skin is a little bit tougher than those with light pigment. It’s very common on dogs with light pigment around their eyes and pink or light brown noses to have hypersensitive skin. Sometimes coat color and density levels will come into play, as well. Thicker coated pets are typically much less sensitive than those with baby fine fur. Also, small, light-colored dogs (white, buff, apricot, red – even some chocolate) can be more prone to sensitivity.

The skin can be conditioned. This is a common practice with dogs who are destined for the show ring. This is a critical step, especially with dogs that have close clipper work done on a routine basis. Prospective show dogs are started out with close clipper work at a very young age. It is repeated on a regular basis each month during the early stages of the grooming process. Not only does a condition the skin, it also teaches the puppy to enjoy the entire grooming process.

With pet dogs that have not gone through this conditioning process, we need to be more careful. With all dogs, the shorter the blade length, the more cautious you need to be. With supersensitive skin types, you need to be even more diligent about gentle and proper clipper technique.

i-do-not-want-to-breast-feed-bottle-feeding-your-baby_4Heat of the Blade

With most metal clipper blades, the longer and faster they run, the warmer they get. Each clipper will be a little different. To be safe, you need to regularly check how warm the blade is getting once they have started running.

To check the heat of a blade, simply touch it to your forearm as though you were testing the formula in a baby’s bottle. You can also touch it to your cheek. Either way, if it is heating up too quickly or is uncomfortable to the touch, ice the blade down with a blade coolant or switch out to a fresh, cool blade.

What to Do If You Suspect Clipper Irritation

Whenever a dog is suspected to be prone to clipper irritation, clipper sensitivity, or clipper burn, I encourage stylists to be proactive in heading it off. Remember, in many cases, you will NOT know if a pet has been affected by it until AFTER they leave the salon. There are many different things you can do but these are the top four in my book.

  1. Choose a blade length that matches the skin sensitivity level of the pet. Longer blades are best for dogs with a greater chance of sensitivity. Minimize how many times your clippers go over one area on the dog.
  2. Always utilize gentle, soft, and supple clipping techniques in sensitive areas such as the head, between the pads, the groin, or under the tail. Test your technique by running the clipper down your forearm, simulating the same tip and pressure you would apply on the dog when running the clipper. Is your technique comfortable to you?
  3. Apply a non-greasy skin soothing ointment or spray after clipping potentially sensitive areas. There are many available designed for pets. Personally, I recommend Skin Works by Coat Handler.
  4. If you even remotely suspect clipper irritation might be a problem, talk to your client BEFORE they leave the salon. Communicate with them about what to look for, and what they can do about it if it becomes a problem at home.
  5. Send the client home with some of your favorite product. Treatments can be packaged in small self-sealing plastic bags or soak a few cotton balls in a liquid relief product. Once they are premoistened, tuck them into a self-sealing plastic bag. Instruct the client on how to utilize the product if they notice the dog starting to rub or itch the affected area.
If you even remotely suspect clipper irritation might be a problem, talk to your client BEFORE they leave the salon. Communicate with them about what to look for, and what they can do about it if it becomes a problem at home.

When I was working with a new client, my initial blade of choice was always a #10 blade for close clipper work. I feel it is a moderate length blade that is relatively safe. In my new client consultations, I discuss this if we are dealing with any breed requiring close clipping, especially in the head area. Depending on how their pet reacted to this moderate length blade, we could make adjustments in future appointments if they had any issues or concerns.

How do you decide which blade you should use? Always err on the side of caution. I would rather sacrifice a little bit of quality by going with the slightly longer blade then dealing with clipper irritation.

Remember, you can always go shorter down the road as your techniques improve and you learn how to work with different skin types. Your primary concern should always be the safety and health of your pet clients.

Happy trimming,

~Melissa

What do you think?  Jump over to the Learn2GroomDogs.com Facebook page and tell us about it.


10 Ways to Keep Your Sanity This Holiday Season

firstBy now, busy salons are bracing for the holiday rush. Thanksgiving. Hanukkah. Christmas. Are you ready?

This isn’t only your busiest season, it’s also the end of the year. It can make or break your earning goals. Will you finish off 2016 with a bang? Will your books be full for January and February of next year?

I love this time year. It forces us to be on top of our game. To be organized. To be ready. To have our days planned. To keep our communications clear with fellow team members and our customers. To know our limitations.

Let’s not forget what the real reason of the holidays is: to spend time with your family and friends. Sure, we want to be there for our customers but not at the expense of our family and close friends.

Back at the height of my mobile grooming business, I lost sight of this. I, along with most of my team, were booked the gills. I often joked if my clients didn’t tip me in cookies and nuts, I would’ve forgotten to eat altogether during this time of year.

My work day would typically start at 5 o’clock in the morning. It would start by preparing all the client’s holiday gift bags for my team of stylists.  By 8 o’clock in the morning Istress was at my first stop. I would typically groom seven, eight, or even nine dogs a day in my mobile unit. This was before the age of generators. With each stop, I had to plug in. What a pain! Those chords were long, heavy, and cold on your hands! Running out of water was a real concern, too. After all, it was Michigan. The temperatures were plummeting below the freezing zone. Many times I would not get back to base until well after 9 o’clock at night. By the time December 24 rolled around I was so exhausted all I could do was fall into bed. One year I totally missed all Christmas Eve activities as well as most of Christmas morning.

That was the year I came to my senses. I love to be busy. I also love to take care my customers. But I had pushed myself too hard. I learned that year how take control of my schedule, to create a plan, and how to use the word “No.”

Here are the few of the things I did to reclaim my sanity so I could enjoy the holiday season with my friends and family.

1. Blocked out time for myself. Long before the holidays arrived, I blocked out times for myself and family events. Holiday parties. Holiday shopping. I made sure I had enough me time scheduled so that I could be at the top of my game for both my customers and my family.

food2. Maintained a healthy diet. Seriously – we cannot survive on cookies alone – although I have tried! After a long day standing at a grooming table – who wants to spend time cooking! Long before the holidays hit, I would prepare healthy dinners and freeze them in individual portions. I learned my crockpot was my friend. For breakfast and lunches, I made sure I had plenty of healthy items that I could just grab. Cut up fruits and vegetables. Lean proteins. Water. Today, with Pinterest – there are plenty of ideas of how to put this together. And when all else failed, a collection of my favorite restaurants I could call for takeout as I drove back to base.

3. Stockpiled supplies. As we went into the holiday season, I made sure that we were well stocked. Shampoo. Conditioner. Specialty shampoos. Paper towel. Laundry soap. Cotton balls. Quick stop. Kool Lube. We were very proactive with our ordering activities to ensure we had everything we needed and would not run out.

4. Maintained my mobile unit/salon. The last thing any of us need is a hiccup with our equipment during our peak season. With our vans, I made sure everything was serviced prior to the onslaught of the holiday season. Oil changes. Brake jobs. Maintenance to the interior workings of the units. Replaced old or tired equipment. I carried this pre-maintenance over to my salon, as well.

5. Premade bows. I am a bow girl. I love their creativity and the sparkle they add to the finished grooming job. It’s like icing on the cake. During the holiday season, our most festive bows were all premade. Glitter bows. Sparkle bows. Pom-pom bows. Tulle bows. Beaded bows. Ribbon insert bows.  I hated taking the time to make them on-the-fly. All our special holiday bows were made well in advance. I would choose the bows myself based on what I saw in the client’s home or I would let the client select their own bows in the salons.

focused_interviews6. Focus. Focus. Focus. When grooming, I used every speed trick in the book. Prepping. Bathing. Drying. Trimming. Wherever I was, in an instant, I could see a clock. I paid attention to minutes – not hours. I would set mental time goals on every single step of the grooming process and fight to stick to them.

7. List keeper. I love lists. Once it’s on paper I can get it out of my mind. My lists allow me to remember the finer details and stay on track. There’s great gratification in crossing things off a list. When it comes to holidays, I have master lists for everything. Shopping lists. Cleaning lists. Gift giving list. To do lists. Decorating lists. If it is something you must think about each year, consider building a master list for the task. I have a folder on my computer called organizational templates. I store all my master lists in that single spot.

8. Took care of my best customers first. I started pre-booking my most regular customers starting in September. I would start with my weekly and biweekly customers. Once they had their appointments locked in, then I would move to the three-week and four-week clients. I would finish off the pre-booking with my five and six-week clients. Typically, by that point, there was very few openings left in my schedule.

9. Pre-booked appointments. Traditionally, January and February in the northern climates can be somewhat slow for most grooming salons. Pre-booking is so important this time a year. By taking advantage of the high traffic in November and December, it’s easy to pre-book January and February 2017. Smart pre-booking can increase your income without adding a single new client.

relax10. Took the week off between Christmas and New Year’s. For my businesses, which are strictly grooming-related, I always reserved that week to regroup. To rest. To allow myself some “me” time. Some years the entire team would take the week off. Other years we would take a more relaxed approach to work by not grooming any pets. After all, most of your clients have already been groomed. We would take that time to address special projects needing to be done in the business.  Deep clean. Paint. Replace worn and tired equipment. By the time January 2 rolled around, we were all refreshed and ready to begin a new year.

At one point my life, I dreaded the holiday season. The demands of my grooming services and my time made it so that I couldn’t enjoy this time of year. Once I reclaimed my time – my life – the holidays once again became that special time of year.

With a little forethought, you can set the stage. You will be able to generate the maximum amount of income from your busiest time of the year without losing your sanity.

Happy trimming!

~Melissa

Do you have suggestions for having the best holiday season?  Jump over to the Learn2GroomDogs.com Facebook page and tell us about it.


4 Ways You Can Make a Better Day

dogIt’s Monday morning.  You walk into your salon with coffee in hand and look at your appointment book.  Hmmm… You’ve overbooked – and by the look of things, you’ve also scheduled too many oversize dogs.  What’s this?  Uh oh.  THAT customer is coming in today.  The one you can never seem to please.  And your first dog always decorates your table with unpleasant treats throughout the entire groom.

We’ve all had days like this. It’s all part of being a professional pet groomer.

I still remember the day I had 16 dogs on my schedule. When I first looked at my workload, I was totally overwhelmed.

But then I really looked at it…

…and chose positivity over panic.

I changed my thought process and my attitude.  I couldn’t change my schedule, but I could change my outlook.  I couldn’t change the fact that there was a lot of work ahead of me, but if I looked for the positives, I would see how much I stood to gain.

By the end of the day, a lot of dogs were going to look and feel a lot better.  And since I had been a commission-based stylist, I was going to have a lot of money in my pocket – not including the tips that were sure to come! This was going to be a good day!

Have you ever stopped and thought about how a day is going to unfold?  Has it ever dawned on you that you are ultimately in control of the day?  You are.

brooke

Ultimately, we choose our thoughts.  We can also control what we choose to believe.

ford

So how do you turn your thoughts and beliefs into affirmative actions?  Is the glass half-full or half-empty?  It’s both – and how you choose to interpret how you feel about that fact is what forms your outlook.

Here are 4 ways to mentally take charge of your grooming day that will boost both your outlook and your productivity.

Planning

anchors-aweighUltimately, you oversee your time and choose how to manage it.  To get the most out of your day it makes sense to plan it as efficiently as possible.

When I had a lot of dogs to get through, I chose an assembly line grooming technique.  This works whenever you have two or more pets to work on.  If you are mobile and the family has multiple pets, take them all at once to your mobile unit.

This is the order that has always worked efficiently for me.  I started with bathing the largest and furriest dog, working down the line to the smallest, lightest coated pet.  Once all my pets were bathed, I started the active drying process.  To determine which dog to start with, I simply reversed the order.  I started with the smallest, lightest coated pet working up to the furriest.  Once everybody was bathed and dried, I started the finish process.  Typically, I started with whatever was the fastest and easiest to move through the rotation.

Always look at your whole day, first.  Take a little bit of time to plan and organize it based on what has been scheduled.  No matter how chaotic it looks, if you believe you can get through it – you will.  That’s half the battle!

Focus

All of us are given 168 hours per week.  For those of us that work full time, about one quarter of it will be spent at work.  That’s not a bad trade if you are passionate about your job.  Plus, it offers the opportunity to earn a living by doing what you enjoy.

Yet, no matter how passionate you are about grooming – it can become unsatisfying or even stressful if you do not learn how to manage your time and focus.

I know stylists that are extremely happy doing just four dogs a day.  If you are one of those groomers – consider yourself very fortunate.  You have the luxury of time.  There are many professional groomers who rely heavily on grooming to support their families and need to groom more pets to sustain their lifestyle and standard of living.

Most efficient, seasoned pros can do between 6 and 12 dogs a day without sacrificing safety or quality.  If they work with an assistant, their productivity only goes up.

How do they do it?

They are totally focused on the task.  They are not distracted by phone calls, emails, Facebook, or idle chatter with coworkers.  They are 100% focused on the pet.  Most experienced pet stylists can turn a small to medium size pet in 30 to 60 minutes.  That includes everything:  bath, blow dry, nail trim, ear cleaning, and full brush-out/haircut.  Larger or extremely heavy coated dogs may take a bit longer.

If you are struggling to hit the time mark of one hour or less per dog, eliminate distractions.  Start timing yourself on a regular basis.  Break the grooming process apart and set time goals for each step.  Most people will find the bathing and drying process is the major time hog that can be improved upon.

Don’t Be Perfect

Of course, you need to produce quality results to bring clients back.  But does every pet that walks out your door honestly need to be show ring perfect?  Really perfect?  Not a hair out of place?  Probably not.

Focus on the fundamentals.  Keep the pet safe and injury free.  Get them squeaky, squeaky clean.  Remove all mats, tangles, and loose undercoat.  Get them blown out to perfection (this is where you can shine – most pet parents do not own a high velocity blow dryer).  Get smooth clipper work.  Trim those nails and make sure the ears are clean.  And don’t forget – a super cute face.

Do not nit-pick the job to death.  Even in the contest ring, the grooms are not perfect.  Do the best you can and then move to the next pet.

The Word “No”

There is unbelievable power in this word.  It doesn’t have to be negative and shouldn’t feel uncomfortable to say.

All of us are given 24 hours in a day.  It is up to us to decide how we are going to use it.  If you are overloaded or getting close, the most powerful word in your vocabulary is, “No.”

However, before you use it (especially if you’re feeling overwhelmed) analyze your day.

  • What can you do to make the day more manageable?
  • Do the problems stem from your overall attitude?
  • Is it a lack of experience and/or knowledge of skills causing the problem?
  • Are inefficient products or equipment slowing you down?

If you are truly being pushed to the brink and can’t squeeze anything more out of your grooming day, it might be time to embrace the “less is better” concept.

Even though we all get to choose what we say yes to, there are trade-offs for every choice we make.  If our work days are already full and we say yes to one thing – one more dog, one more customer – we must say no to another item on our agenda.

I have two suggestions for this dilemma.

First, if you have too many customers – and you don’t want to hire more help – you need to eliminate a few clients.  One of the easiest, and most rewarding ways to streamline your client base is to raise your grooming prices.  By raising your prices, you will automatically weed out the customers that do not value or can afford your services.  Typically, you can free up your time without sacrificing your earning capacity.

Your second option is to focus on your most valuable clients.  Those regular clients you see every six weeks or less.  Take the time to schedule them in advance.  Taking control of them first makes it much easier to say “no” to customers who don’t use your services as often.  Many highly regarded pet stylists book a year in advance.  They take full control of their schedule and take care of their most valuable customers.

Both scenarios ultimately utilize the word “no.”  No, you will not cut a special deal for certain clients.  And no, you will not take any clients that do not fit your ideal regular client profile unless you honestly have room to work them in.

Always be aware of your attitudes and how they are affecting your actions.  Always learn from your past but then let it go.  Look forward to creating the future you want.

Life is full of variables.  Our perception becomes our reality.  Whatever you choose to believe will either help you move forward or hold you back.

The choice is yours.  Make it a good one.

~Happy trimming,

Melissa


Need a Little Inspirational Boost?

Are you needing a little pick me up this week?  Here are some inspirational quotes to help kick start your day.

62b516ec-bfe9-443d-bf85-9775295544ef 48c36637-1ea1-444c-b90c-9a60165c0ee6 35691dbb-69aa-491b-a043-7faf8ddfef58 c0985ba4-b2cf-4ded-9fc9-f92204d719fc 25655a6d-a9d6-4cc4-8095-a96fb974d20b 574d3ea3-f3de-4749-b148-6f483d8f8101ccd96d25-5fe2-4afd-9b24-35809ff1026474e67831-9fc9-42cc-a2a2-c42d274787fd


Tips for Using Learn2GroomDogs.com to Get the Most of Your Subscription!

Are you trying to make the most of your Learn2GroomDogs.com subscription?  While we designed Learn2GroomDogs.com to be as “user-friendly” as possible, we know that sometimes it helps to have a guided tour to make things easier.  Here are some of our favorite tips and tricks to help make your experience with us even better!

Finding Your Favorite Videos


Sometimes you just know that the video you watched will come in handy again someday.  Add it to your list of favorite videos you will watch time and time again.  We even keep it for you if you leave.  When you renew your membership, that list will be there waiting for you.

Coupon Codes


We do promotions several times a year.  If you do not have an active membership, you can use the provided coupon code to get the promoted discount.  Do not cancel an existing membership to try to apply a code.  This will result in double billing – who wants that?

Passwords


It happens to all of us – mind-blanking on a password.  If it happens, don’t panic.  Simply follow the steps above to recover your password.  Security features built into our website prevent customer service from being able to see your password.  Your best course of action is to recover – or if needed – create a new password.

Account Details


You have complete access to all of your information.  It’s just a few clicks away!  If you need information for your records, you don’t need to wait for us – your information is right at your fingertips.

While We’re Talking About Account Information…

Sharing your membership with someone may seem like a nice gesture, but it can also be a disaster!  ANYONE who has your information can see your private account data.  That means your address, email, and credit card information can be seen by anyone you give access to.  It doesn’t stop there – if that person also shares your information with anyone else… you get the picture.  Salon owners who share their account with their employees are sharing more than they think.  Be safe – protect yourself – keep this information to yourself.

Here are some other ways you can use the site to get the most out of your membership.

team rusty ring meet-anywhere flexi-arm-trick


Taking a Proactive Approach to Managing Your Time

main-imageAre you managing your time?

No matter how we divide up our week, the hours don’t change. We are all given 168 hours.

How is your going to be spent?

Is your week going to be smooth, controlled, productive, and rewarding? Or is your week going to be chaotic, stressed, and frustrating?The choice is actually yours. The thing about time management that you have to understand  is that ultimately you are in complete control. How you manage your time is YOUR responsibility. Managing that obligation is totally up to you – no one else.

There are always ways to make more money – but you can’t make more time.

Do you feel stressed – or blessed?

stressAll businesses have budgets. They have quotas. There is a balance between the cost of running the business and the amount of money coming in through the doors. There has to be more coming in than going out in order to be successful. The dream of running a thriving small business does not exist if the outflow exceeds the inflow.

There’s a story I read years ago in First Things First by Stephen Covey. It’s a story about fitting the most into each day. I always think about it when my own life has a tendency to spin out of control. (And yes, this blog post is a little bit about self-therapy I desperately need!)

In the story, the time scenario is demonstrated with rocks and a jar. The tale starts with a glass jar and a tray of large rocks. The facilitator asked the audience how many rocks could fill up the jar. They all made guesses and the instructor put in the rocks until the jar appeared full. He then asked the audience if the jar was full. Everybody looked at the rocks in the jar and said yes. Then the instructor pulled out a container of gravel from under the table. He poured the gravel into the glass jar and gave it a shake. The small pebbles filled in the spaces between the larger rocks. He turned to his audience again and asked if the jar was full. The audience realized there was more to this game so they hesitated. The facilitator reached under the table again. This time he pulled out a bag of sand. He sprinkled the sand on top of the rocks and the gravel. He gave the glass jar a bit of a shake. The sand settled in between the cracks. He asked his audience again if the jar was full. This time they said no. And sure enough out from under the table came a pitcher of water. He poured in the water until it reached the top of the jar. Now the jar was full.

So what is the moral of the story? Some people think it’s about being able to fit more into your day if you really work at it. That’s not really the lesson. His point was that if the big rocks don’t get put in first, the rest wouldn’t begin to fit inside the glass container.

Your life is the same. Your work is the same. You need to fill in the big pieces first before the smaller pieces can be added. By being deliberate with your time, you can get more out of your day – out of your week – when you place the pieces in the right order.

So how does the scenario play out in a grooming business? Like many service-based businesses, time is money. How do you make the most of it? Do you struggle to get four or five dogs done each day? Are you frustrated because you can’t get eight dogs done in a day without making yourself miserable?

What are your big rocks and how many of them can you fit? How can you fill up your personal jar the most efficiently?

Everything starts with an appointment book or digital schedule. If time is money, and you can’t create more time, you want to make the most efficient use of the time available.

project-teamThe Team

Look at the players you have on your team. What are their strengths? What are their weaknesses? Do they have specialties? Which team members have high-level skills?It doesn’t matter if you are solo flyer or part of a larger team. Isolate and analyze all the strengths and weaknesses. Successful teams focus on strengths. If you have a stylist who is highly proficient at breed profile trimming and high-level skills, it is a waste of time to have that person doing elementary tasks that could easily be delegated to others.

By the same token, if you are a solo stylist, you can still delegate. Do you really need to wear all the hats? Can you delegate salon cleaning? Hire a receptionist or a bookkeeper? My guess is your strength is grooming. Don’t waste time on other tasks that you can delegate.

If you’re trying to grow your business and your team, think about this. People can only handle larger stones if they increase their knowledge base. Helping your team grow by enhancing imagestheir skills is always a smart move.

The Appointment Book

This is a crucial part of putting in the big rocks. The big rocks would be the full-service grooms. Bichons, Shih Tzus, Schnauzers – pets that require haircuts.

Next in line would be the bath and brush style pets. These will be what I would consider the gravel-sized grooms: Golden Retrievers, Labs, Shelties, etc.

After that you’re looking for the sand. These would be the smaller, very simple dogs to do. They may be smaller weekly or biweekly bath and brush dogs or simply short-coated small dogs. Many stylists affectionately refer to them as “Splash and Dashes.”

acco_aag_planner_monthlydaily_lg_optThe water would be the quick things that you could do to increase your revenue. These would be add-on services like:

  • Walk in nail trims
  • Teeth brushing
  • Nail filing
  • Coat and skin conditioning treatments

There is a long list of extra services that could be your water.

Start by figuring out how many of the larger rocks (the full-service grooms) need to go under each stylist per day. Once that is been established, then schedule with less taxing jobs such as the bath and brush dogs. These dogs will be the gravel, filling in between the full-service grooms. Many people color code these types of jobs in the appointment book to give a strong visual of how the day is shaping up. Once the rock and gravel is scheduled, then you can fill in the gaps with the sand – those appointments that are super simple to do. And then to really fill up the day, add in the water – the add-on services.

Grouping Tasks Together

screen-shot-2015-09-15-at-9-20-12-amTo use your time efficiently, group similar tasks together whenever possible. Batching tasks together will always enhance your productivity. Think about it like an assembly line. Even if you just have a couple dogs scheduled at one time, try to work them in an assembly line fashion.

Have the clients drop all the dogs off at approximately the same time. Prep them all at the same time. Get them all into the tub at about the same time. Condense all the drying into a single span of time. Finish them one right after the other. Finally, release them all at the same time.

Why does this work? It minimizes the number of distractions with clients coming and going. It allows you to be much more focused and efficient with your time at the grooming table.

Slow Down

Sometimes the best way to increase your time is to actually slow down. Be deliberate, and methodical. Plan out what you are going to do. Stop and think. Breathe.

Use your appointment book. Create systems you can follow consistently. Ultimately those systems will be your shortcuts to efficiency – and your sanity.

stock-girl-peace-serene-calm-recovery-happy-6y3wAll of us are only given 168 hours a week. The choice is yours how you are going to use it and live your life at work and at home.

Are you going to feel stressed?

Or are you going to feel blessed?

Use your time wisely.

What techniques do you use to be proactive with your schedule? Jump over to the Learn2GroomDogs.com Facebook page and tell us about it!

Happy trimming!

~ Melissa


Can You Teach Yourself to Strip?

finger-pluclkI was at GroomExpo just a few weeks ago and met many wonderful pet professionals. One of them was Connie Carter of Gorgeous Growlers Grooming in Florida. She had attended several of my lectures and at the end of the show she stopped to thank me as we passed in the hall. We chatted a bit and as we parted ways, I reminded her that I was happy to help with any questions that she wanted to email to me. I love complex questions that can lead to blog topic ideas! Well, guess what? Connie didn’t waste any time. Within a week, I got my first question from her – and it’s a good one.

“Can I learn how to hand-strip online? How long does it take to learn how? I have a new client whose Westie puppy is being delivered at the end of October. I do have some experience helping but I’ve never done a full hand stripping job of my own.”

The short answer to your question is: “Yes.” You can teach yourself to hand-strip if you have the right information. The trick is getting the right information at the right time – AND you need to have the right dog with the right coat to practice on!

connieLuckily, hand-stripping is pretty forgiving. Granted, some breeds are easier to learn on than others.

There are two types of coats that need routine stripping to maintain the correct texture and color:

1. Sporting Dogs (also known as Gun Dogs)
2. Harsh-coated pets (primarily in the Terrier and Working groups)

I still remember the coat of my first hand-stripped show West Highland White Terrier. It felt like a suit of armor. The dogs’ jacket was so hard, nothing was going to penetrate that coat. At that point in my career, I had only clipped Westies. They were smooth, soft, and cuddly. I had no idea what hand-stripping was – let alone that hand-stripping was the correct way to prepare the coat.

I rank the difficulty of hand-stripping on a scale from 1 to 3. The coat is factored in, as well as the temperament of the pet.

(Because Connie based her question on a West Highland White Terrier, I will focus more on the harsh-coated coat types. I would say Westies fall between a 2 and a 3 on the following difficulty scale.)

RATING SCALE

ONE

Super simple. The hair pulls out with very little effort.

TWO 

Requires a bit more thought and effort. The hair needs to be worked a little bit more. You will need a wider variety of stripping tools to get the job done. You also need to think about the new layer of coat coming in. This fresh layer of harsh coat will need to be constantly rotated. The rotation normally takes place at consistent intervals so the dog is never stripped down naked.

THREE 

In a word – challenging. Different parts of the coat on the dog’s body grow at different rates. Hand stripping them in the right sequence is critical for correct coat regrowth. Some sections are easy to pull down, while others are very difficult. Getting the dog to look conformation show ready is an art. It requires education, knowledge, training, skill, and practice. Lots and lots of practice.

Many accomplished stylists do a combination of half stripping, half clipping on their pet clients. This technique mimics the look and texture of a properly pulled coat. It’s typically much quicker to do. It’s easier on the pet – and kinder to the client’s pocketbook. It will also leave a bit a coat on the dog, making it more attractive to a pet owner.

When you are first starting to learn the technique of hand-stripping, it is advantageous to start with what I would consider a #1 rated dog. Start with something very easy. Preferably, the coat is blown and literally falling out. This type of coat requires very few tools to pull it out – maybe just your fingers. Which breeds with these be? Here are a few:

  • Many of the Russell-type breeds
  • Some Cairn Terriers
  • Border Terriers
  • Some Irish Terriers
  • PBGVs
  • Irish Wolfhounds
  • Otter Hounds
  • Podengos
  • Scottish Deerhounds
  • German Wirehaired Pointers
  • Wirehaired Vizslas
  • Spinone Italianos
  • many mixed breeds including wire coated Doodles

stripAs you increase your skill level, you’ll be ready to tackle more challenging coats. I would consider these dogs a #2 in their level of difficulty. Keep in mind many dogs could waver between levels.

  • Wire coated Dachshunds
  • Australian Terriers
  • Dandie Dinmont Terriers
  • Glenn of Imaals
  • Norfolk Terriers
  • Norwich Terriers
  • Brussels Griffons
  • Bouvier des Flandres’

Once you have mastered the skills required to hand-strip #1 and #2 rated coat types, then you’re ready to start working on the most challenging group. Remember to keep in mind that this also depends on the dog.

  • all of the Schnauzers
  • Airedales
  • Lakeland Terriers
  • Scottish Terriers
  • Welsh Terriers
  • Westies
  • Wire Fox Terriers
  • Affenpinschers

All of the harsh-coated breeds will vary slightly with their degree of difficulty. A number of factors affect where they ultimately fall in this rating system. Genetics need to be considered. Hormones, as well as whether the dog is  altered or intact will affect a coat. The length of time between grooming sessions will dictate how readily their coats pull. The climate and the season will also play a role in how easily the coat is removed.

Where do you turn when you want to learn the technique of hand-stripping? You have options – and many of them can be self-directed.

Observation

Start with observing high-quality dogs. Seeing a dog in the flesh is the best way. Go to dog shows. Study the dogs in the grooming area as well as in the ring. Look at magazines featuring top winning dogs. Do an online search for images of AKC or UKC Champions. Go to top breeder websites. Watch dog shows online or on TV.

You need to firmly etch a mental picture of what a high-quality hand-stripped dog should look like. It is also important to actually touch the coat to get an idea of what it feels like. Achieving any type of quality without this knowledge will be impossible.

bookBooks

Breed specific books will give you details. There is one particular booklet I really like. It does an excellent job of explaining the techniques of hand-stripping. It’s older and though it may not be very sophisticated, the material is timeless This book caters to what I would consider the more challenging breeds: broken-coated Terriers that have their coats “staged” for proper regrowth. However, the techniques outlined can be applied to many of the easier breeds as well.  Click here to see more details about this book.

Videos

Most professional pet groomers are visual learners. Videos are a great way to go – as long as the content is accurate.

In this day and age, you have to be very careful. Trust me, I just did some quick research to see what was currently available on YouTube concerning hand-stripping. There certainly was a wealth of information but much of it was scary. Sure, there is a few nuggets of excellent content but you have to know what you’re looking for and have enough knowledge to know whether you’re looking at quality techniques or not. You’re better off looking for top stylists that are producing videos on the topic. You can find them both in DVDs as well as online streaming. In the Learn2GroomDogs.com library there is a wide assortment of streaming video lessons. Here’s a hint. If you search the site using the word “strip” in the search bar, you will pull up ALL the hand-stripping lessons. From there, you can isolate what appeals to you.

All of the training partners do a great job. Jennifer Hecker does an excellent job explaining the basics of dealing with a harsh-coated Terrier. Lisa Leady, Suesan Watson, and Amy Triezenberg all focus on beginner and intermediate hand-stripping. Most of their lessons deal with typical pet dogs we see in our grooming salons. Michelle Evans focuses on more advanced techniques, as well as how to apply different stripping techniques. There are many other training partners sprinkled through the hand-stripping section who also have exceptional lessons.

When you are looking for DVDs or videos to watch, make sure you verify the qualifications of the demonstrator. There are many high-quality lessons available but others can be a waste of time.

Clinics and Seminars

One of the best ways to learn hand-stripping techniques is to attend a clinic or seminar. Advanced hand-stripping is definitely an art. It takes plenty of knowledge and practice. Learning from a master is a huge shortcut when it comes to becoming proficient. How do you find out about clinics and seminars? Many certification organizations host workshops. Make sure you are on their mailing lists. Join a couple professional groups on Facebook such as Pro Groomer Network. Your state may have an organized groomers Facebook page. Grooming schools in your area may also host events.

Mentor

Finding a mentor for a particular technique or breed will certainly fast track you to your goals. The mentor may come from the conformation show ring, the competitive pet styling arena, or they may have years of experience grooming pets. As your skills grow, your mentors might grow and change. And if you can’t find a mentor, find a study partner who is looking to expand their skills. Somebody that you can work with you as a team to find the best information. Meet up after hours to work on your skills together with practice pets.

Whatever route you choose, you certainly can teach yourself. Finding help in the form of books, videos, seminars, clinics, or an actual mentor will certainly help. The more you are able to combine those learning resources, the shorter your learning curve.

The art of hand-stripping is becoming more widely accepted in the pet grooming arena. When a new harsh-coated Terrier walks through your door, think twice about clipping the coat off. Is that really the best option? Clipper cutting a harsh-coated Terrier typically destroys the correct texture. Many clients opt for that route simply to reduce cost and time factors associated with hand stripping. For those clients that have educated themselves about their breeds, hand stripping may be their preference – as long as they can find a professional pet stylist that can execute the technique correctly.

Are you that person?

Do you do any hand-stripping?  Why or why not? Jump over to the Learn2GroomDogs Facebook page and tell us about it!

Happy trimming!

~ Melissa


Count Me In!

Sign up to get notified when we host FREE Facebook Live Events!

Thanks! We'll remind you to join our next Facebook Live event!

Count Me In!

Sign up to get a reminder when your Members' Only Facebook Live Q&A is about to start!

Thanks! We'll remind you to join our next Facebook Live event!

Count Me In!

Join us for our FREE Webinar and get tips, tricks, and the secrets to success from our team of top dog-grooming Experts. We'll send you a reminder email the day of the Webinar.

Thanks! We'll remind you to join our next Facebook Live event!

Count Me In!

Join us for our FREE LIVECAST and get inspired by our team of dog-grooming Experts. Learn the tips and tricks other members have used to fuel their success through Learn2GroomDogs.com. We'll send you a reminder an hour before the LIVECAST begins.

Thanks! We'll remind you to join our next Facebook Live event!

Count Me In!

From the atmosphere and lay out of your salon, marketing to attract and keep clients, to how many dogs you are going to do that day, Melissa and Joe will help you map out a plan for Success!

Thanks! You will be sent reminder emails and a special link to join the webinar!